
Pressure washing a brick path seems like an easy fix. Dirt is lifted quickly, color returns, and surfaces look clean in minutes. I didn’t expect the actual effect to show after weeks, after the path was dried and reapplied.

what i did
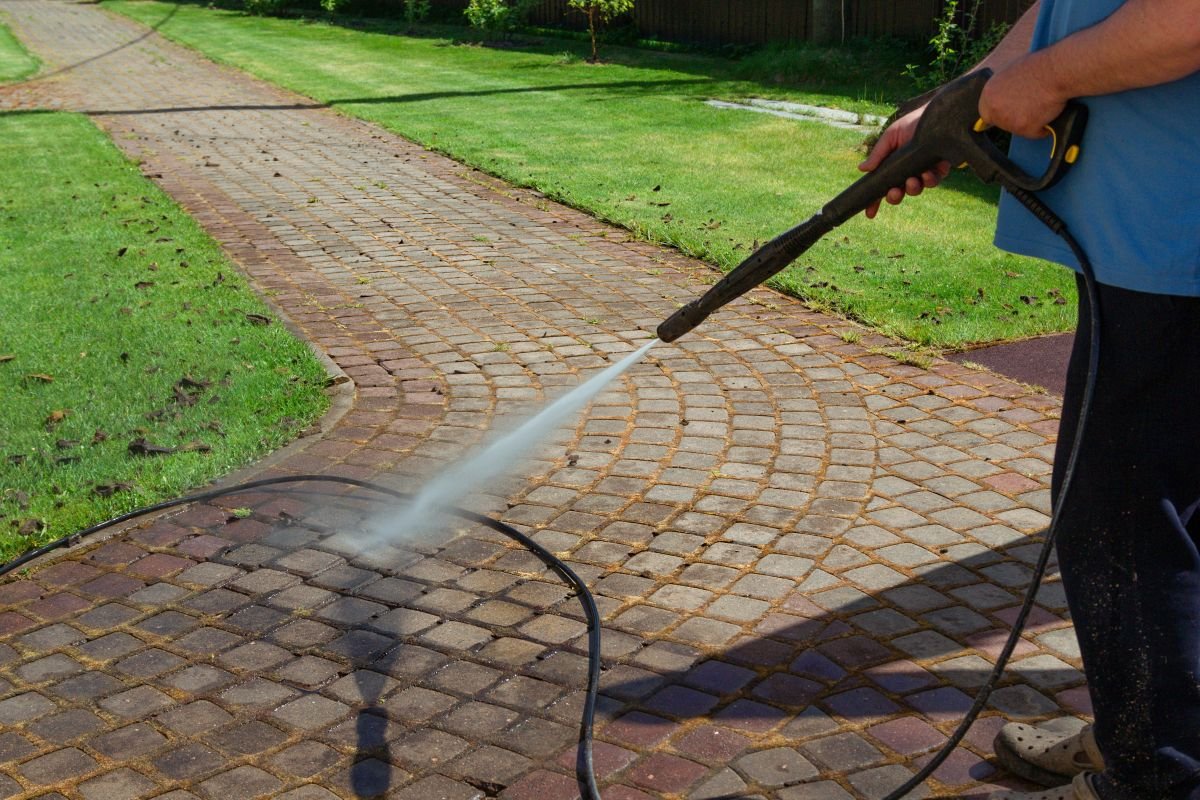
The path used to collect moss and dirt between the joints during the winter. Pressure washing seemed like the obvious solution. It worked on the driveway and patio with no visible problems.
I used the standard green nozzle and worked in steady passes across the surface. Algae picked clean. The brick color returned. Joints appeared clear and tight. Nothing suggests I did anything wrong.
What the path looked like then
After drying, the surface looked as expected. Bricks were clean, joints looked intact and color was uniform.
I checked it and moved on. There was no sign of damage. No loose pieces, no gaps, nothing to indicate the mortar has been affected.
What started to show later
Around week three, I noticed a fine white powder forming along the joint lines. At first it looked like cleaning residue.
It wasn’t.
By the sixth week, two joints near the center of the path had begun to break. Not collapse, but the structure on the surface softens and loses. Stepping near the edges caused small fragments to break off.
The mortar had not completely failed, but it was no longer the same.

What did the pressure do?
Brick is hard. No mortar between the bricks.
Mortar is porous and softer than brick. High pressure water does not stop at the surface. It penetrates the mortar and begins to remove the binding material from within.
This is not immediately visible because the change starts below the surface. The mortar appears intact after washing. Damage appears later, when the weakened material breaks down with use and contact.
The white powder was the first sign. Efflorescence occurs when water passes through masonry and carries minerals to the surface as it dries. It shows that the water has moved deeper than intended.
After the breakdown.
where it first shows up
Joints with minor cracks or wear are replaced first. Any weak point allowed the pressure to penetrate and act.
The impact was seen faster in high traffic areas. The edges of the path, where the weight shifts over the joints, were broken before the center.
Old mortars are more sensitive than new ones. If the path hadn’t been re-directed over the years, the pressure accelerated a process that would have taken much longer.
What I changed next
I stopped using pressure on the brick path.
For moss and dirt between joints, a stiff brush and diluted cleaning solution remove the buildup without affecting the mortar. It takes more time but keeps the structure intact.
For the affected areas, loose material had to be cleaned and joints re-routed to prevent further damage.
The bricks were not the issue. joints that hold them in place.

Which nozzle settings work better?
- Red (0°) – very narrow stream, can cut into surfaces, avoid for general cleaning
- Yellow (15°) – strong pressure for concrete, not for joints or soft materials
- Green (25°) – Normal cleaning, but still too strong for old mortar
- White (40°) – safe for most surfaces, spreads pressure more evenly
- Black (soap) – low pressure, used to apply detergent rather than force dirt out
Keep the distance in mind. Closer pressure increases. Reduces the father effect.
This is what changed
Previously, I treated all hard outdoor surfaces as equal. If it wasn’t wood, I assumed it was safe to pressure wash.
Brick works differently. Can control surface pressure. Cannot do joints.
The road looked its best the day it was cleared. It appeared at its worst six weeks later. The cleansing and the damage happened at the same time, but only the first one was visible.


