
Sharing is caring!
There’s something special about showing up at a friend’s house with a handmade gift. But let’s be honest: between work, family, and a never-ending to-do list, there’s not a lot of extra time left.
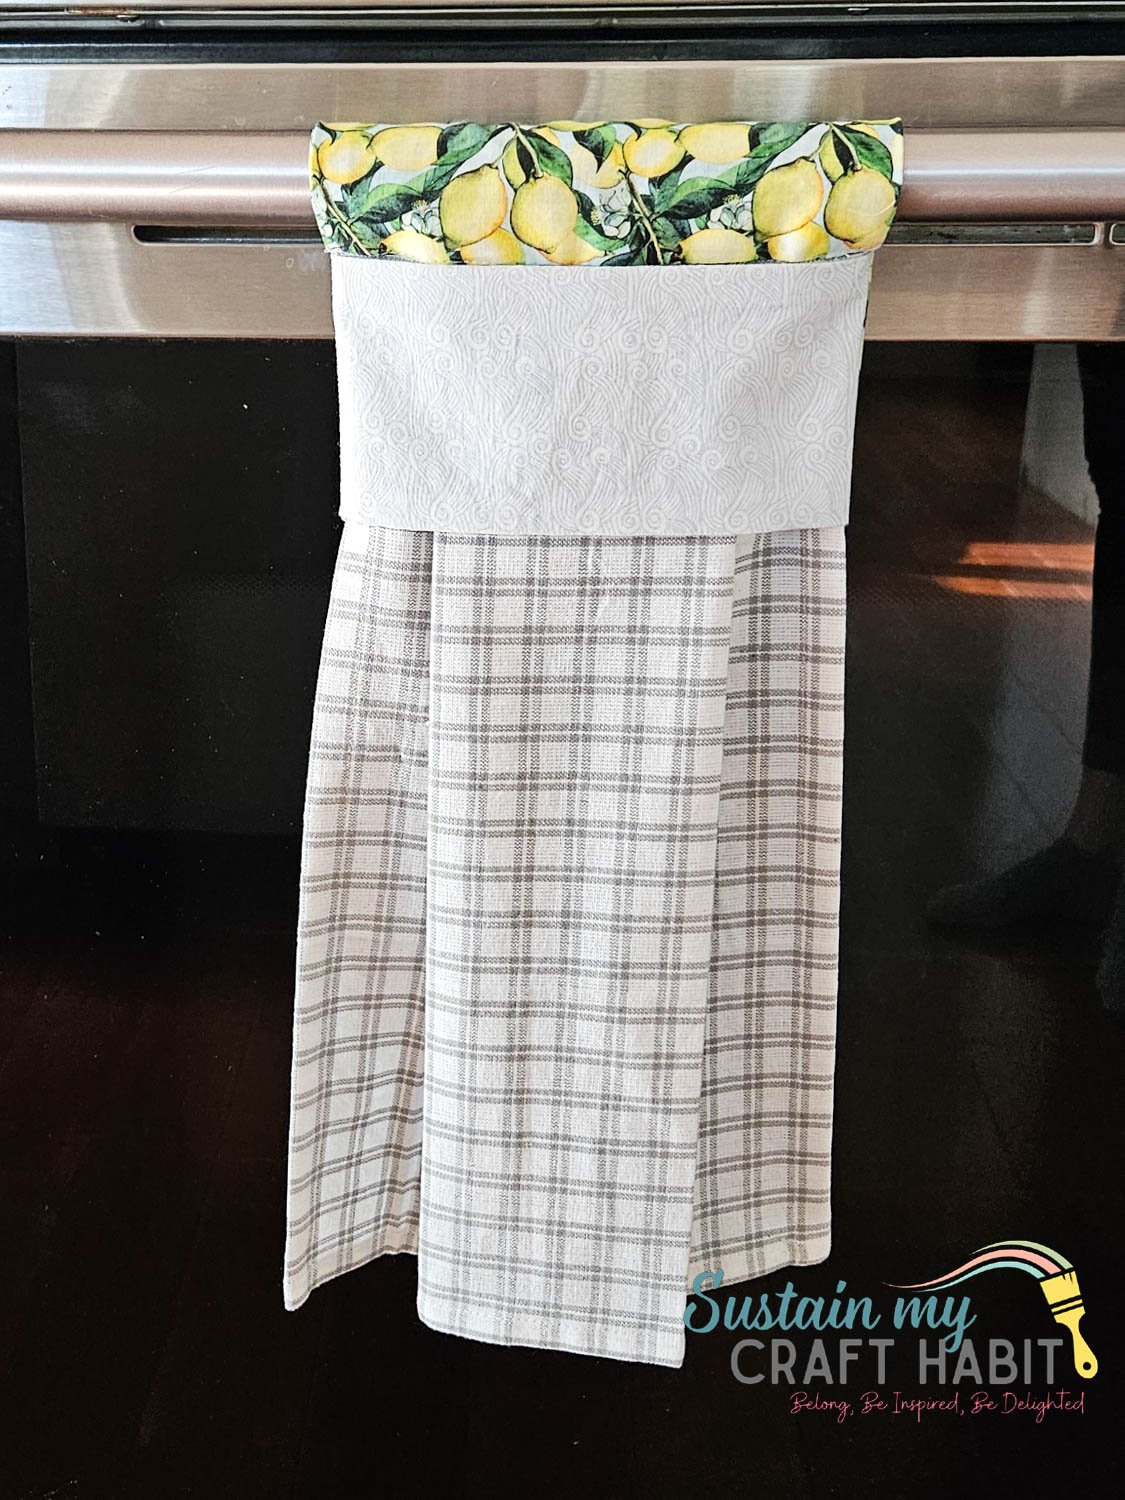
That’s why these modern DIY no-slip hanging kitchen towels have become quite popular for me. They hit that “sweet spot” of gift giving—they’re incredibly practical, aesthetically pleasing, and—most importantly—they take less time to make a trip to the store!

I firmly believe that the best gifts are those that make everyday life a little more beautiful and more functional. In my quest to create a more intentional, zero-waste kitchen, I realized that the humble tea towel needed serious promotion.
These DIY no-slip kitchen towels stay where you put them, look great draped over an oven handle, and are a great way to use up those cute fabric scraps you’ve been saving. Whether it’s for a new neighbor or a favorite teacher, this is a handmade gift they’ll really reach for every single day.
I’ll walk you through how to make it yourself, plus some simple modifications to suit different styles and skill levels. Let’s get started!
Why you will like this project
- Uses inexpensive materials you can find at most craft or fabric stores or scrap fabrics you already have!
- A complete step-by-step tutorial makes it beginner-friendly, even if you’re new to sewing.
- Makes a practical handmade gift that people actually use every day
- Great for matching seasonal decor or kitchen color schemes
- Quick to make batches for holidays, markets or gift sets
Let’s keep in touch! Subscribe For our latest sewing patterns, tutorials and tips.
Materials needed
Pro tip: To make the project easier, I mostly use a standard cheap store-bought tea towel for the main piece and then scrap fabric for the tab and hanging loop piece.

How to Sew a DIY No-Slip Kitchen Towel in Under 30 Minutes
Download the printable pattern And print out on 8.5×11 printer paper at actual size (do not adjust scale).
Align the red border lines to match the pattern pieces together.

Lay on top of the fabric aligning the grain line and cut around the solid lines. Cut two pieces of TAB (1) pattern and hanging loop (2) pattern and cut one piece of MAIN (3) pattern.


Fold and press the bottom and side edges of MAIN (3) by ½” to the wrong side. Fold and press again another ½”. Sew the hems in place.


MAIN (3) Make a box pleat on top of the piece Press and pin the pleats in place. Next, baste the pleats to hold. Set aside for slice time.

Align the hanging loop (2) pieces with right sides together and sew the long edges together with a ½” seam allowance. Leave the sides unnotched. Turn the piece right side out and press the seam flat.


Place this prepared piece on top of one of the TAB (1) pieces, aligning the small circles, with right sides facing. Stitch the best side edges together.

Arrange the other TAB (1) piece with right sides facing each other on top (and the loop piece sandwiched in between), matching the single notches. Stitch the layers together with a ½” seam allowance and leave the bottom edge unstitched with double notches.

Fold the bottom edge to ¾” and press flat with an iron.

Align the top edge of the MAIN (3) piece with right sides together with one of the folded edges. Sew together with a ¾” seam allowance. Fold the seam allowance up to the TAB piece and stitch down the other side along the folded edge to finish.

Fabric choices and style options
Cotton works best for absorbency, but the blend pattern is where it really shines. I love pairing a bold print with a neutral backing to make it look a little more polished.
Seasonal fabrics – think autumnal tones or festive prints – turn these into easy themed gifts without extra effort.

The perfect gift bundling
For a housewarming gift
Two coordinating hanging towels, a high-quality dish soap (such as glass-bottled soap), and a durable wooden dish brush or Handmade Crochet Dishcloth.
For a birthday or as a thank you gift
Create a modern hanging towel with neutral linen, wooden spoons or , and jars of gourmet baking mix or local honey.
For seasonal holiday gifts
Sew a kitchen towel in a seasonal color (deep terracotta for fall or airy pinstripes for spring). DIY citrus candles.

Perfect for any kitchen
These DIY no-slip kitchen towels hit that sweet spot between useful and personal, which is why I keep coming back to them. Once you’ve made one or two, they become the kind of project you can do without much thought—and that’s when they really start to shine as gifts!
More handmade gift giving ideas


Want tons of inspiration and money-saving ideas for decorating, gifting, and crafting? join up here!
like? Pin it for later!

Gifting Handmade: Why This No-Slip Kitchen Towel Is Here For Me
- 100% Cotton fabric
- Sewing machine and draw
- No Slip Hanging Tea Towel Sewing Pattern Use a printable or visual guide for the steps
- Fabric scissors
-
Download and print the printable pattern.
-
Align the red border lines to match the pattern pieces together.
-
Lay on top of the fabric aligning the grain line and cut around the solid lines. Cut two pieces of pattern part 1 and 2 and cut a piece of pattern part 3.
-
Fold and press the bottom and side edges of the MAIN (3) SKIRT piece by ½” to the wrong side. Fold and press another ½” again. Sew the hems in place.
-
MAIN (3) Following the SKIRT piece make a box pleat at the top. Press and pin the pleats in place. Next, baste the pleats to hold. Set aside for slice time.
-
Align the hanging loop (2) pieces with right sides together and sew the long edges together with a ½” seam allowance. Leave the sides unnotched. Turn the piece right side out and press the seam flat.
-
Place this prepared piece on top of one of the TAB (1) pieces, aligning the small circles, with right sides facing. Stitch the best side edges together.
-
Arrange the other TAB (1) piece with right sides facing each other on top (and the loop piece sandwiched in between), matching the single notches. Stitch the layers together with a ½” seam allowance and leave the bottom edge unstitched with double notches.
-
Fold the bottom edge to ¾” and press flat with an iron.
-
Align the top edge of the MAIN (3) piece with right sides together with one of the folded edges. Sew together with a ¾” seam allowance. Fold the seam allowance up to the TAB piece and stitch down the other side along the folded edge to finish.
Sharing is caring!


