
We are just starting to see those first spring flowers emerging from the soil. Collect some of those beautiful early blooms to make this beautiful one Pressed flower art for your home.

Pressed Flower Art
Last year, around this time, I gathered some blooms and placed them between the pages of the book. I recently came across them and decided it was time to display them! With the help of a floating frame and gold paint pens from the craft store, I was able to create this beautiful pressed flower art! With extras, I made Pressed flower resin magnet.
It’s been a really long winter. We are ready to see colorful, fragrant flowers in our gardens. Around our area of southern Canada, crocuses, pansies and bluebells are some of the first to appear in spring. It reminds us of this beautiful Sun Print Wall Art!

Supplies needed to make pressed flower art
Find complete printable instructions and materials list at the end of this post.

We love using natural supplies for crafting and you can find nature inspired tutorials on our blog including Floral Resin Jewelry And plenty Creative driftwood crafts.
How to press flowers
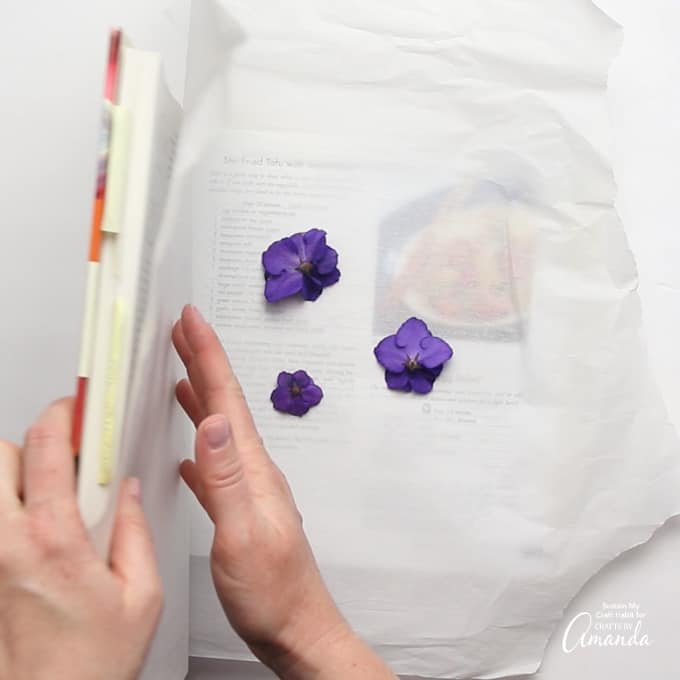
- There are many ways to press flowers. The easiest, however, is to place the flower on some absorbent paper and press it between the pages of a heavy book. Make sure your flowers are not too thick (they may darken). Leave to dry for 2-3 weeks.
- Once you have your pressed flowers, disassemble the photo frame and clean the glass on both sides. Allow to dry completely.
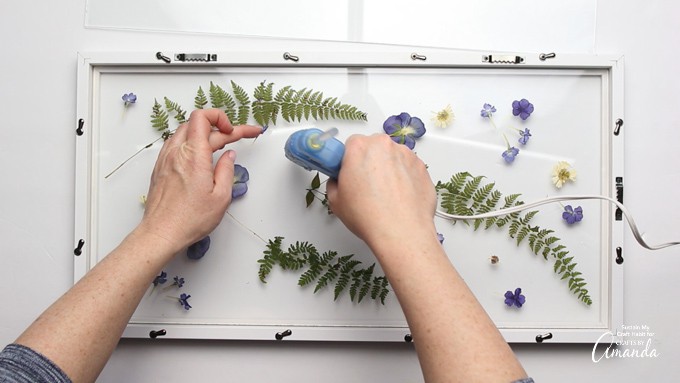
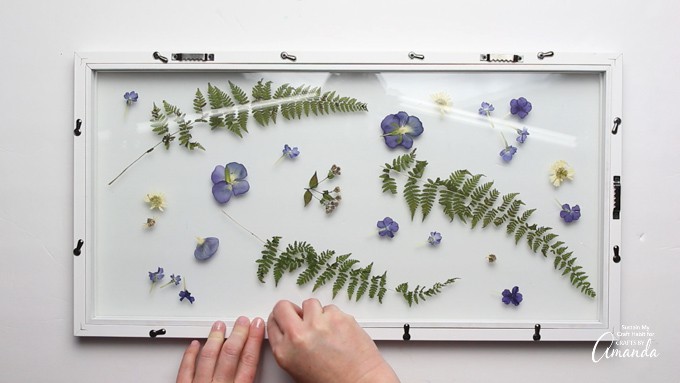
- Face down the frame. Arrange the leaves face down on the glass, starting with the larger pieces.
- Fill the spaces with small flowers. Continue until you are happy with the arrangement.
- Use a very small amount of hot glue to secure the pressed flowers in place. If you skip this step, the pieces will slip between the plate and the glass.
- Once you are happy with your floral arrangement reassemble the frame.
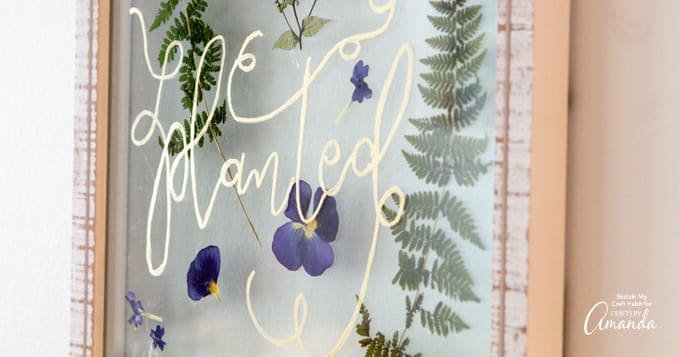
- Turn the frame right side up. Trace a favorite phrase onto the glass using a gold paint pen.
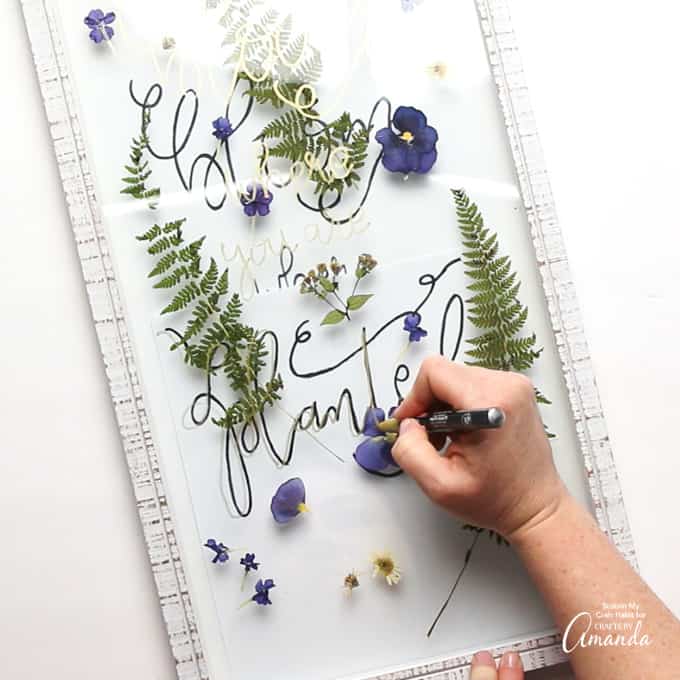
- Either create or grab your own phrase “Bloom Where You Plant” template Available on our blog. Let the paint dry.

That’s it! You have a beautiful new floral arrangement to enjoy before the real flowers bloom. You can enjoy this display all year round or swap spring pressed flowers for summer blooms in a few months.
Spring is a beautiful time of year, all the flowers and trees start to bloom and bring life back after the cold winter months. In celebration, we have tons of fun spring crafts for you listed below!
More spring crafts
Pressed Flower Art
Collect some of those early spring blooms to make this beautiful pressed flower art for spring! Step-by-step photo and video tutorials included.
supplies
- Pressed flowers such as pansies, daisies, ferns
- 1 Floating photo frame
- Hot glue gun and clear glue sticks
- Gold paint pen
- Printable template Optional
Instructions
-
Disassemble the photo frame and clear glass on both sides. Allow to dry completely.
-
Face down the frame.
-
Arrange the leaves face down on the glass, starting with the larger pieces.
-
Fill the spaces with small flowers.
-
Continue until you are happy with the arrangement.
-
Use a very small amount of hot glue to secure the pressed flowers in place.
-
Once you are happy with your floral arrangement reassemble the frame.
-
Turn the frame right side up.
-
Trace a favorite phrase onto the glass using a gold paint pen.
This post originally appeared here on April 24, 2019.


