

Beading is more than just a hobby; It is a meditative, versatile and rewarding form of artistic expression. Whether you want to make intricate jewelry, upcycle old clothing, or create unique home decor, mastering the art of beadwork can turn small pieces of glass or stone into stunning masterpieces.
Essential beading supplies for beginners
Before you can draw your first bead, you need the right toolkit. High-quality materials not only make the process easier but also ensure that your finished work shines.
Necessary items:
- Beads: Common types include seed beads (size 11/0 is standard), delica beads (perfectly cylindrical for weaving), glass beads, and semi-precious gemstones.
- Needles: Beading needles are thinner than sewing needles. A size 10 or 12 is ideal for most projects.
Threading Material:
- Fireline: A pre-waxed, braided cord popular for durability.
- Nymo: An excellent nylon thread for fringe and soft drapes.
- Beading Wire (Aquilon/Tiger Tail): Best for necklaces and bracelets that require structure.
Other Tools:
You’ll need a bead mat (to keep the beads from rolling), chain-nose pliers, round-nose pliers, and sharp thread snips.

Popular Bead Crafts for Adults: Ideas to Get Started Today
If you’re looking for inspiration, these are some of the most popular beading projects:
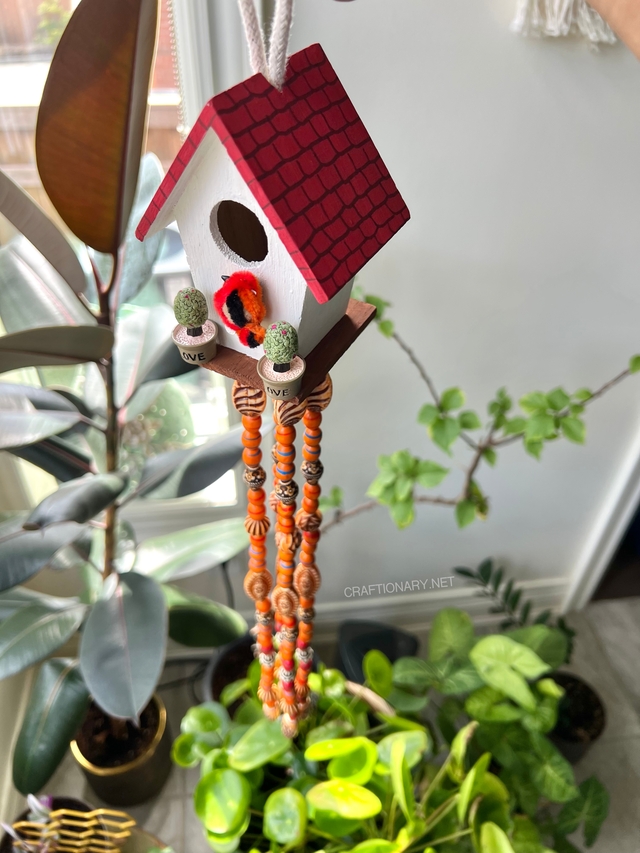
1. Beaded Birdhouse:
Beaded garlands: Perfect for farmhouse-style mantels or Christmas trees. Use wooden beads for a rustic feel.
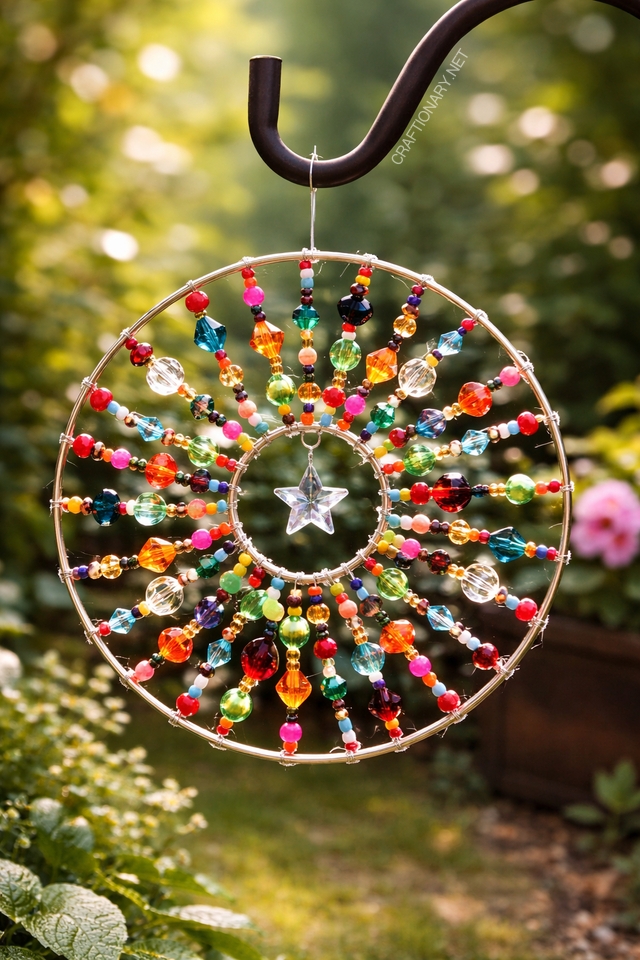
2. Sunburst Beaded Suncatcher:
Sun catchers: Combine glass beads with crystals to capture and refract light in windows.
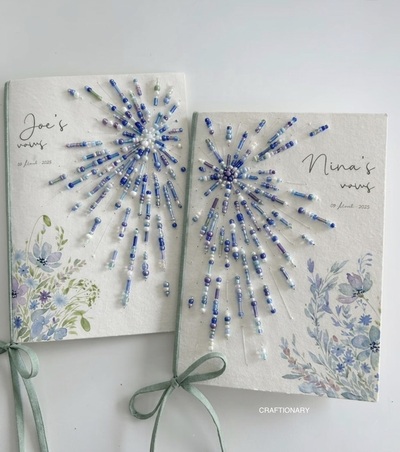
3. Fireworks greeting card
String beads on greeting cards or wedding vows to create personalized greetings or book covers.
Learn more: Handmade greeting card ideas for birthdays and parties
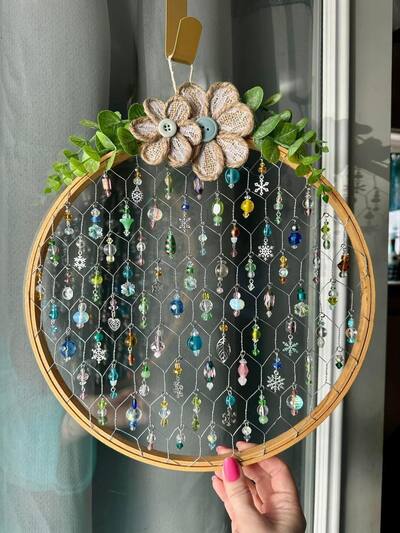
4. Chicken wire beaded suncatchers
A unique combination of chicken wire as a frame and string of beads to decorate each diagonal creates stunning creations.
Learn more: Final Guide: Make Chicken Wire Beaded Suncatchers
5. Beaded Windchime
Use mason jars and string of beads to make a multi-purpose candle holder for evenings in the garden and a windchime for soothing sounds.
Learn more: Make Wind Chimes (20 Brilliant Ideas)
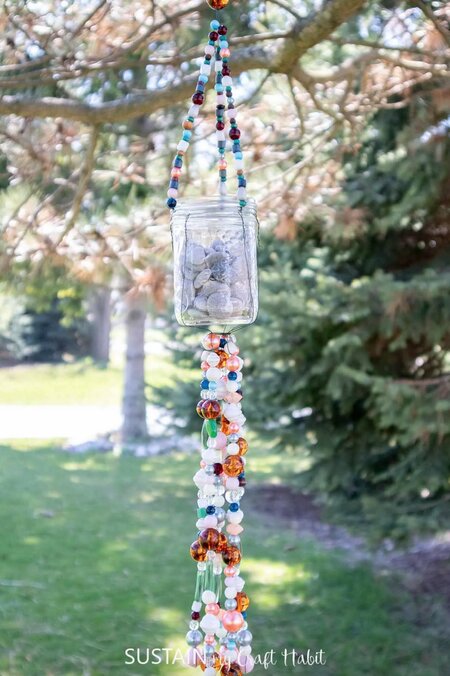
Image: Sustain my craft habit
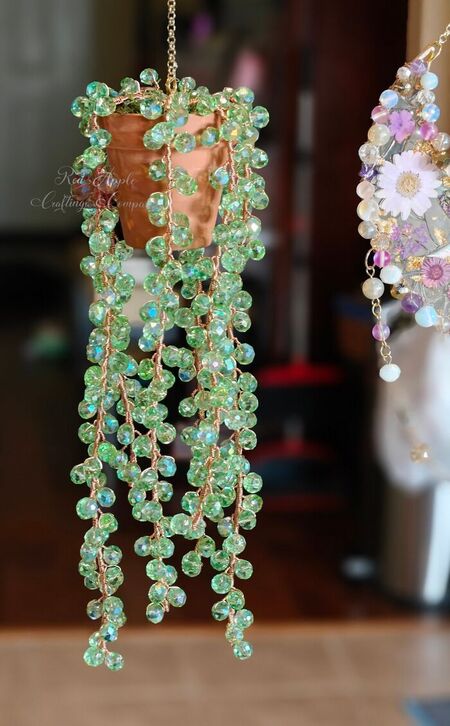
6. Succulent plants with garlands
A popular trend is to create adorable houseplants that provide a blend of light and nature.
Learn more: Create beaded succulents: a lasting blend of craft and nature
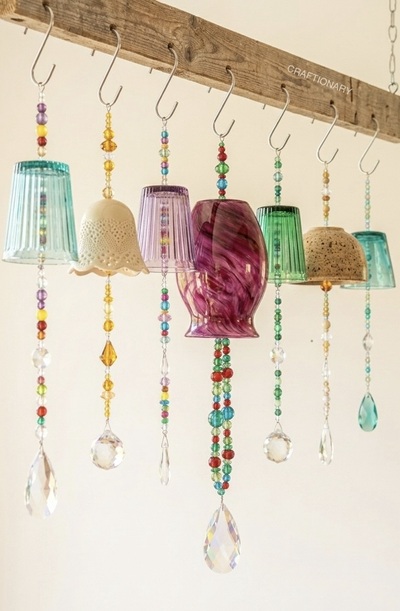
7. Upcycled Glass Suncatcher Bells
Adding a touch of whimsy and light to your outdoor space doesn’t require expensive store-bought ornaments. Upcycle vintage glassware into functional art that catches the sun and creates a peaceful atmosphere.
Materials needed
To achieve a vibrant and eclectic look, gather the following supplies:
- Glassware: Mixed glass cups, small bowls or vintage bells. Look for pieces with interesting textures or colors.
- beads: A variety of glass, crystal and acrylic beads in multiple sizes and colors.
- Prism (Optional): Large faceted crystal teardrops or spheres at the bottom of each strand to maximize light refraction.
- Stringing Materials: Strong monofilament (fishing line) or nylon-coated beading wire.
- Hardware: A pair of S-hooks, bead pieces and crimping pliers for hanging.
- Drill and Bits: Power drill and diamond-tipped hole saw bits (especially for glass).
Step by step instructions
1. Preparing the glass
The most technical part of this project is drilling the glass.
- Safety First: Always wear safety goggles and gloves when working with glass.
- Drilling: Place your piece of glass upside down. Create a small pool of water at the base to keep the drill bit cool. Using a diamond-tipped bit, slowly drill a hole in the center of the base. Do not apply heavy pressure; Let the beat do the work.
2. Designing your bead strands
Lay your beads on a flat surface to plan your pattern.
- Color Themes: You can create monochromatic strands or rainbow sequences.
- Composition: Mix simple beads with faceted ones to create visual rhythm.
3. Internal strand assembly
- below: Secure your large crystal prism to the end of your wire using a crimp bead.
- Stringing: Add beads until the strand is long enough to hang substantially below the rim of your glass bell.
- Anchor: Add a large bead or washer that is wider than the hole you drilled in your glass. This will act as a stopper inside the bell.
4. Completing the bell
- Thread the wire through the hole in the glass from the inside out.
- Continue adding beads to the top of the glass bell to create a hanging section.
- top: Make a loop at the very top using a crimp bead and attach it to an S-hook for easy hanging.
Helpful tips
- Stress Control: Make sure your crimp beads are tightly squeezed with professional pliers. If they are loose, the weight of the glass can slide across the strand.
- Variety: Different shapes (tapered cup vs. round bowl) create a more dynamic display. Don’t be afraid to mix and match styles.
- Lighting: For the most dramatic rainbow effects hang this in a location that receives direct golden hour sunlight.
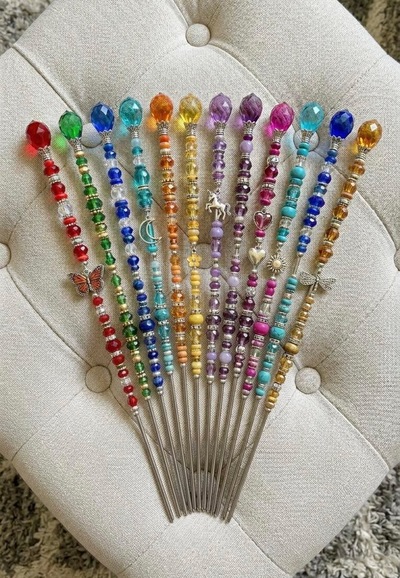
8. Beaded Garden Stakes: Make sparkling fairy wands for your plants
Add a touch of magic to your indoor garden or outdoor flower bed with DIY beaded garden stakes. Often referred to as fairy wands or garden jewels, these sparkling accessories are a favorite among gardening enthusiasts looking to personalize their space.
Materials you will need:
You need components that won’t rust or fade.
- rod: Use stainless steel skewers or 10-12 galvanized wire. Stainless steel is best because it will not rust in wet soil.
- beads: Choose glass, crystal or acrylic beads. Avoid wood or cheap plastic if it will be in direct sunlight, as it can rot or peel.
- Charms: Tibetan silver or zinc alloy ornaments (butterfly, unicorn, sun and moon).
- Toppers: Large bubble faceted crystal beads or drawer knobs for a dramatic finish.
- Adhesive: A strong waterproof glue like E6000 to secure the top bead.
Step by step instructions for beginners
1. Prepare your wand
- If using stainless steel skewers, make sure they have flat or threaded tops.
- If you’re using plain wire, use pliers to make a small loop at the bottom to prevent the bead from sliding, or just rely on the friction of the clay.
2. Design your pattern
- Place your beads on a flat surface before stringing. Follow a color-blocked theme (eg, all reds, all blues).
- Mix the textures. Combine simple round beads with faceted rondels and metallic spacers to create visual rhythm.
3. Stringing the beads
- Slide your bead onto the rod. Leave about 3-4 inches of bare rod at the bottom; This part will be driven into the ground.
- Include charms: Use a small jump ring to attach your butterfly or unicorn charms to the rod between the two beads. This ensures that they hang properly and don’t slide around.
4. Securing the topper
- The top bead is the crown of your fairy wand.
- Apply a small amount of E6000 glue to the tip of the rod.
- Slide in your large faceted topper beads.
- Allow the stick to lie flat for at least 24 hours before placing in the plant to allow the glue to fully cure.
Useful tips:
- Weight Balance: Do not make the beaded section too heavy, or the stake may bend into the loose soil.
- Safety: Always trim the tops of the rods if you have pets or small children playing near your plants.
- Sparkle Factor: Place these on windowsills or areas that receive golden hour sunlight to maximize the prism effect in your room.
- Bead Selection: Glass and high-quality crystal beads will retain their color for years. Inexpensive painted plastic beads may fade or fade over time due to UV exposure.
- Cleaning: To clean simply wipe them with a damp cloth. Because they are made of glass and steel, they are very easy to maintain.
- Garden Markers: Use this as a marker for the vegetable garden. You can also add alphabet beads to spell out what you’ve planted.
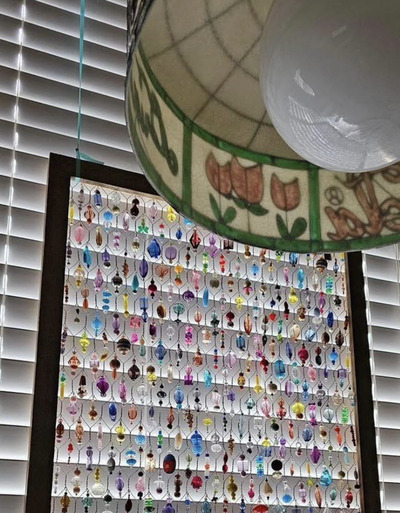
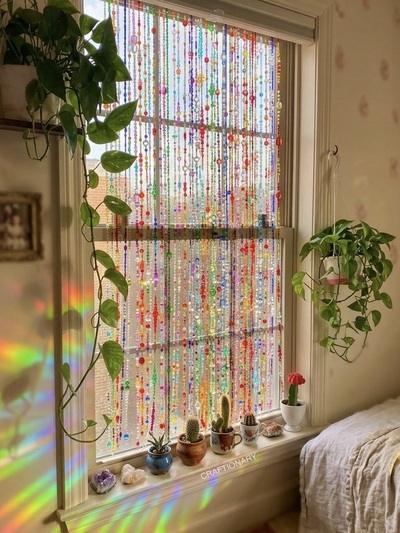
9. DIY Rainbow Beaded Window Curtains
Bring a magical aesthetic to life with just a few strings of beads that will blow your imagination while out in the sun.
Learn more: How to make a DIY rainbow beaded window curtain
10. DIY Rainbow Beaded Chandelier
Create a handmade masterpiece that transforms into a light show every sunny afternoon.
Learn more: How to make a rainbow beaded chandelier suncatcher

Troubleshooting your beadwork
1. How do you finish a beaded bracelet so it doesn’t break?
The secret is in the tension and the knot. If using elastic, use a surgeon’s knot and add a small drop of GS Hypo Cement or clear nail polish to the knot. If using wire, always use high-quality crimp tubes rather than flat crimp beads.
2. What is the difference between bead weaving and bead stringing?
Stringing is the act of placing beads on a thread or wire in a linear fashion.
Weaving uses a needle and thread to stitch beads together into a fabric-like structure using techniques such as peyote stitch, brick stitch, or right-angle weave (RAW).
3. How do you organize a messy craft room full of beads?
Beaders often struggle with bead soup (mixed beads). Use clear, stackable containers or tic-tac-style bead towers. Organizing by color is visually refreshing, while organizing by size/type is more functional for technical projects.
Beading is a journey of patience. Whether you’re making memory capsakes or practicing meditation line art with beads, focus on the process rather than just the result. By choosing quality materials and mastering the basic stitches, your crafts will not only look beautiful but also stand the test of time.
Are you ready to start? Grab a tube the size of 11/0 seed beads and a spool of fireline—your next masterpiece is just a stitch away.
You may also like:
Final Guide: Make Chicken Wire Beaded Suncatchers
Create beaded succulents: a lasting blend of craft and nature


