
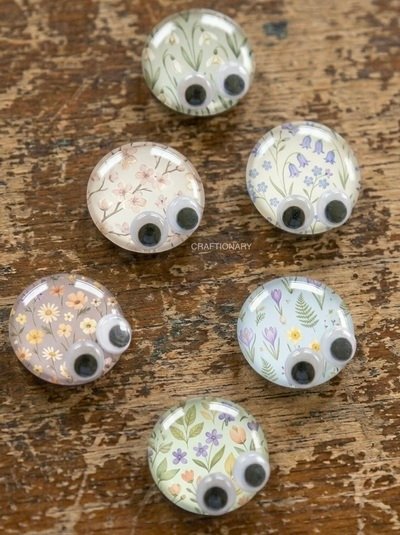
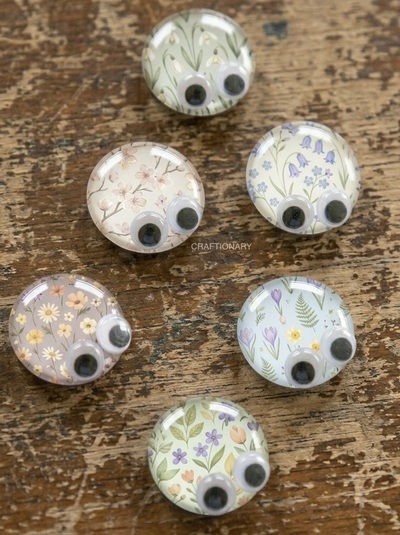
DIY Glass Gem Bugs, commonly known as bugles, are the perfect project, whether you want to make whimsical refrigerator magnets, worry stones, or unique garden markers.
A cute idea to turn plain glass gems and scrap paper into personality-filled critters that look professional enough to sell at craft fairs or make with kids and friends. Kindness craft Spread smiles and joy by hiding around your community with sweet surprise messages for seekers.
Make DIY Gem Bugs:
Contents:
You will need the following supplies:
- Clear glass gems: Also known as floral marbles or cabochons. Look for the flat-bottomed variety.
- Scrap paper: Washi tape, origami paper, scrapbook scraps or even colorful magazine cutouts.
- googly eyes: Smaller sizes (3mm to 5mm) work best for bug looks.
- Adhesive: A clear drying glue Mod Podge Or Diamond Glaze.
- Magnet (optional): small ceramic or Neodymium magnet If you want them to be functional.
Step by step instructions
1. Choose and prepare your paper
The magic of this project lies in the magnifying effect of the glass. Choose paper with small, dense patterns – stripes, chevrons or small flowers work beautifully.
Pro tip: Place your glass gem on different areas of the paper to preview how the pattern will look through the lens.
2. Glue the gem to the paper
Apply a thin, even layer of clear-drying glue to the flat side of the glass bead. Press it firmly onto the right side of your chosen paper.
Avoid bubbles: Press outwards from the center to force any air bubbles to the edges. Allow this to dry completely (about 15-20 minutes).
3. Trim the excess
Once the glue is dry, use sharp detailing scissors to cut around the perimeter of the glass bead. The paper should be flush with the edge of the glass.
4. Bring the bug to life
Using a small dab of glue, attach two small googly eyes to the top (curved) side of the gem.
Placement Matters: Placing the eyes closer to one edge creates a face, making the gem look a bit like a beetle or ladybug.
5. Seal the bottom
To protect the paper from peeling or moisture, apply a final coat of Mod Podge to the paper backing. If you are making a magnet, glue the magnet to the back after the sealant has dried.
You’re done. Print a small tag with it Mercy message And enclose it in a sandwich bag to spread the bugs around the area to the delight of the pros. You can also include it DIY stress relief kit For your loved ones.
Common Questions:
1. What is the best glue for glass gems?
While school glue works, Mod Podge is the industry standard for paper-to-glass. If you want a glass-like, crystal-clear finish without any yellowing, Judikins Diamond Glaze is a favorite among professional artisans.
2. Can you use fabric instead of paper?
Yes! Scraps of thin cotton fabric work great and provide a beautiful texture. Just make sure you use enough glue to fully saturate the fabric so it sticks to the glass without air gaps.
3. How do you make this waterproof for the garden?
If you plan to use these as outdoor pet rocks, you must use a permanent waterproof sealant. E6000 For glue and one Outdoor-grade acrylic sealer for support. Note that googly eyes may eventually turn yellow or fade in direct sunlight; Painted eyes are better for long-term outdoor use.
Related: Best Sealer: How to Waterproof Acrylic Paint on Rocks, Wood, Glass Crafts
Expert tips for success
- Washi Shortcut: If you don’t want to mess with glue and cutting, use washi tape. Just stick the tape behind the gem and trim. The adhesive is already there!
- Themed Sets: Create families of bugs using the same color palette (eg, all blues and greens) to give as gift sets.
- Collection: These little guys fit perfectly Empty mint tins-Making them a great travel toy for kids.
Are you ready to clean out your paper bin? This project is the ultimate way to turn trash into treasure that puts a smile on anyone’s face!
You may also like:
30 Soul-Touching Random Acts of Kindness Crafts
DIY Stress Relief Gifts – Stress Relief Kits with Free Printables
Slow Stitching: A Guide to Mindful Hand Sewing with Creative Ideas


