
Step 2. Build the inner base frame
Using the measurements from step 1, cut yours 1 x 2 board For size with 45-degree mitered corners on the short sides. This will form the first of two base frames that form the framework of the project.
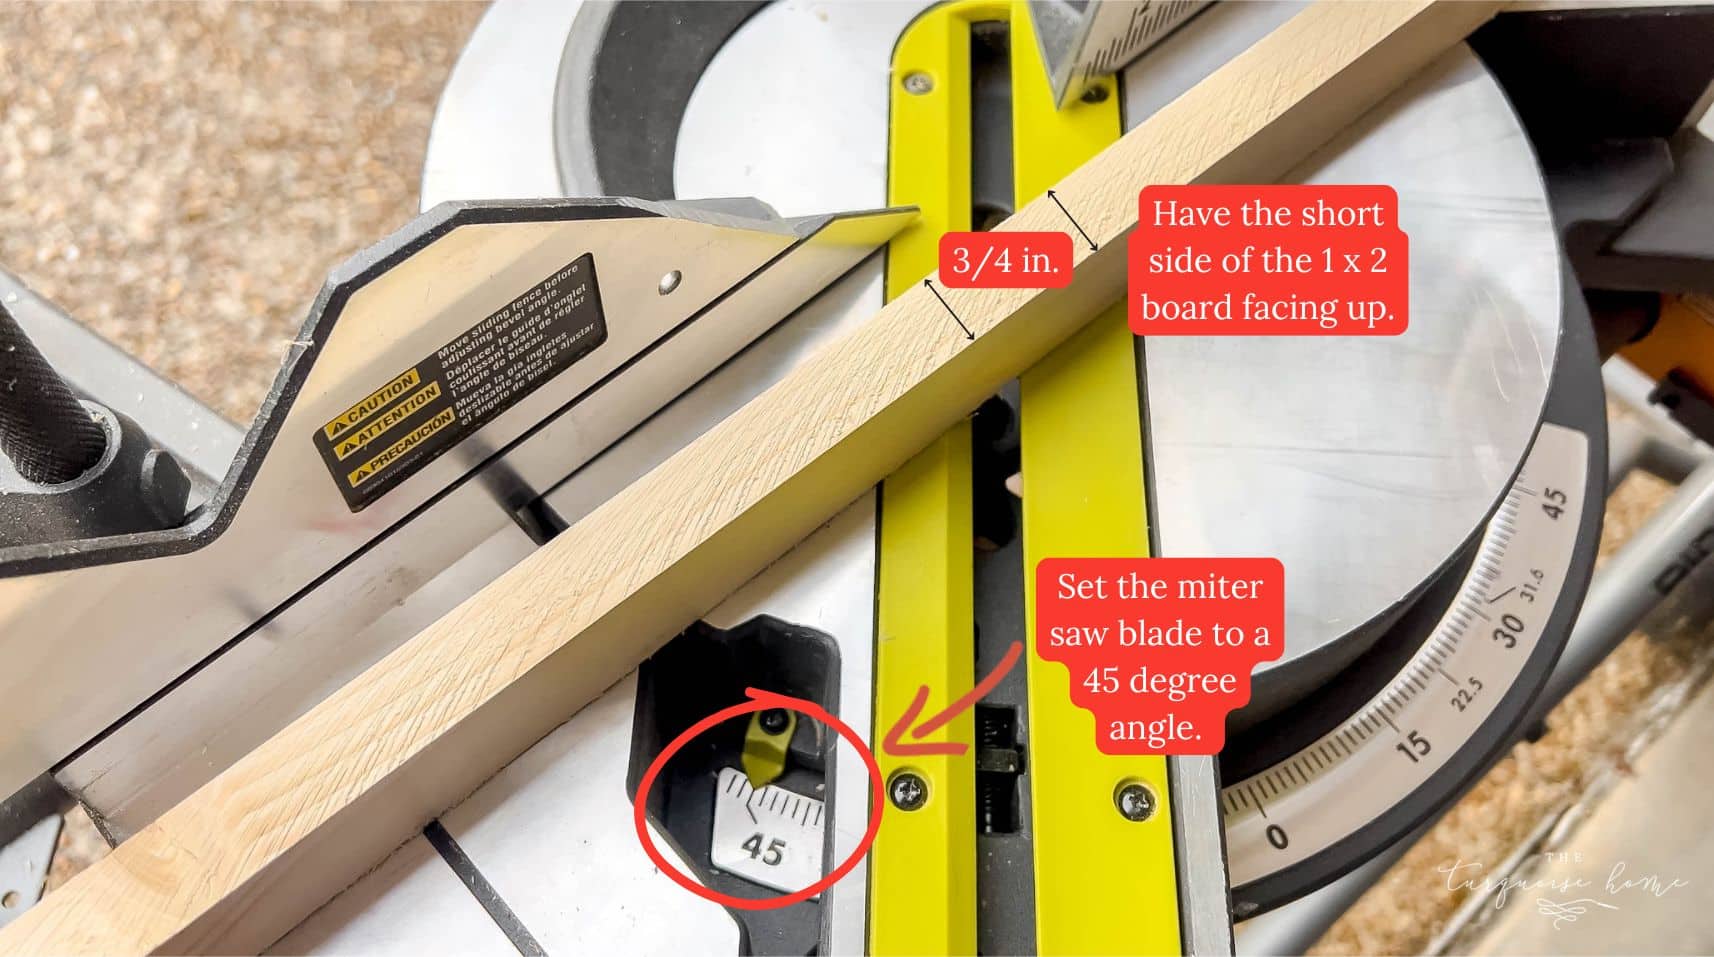
When positioned correctly, the long side (about 1.75 inches) of the board will sit in front of the TV, while the short side (about .75 inches) will face out. This helps create a slimmer, more finished profile around the screen.
I used a miter saw for this cut because it gives the cleanest and most accurate angles, but you can also use a circular saw if that’s what you have.
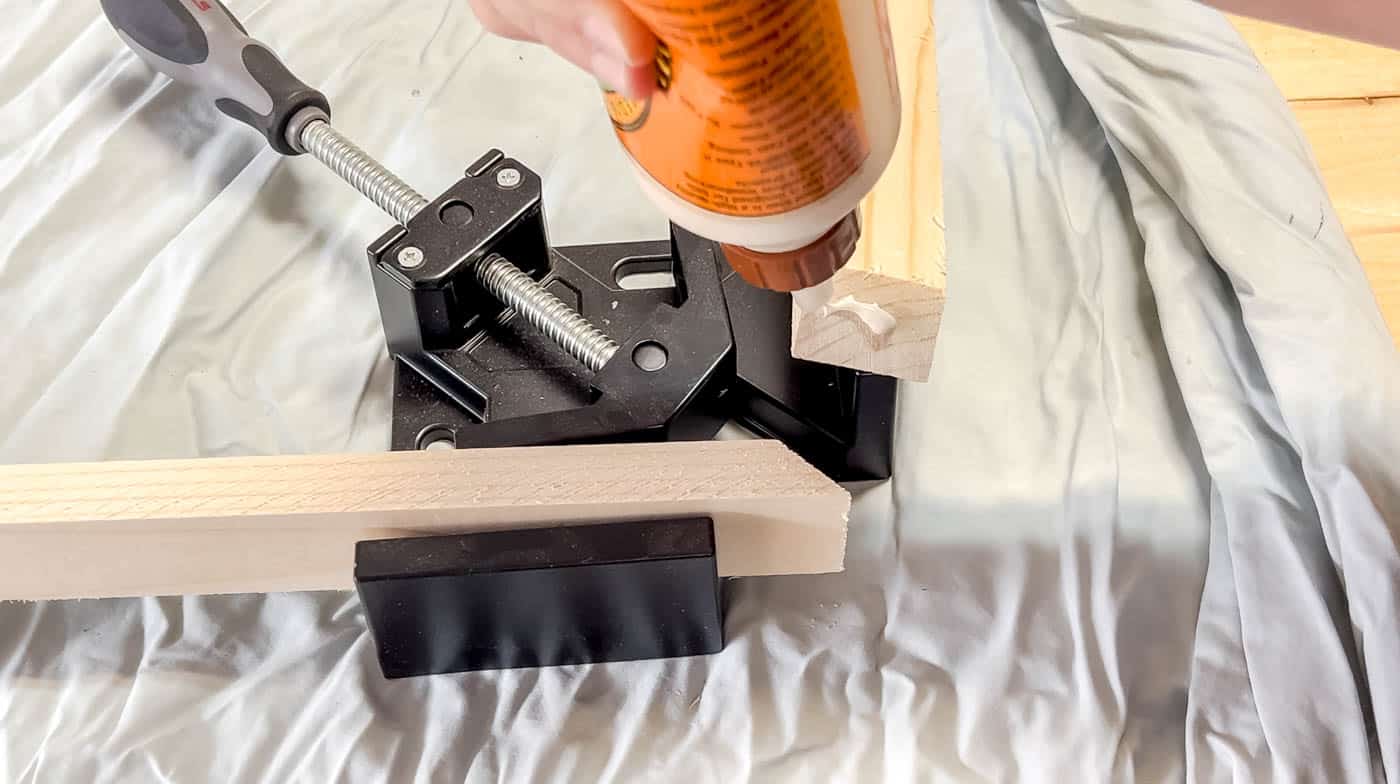
Once your pieces are cut, apply wood glue to each corner and clamp the frame together to make one large rectangle. I highly recommend using corner clamps here. They make frame building a lot easier and help keep everything square while the glue dries.
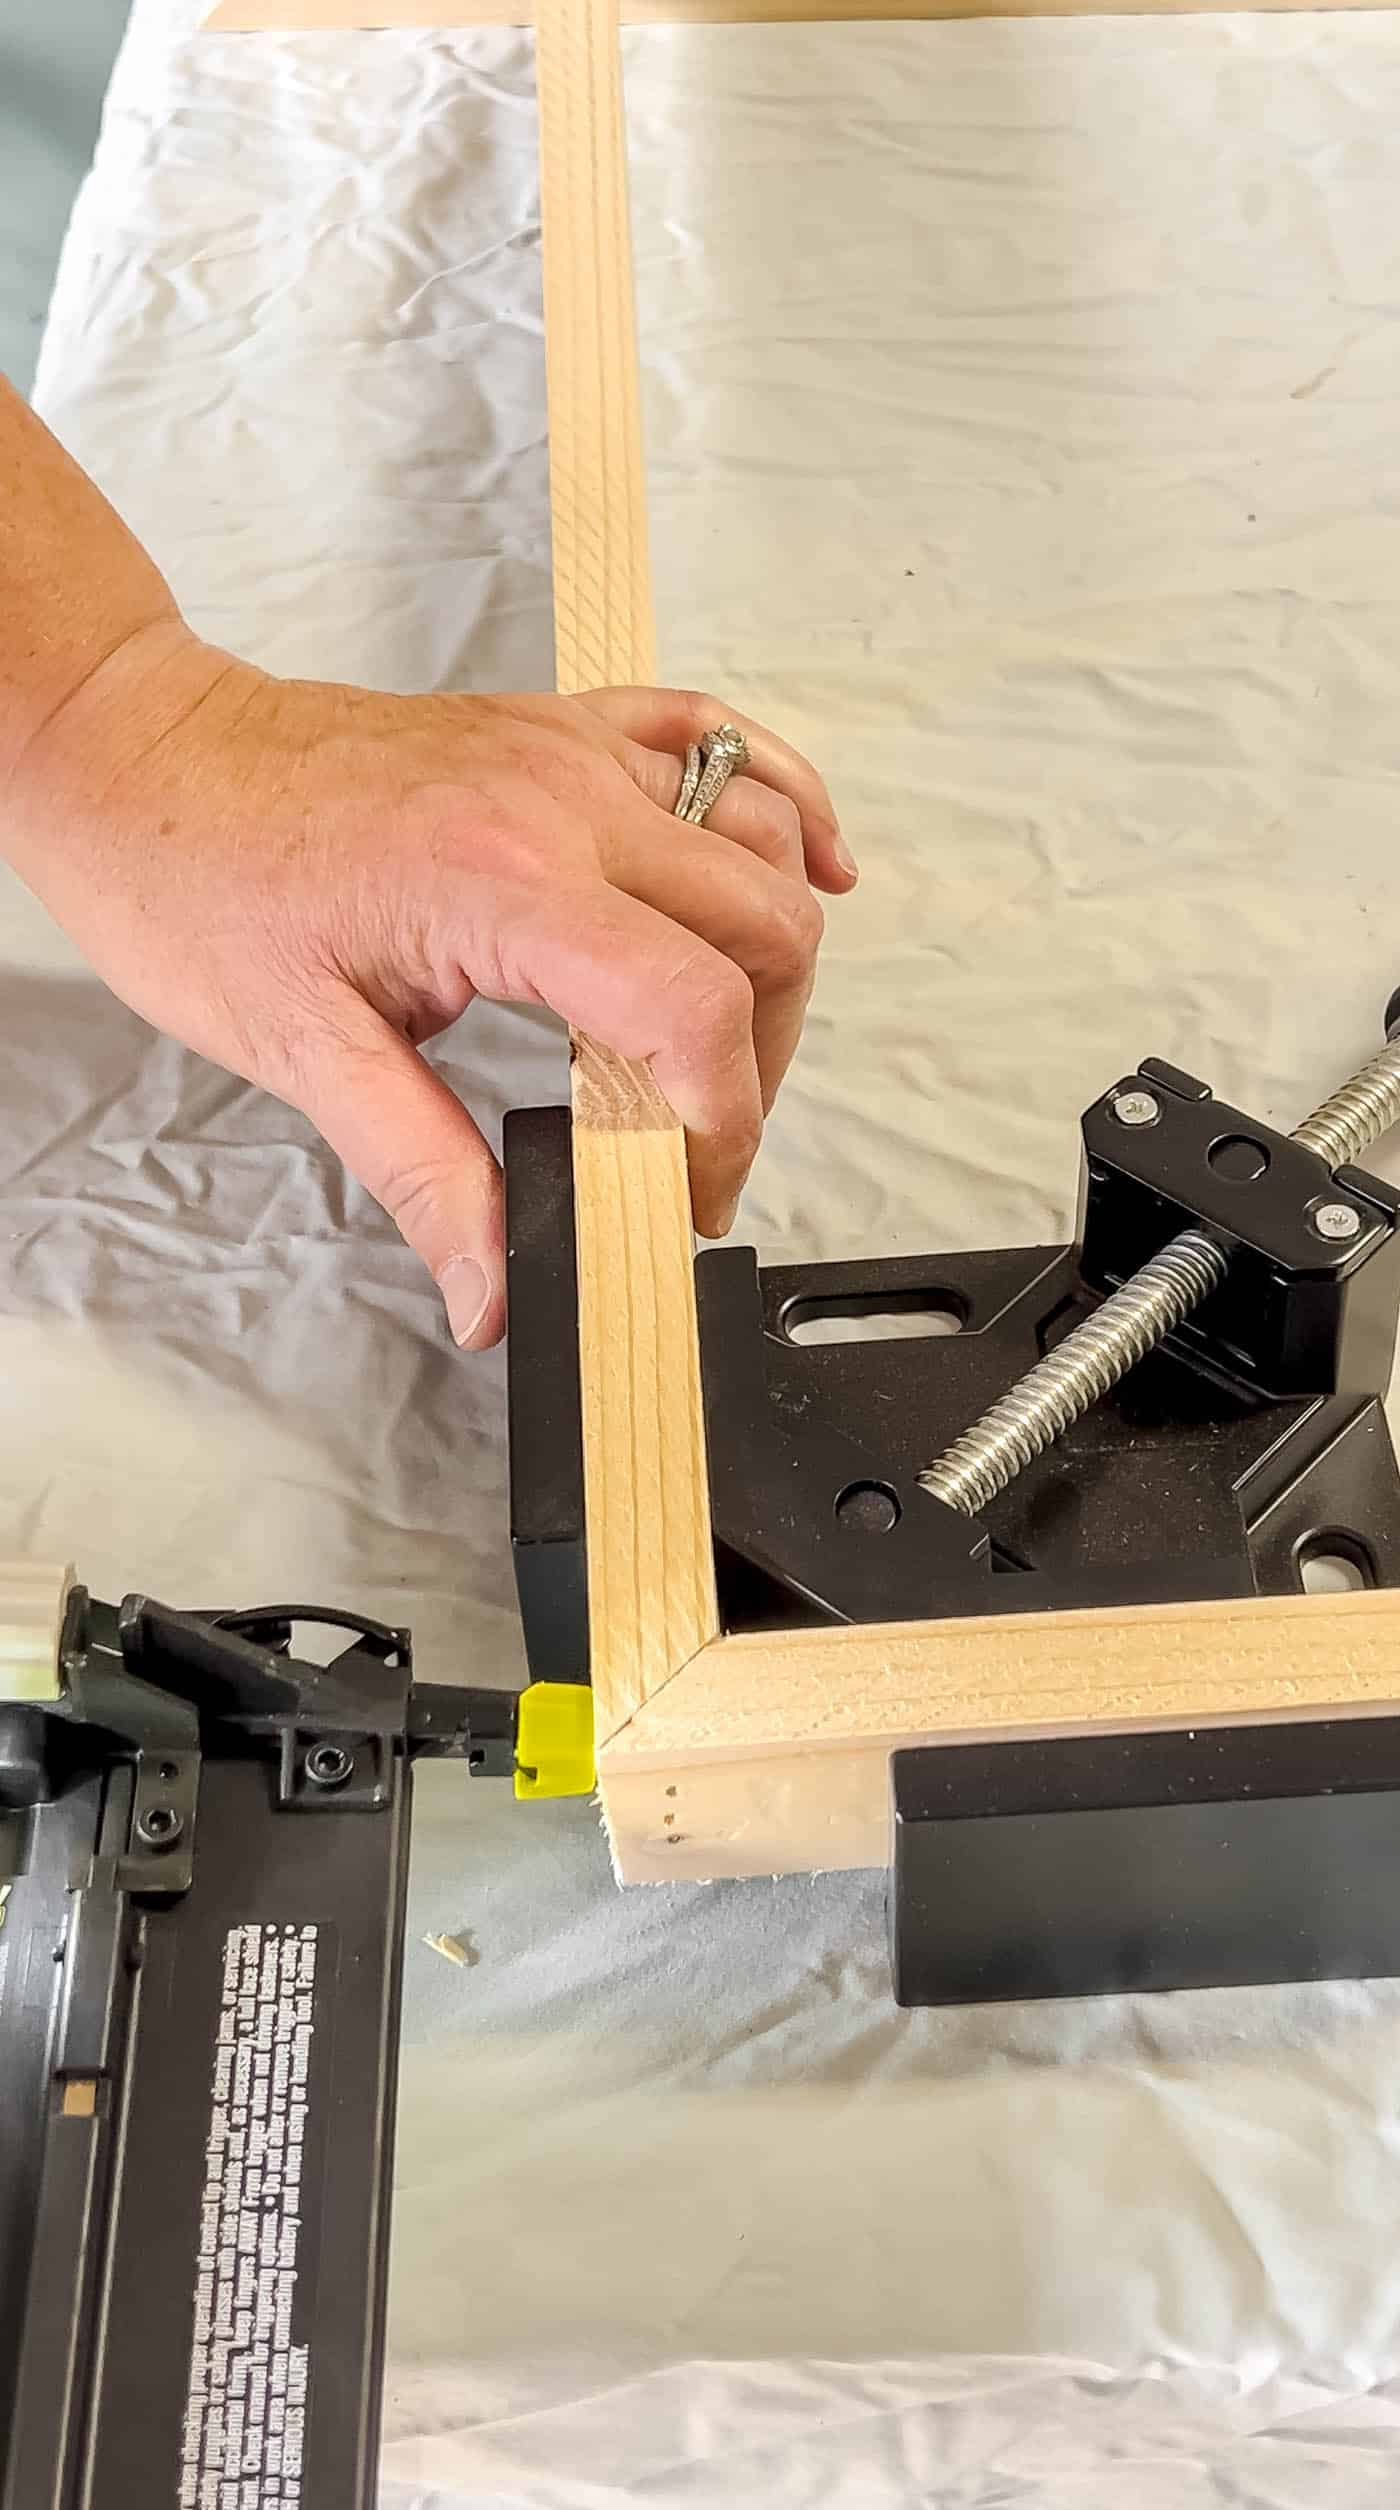
After the glue is completely dry, reinforce each corner with finishing nails or corner brad nails to make the frame stronger and more secure.
Before proceeding, test the frame on your TV to make sure the fit feels right. This is the perfect time to make any minor adjustments before adding another frame layer or decorative trim later.


