
Looking for easy ideas on how to decorate a basket? Here’s a simple project with step-by-step instructions.

I just finished the cutest simple project with this basket.
After I finish (And made four more baskets as I kept getting more ideas to use this technique), Whitney came home for a concert and went in through the back door
I think she squealed when she saw the baskets.
I say “think” because I’m not really sure what screaming feels like.
Eeeek?
Errrr?
Awokeki?
Suffice it to say it was a sound of awe and wonder and joy.
“You made it?” she said. “That’s the most beautiful basket I’ve ever seen.”
I love that girl.
He really knows how to compliment a craft project.
Want to decorate a basket in under 30 minutes? Here is the project and step by step.


The cutest, right?
And when I show you how easy it is to make, you may decide that we need to be friends forever.
But wait?
I didn’t stop with the flowers.
Why?
When you can make this.


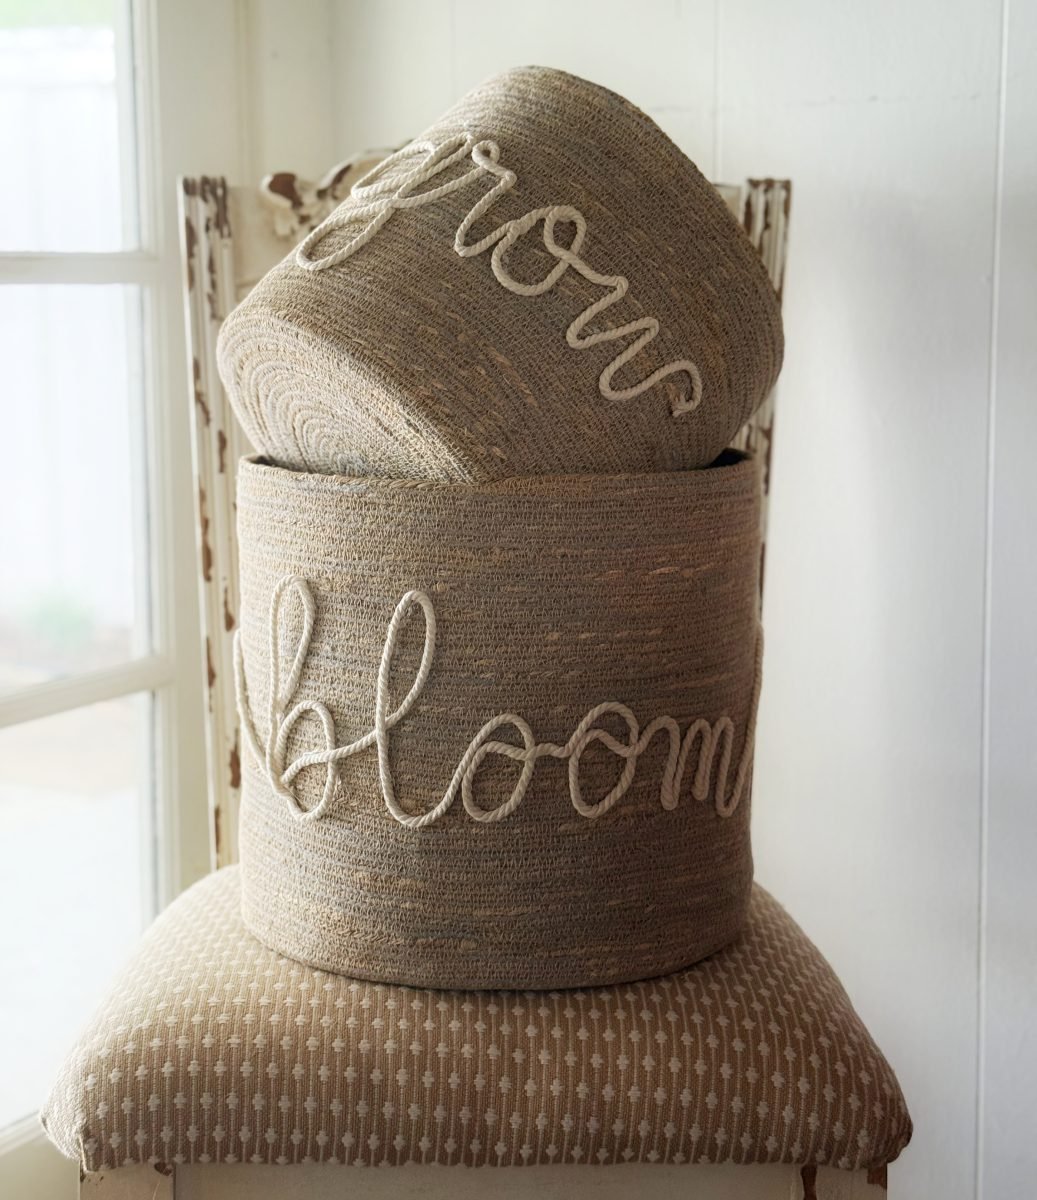
I made words on the baskets.
This is a planter basket, so I used Bloom and Grow, and there’s a big one that says Glow and Grow.
I think I’m going to make a few more for my laundry room with words like STUFF and NEST and HOME and COFFEE.
Let me share how (And a few tips I learned along the way).
Supplies:
Basket (I already had this one, but I found one that is very similar)
Low-temp glue gun (more on this later)
Low temperature glue sticks
Chalk
Scissors

1. Sketch design with chalk
Plan your design for your basket.
you A similar basket can be seen here.
I knew I wanted flowers with swirls, so I just looked at the flower pattern and sketched it.
The surprising thing about chalk? Have you created a design and don’t like it?
You can just erase it and start over.
You can also print a pattern on paper and use white carbon paper to trace it onto your basket with a pencil.

//Macrame cord 5 mm //
2. Use macrame cord
I used this cord.
I like the 5mm width because it really stands out in the basket and is strong enough to make shapes and letters easily.
It also comes in tons of other colors.

3. Trace the leaves with glue
I used a low-temp glue gun for this project.
I learned about low-temp glue guns and low-temp glue years ago.
For a project like this, that’s pretty good. Trace one leaf at a time so the glue doesn’t have time to dry.
you Here you can see the glue gun.
And The low temperature glue sticks here.

4. Wind the cord into a petal
Cut your cord before gluing to the basket.
After you apply the glue, follow the line of glue along the cord.
It should make a flower petal like this.

5. Repeat for the other four petals
Follow the exact steps for each of the other flower petals.
It is easier if you cut all the pieces of yarn in advance, so that all the petals are the same size.
Now it’s time for the center and swirls.

6. Add swirls
I sketched the swirls coming out of the center of the flower.
Similarly add glue line and string.
Start at the edges and work towards the center.

7. Make the center swirl
Start twisting the yarn in a circular pattern.
Continue adding yarn to the center of the petals and around the ends of the swirls until you have a large circle covering everything.
Add a drop of glue and tuck the end under the medallion.
Complete all the steps for the second flower.

It’s such an easy budget project.
And now? You’ll never look at a basket the same way again.
So what do you think?
Was it “squall” worthy?
I have to inform Whitney. 🙂

PS Here are some other storage basket options that would work perfectly for this project.
you You can see them all here.

Disclosure: This post uses affiliate links.
Want to learn how to decorate your home for free?
Click here to get my five best secrets.


