

If you’re looking forward to a hot shower with an exhilarating burst of water spray, you’ll be understandably disappointed if the water runs out of your shower head or bounces sideways. When new, the shower head delivers an even spray of water, but over time, minerals in your water can begin to clog the tiny holes in the shower head, reducing the spray force and giving you a lack of shower.
When your shower head fails to perform as well as it once did, it may be time to clean the shower head, removing scaly buildup inside the fixture to restore its flow strength. Unclogging shower heads is easy, and you’ll be glad you spent the little time necessary with these solutions for cleaning shower heads and tips for preventing mineral buildup.
Cleaning the shower head when it is attached to the wall

However it is easy to remove and that too change the shower head, Not all heads open easily. If you don’t have one, you’ll need a wrench and some elbow grease. Also, new or well-maintained shower heads may require only light cleaning. Soak the shower head in acidic vinegar solution A lot of hard water will dissolve stains and deposits to descale your shower head.
supplies
Distilled white vinegar (or Commercial cleaner)
baking soda
Ziploc bag
Rubber band or Zip tie
Soft brushIf necessary
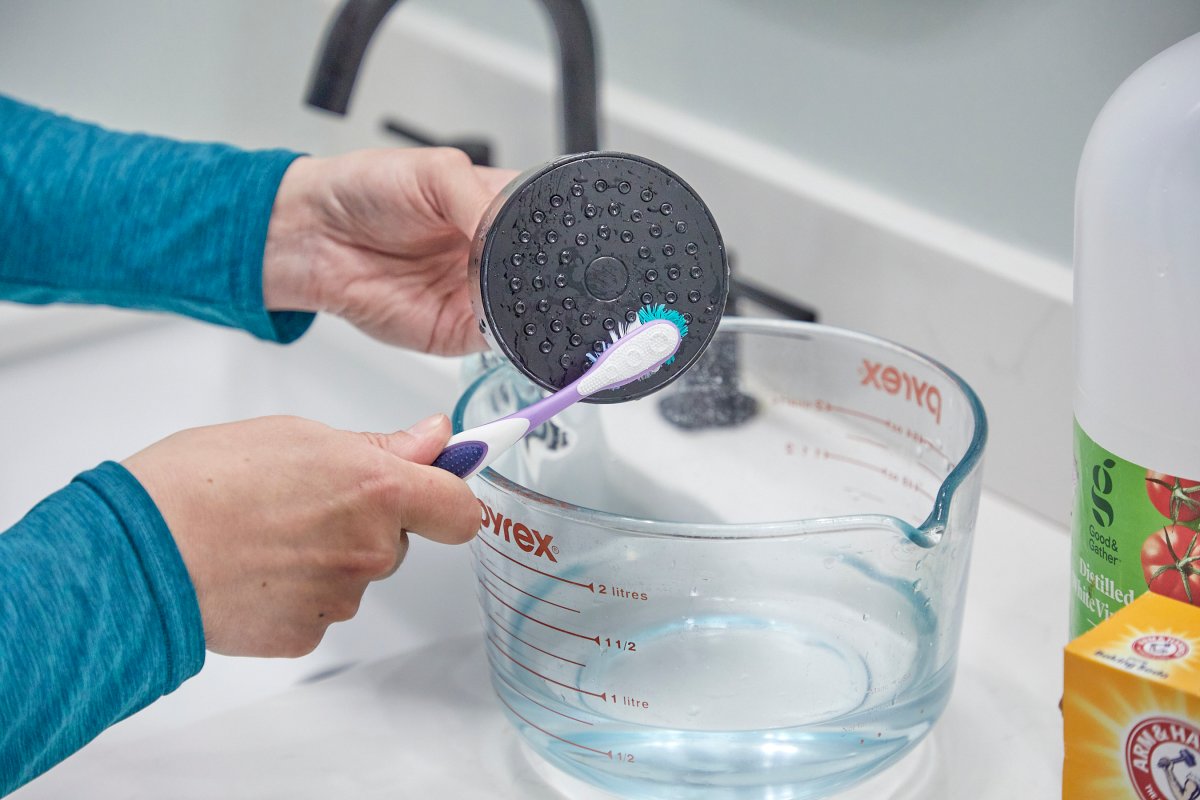
Step 1: Measure and mix the vinegar and baking soda solution.


Handy pantry staples you may need; You can clean the shower head with vinegar and baking soda. The acid in vinegar (which has an average pH level of only 2) or some cleaners can dissolve minerals that discolor and clog your shower head. If minerals are the only problem you can see with your shower head, you can try vinegar alone. Adding baking soda, which is a base and has an average pH of 9.5, can also dissolve organic gunk like dirt and grease. That mixture of basic and acidic elements in it Homemade shower cleaner Addresses both minerals and fines and causes a fizzy chemical reaction, although the fizz is mostly for show.
To clean your shower head with vinegar, pour enough vinegar into a measuring cup or similar container to fill your Ziploc bag about halfway. If you want to add baking soda, use just enough to dissolve organic grime and no more than 1 part for every 2 parts of vinegar. If you use equal amounts, the acid and base can cancel each other out. Or if the mineral deposits are particularly bad you can opt for a professional cleaning solution instead. Be sure to follow all safety and usage instructions, including the product’s recommended surfaces, personal protection, and use of ventilation if necessary.
Step 2: Fill and attach the bag to the shower head.
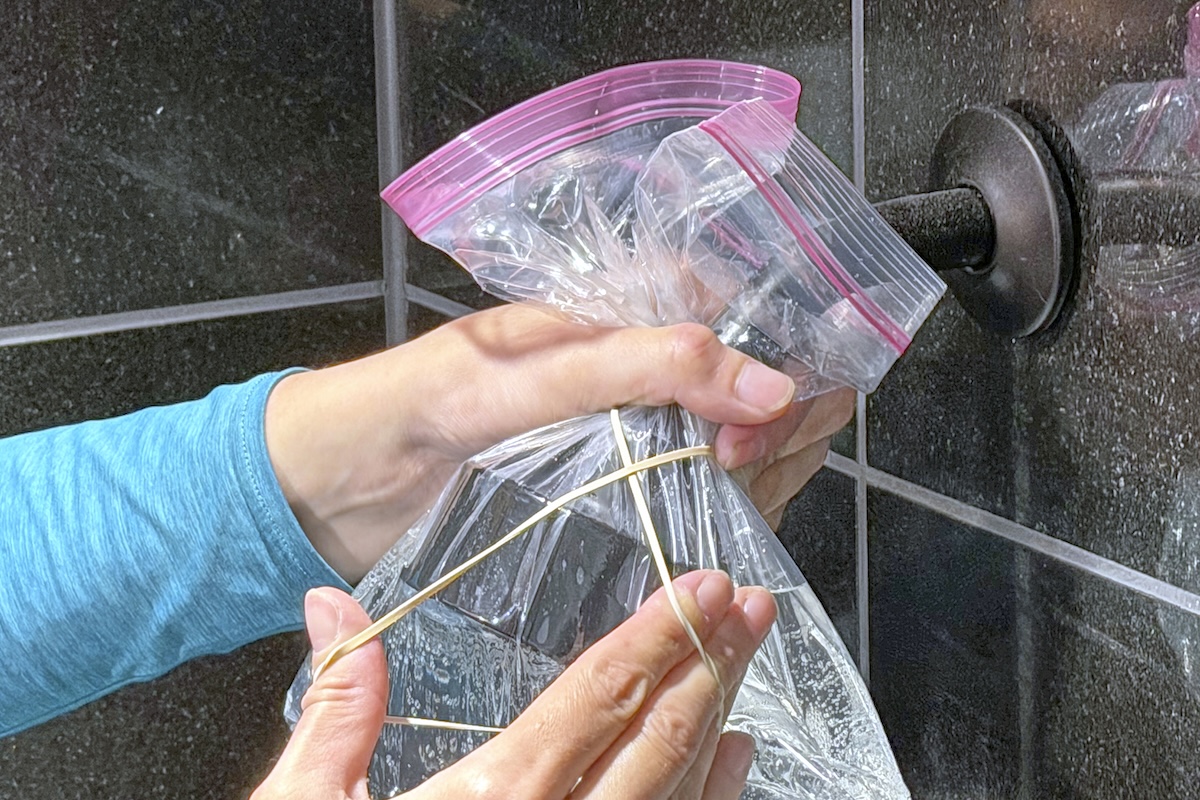
Pour the cleaning solution from your measuring cup into a quart- or gallon-sized container Ziploc bagFill the bag enough to submerge the entire shower head. Fold the top edges of the bag down and secure the bag around the shower head using a large rubber band, zip tie, or tape, making sure the head remains submerged.
Step 3: Allow the shower head to dry for several hours.

The length of time to soak the shower head depends on how many hard water deposits or other debris are on its surface. Fine grits are fine. If you only do menstrual soaking to prevent hard-water build-up, about 30 minutes is probably long enough. But for a deeper clean, leave the vinegar bag on for 4 to 8 hours or even overnight.
Step 4: Remove the bag and clean the shower head.
After removing the bag, run the shower at full pressure to remove any remaining deposits, clean the vinegar, and check the spray. The soak should have softened any remaining deposits or grime so they should come off easily by just rubbing with a rag or rubbing the shower head with your thumb. If you need to clean the entire head after soaking, gently scrub it with a toothbrush. Shower once more to remove residue, especially if you soaked the head in a professional cleaner.
Shower head removal for deep cleaning
If your shower head has heavy mineral deposits on its exterior, similar deposits may be present inside the shower head and on its filter screen. If you have observed Reduced water pressureHaven’t cleaned the shower head in months, or know it You have hard water in your homeYou may need to remove the shower head for deeper cleaning. Removing the head can be the best way to clean a clogged shower head, as you can soak and scrub it thoroughly and check and clean its screen filter.
supplies
Adjustable Wrench (if required)
A rag or small cloth
Pliers (if required)
Tweezers or Needle-nose pliers
A toothbrush or A small nylon scrubbing brush
Bowl or bottle
Distilled white vinegar
baking soda
A small sewing needle or straight pin
Step 1: Remove the shower head.
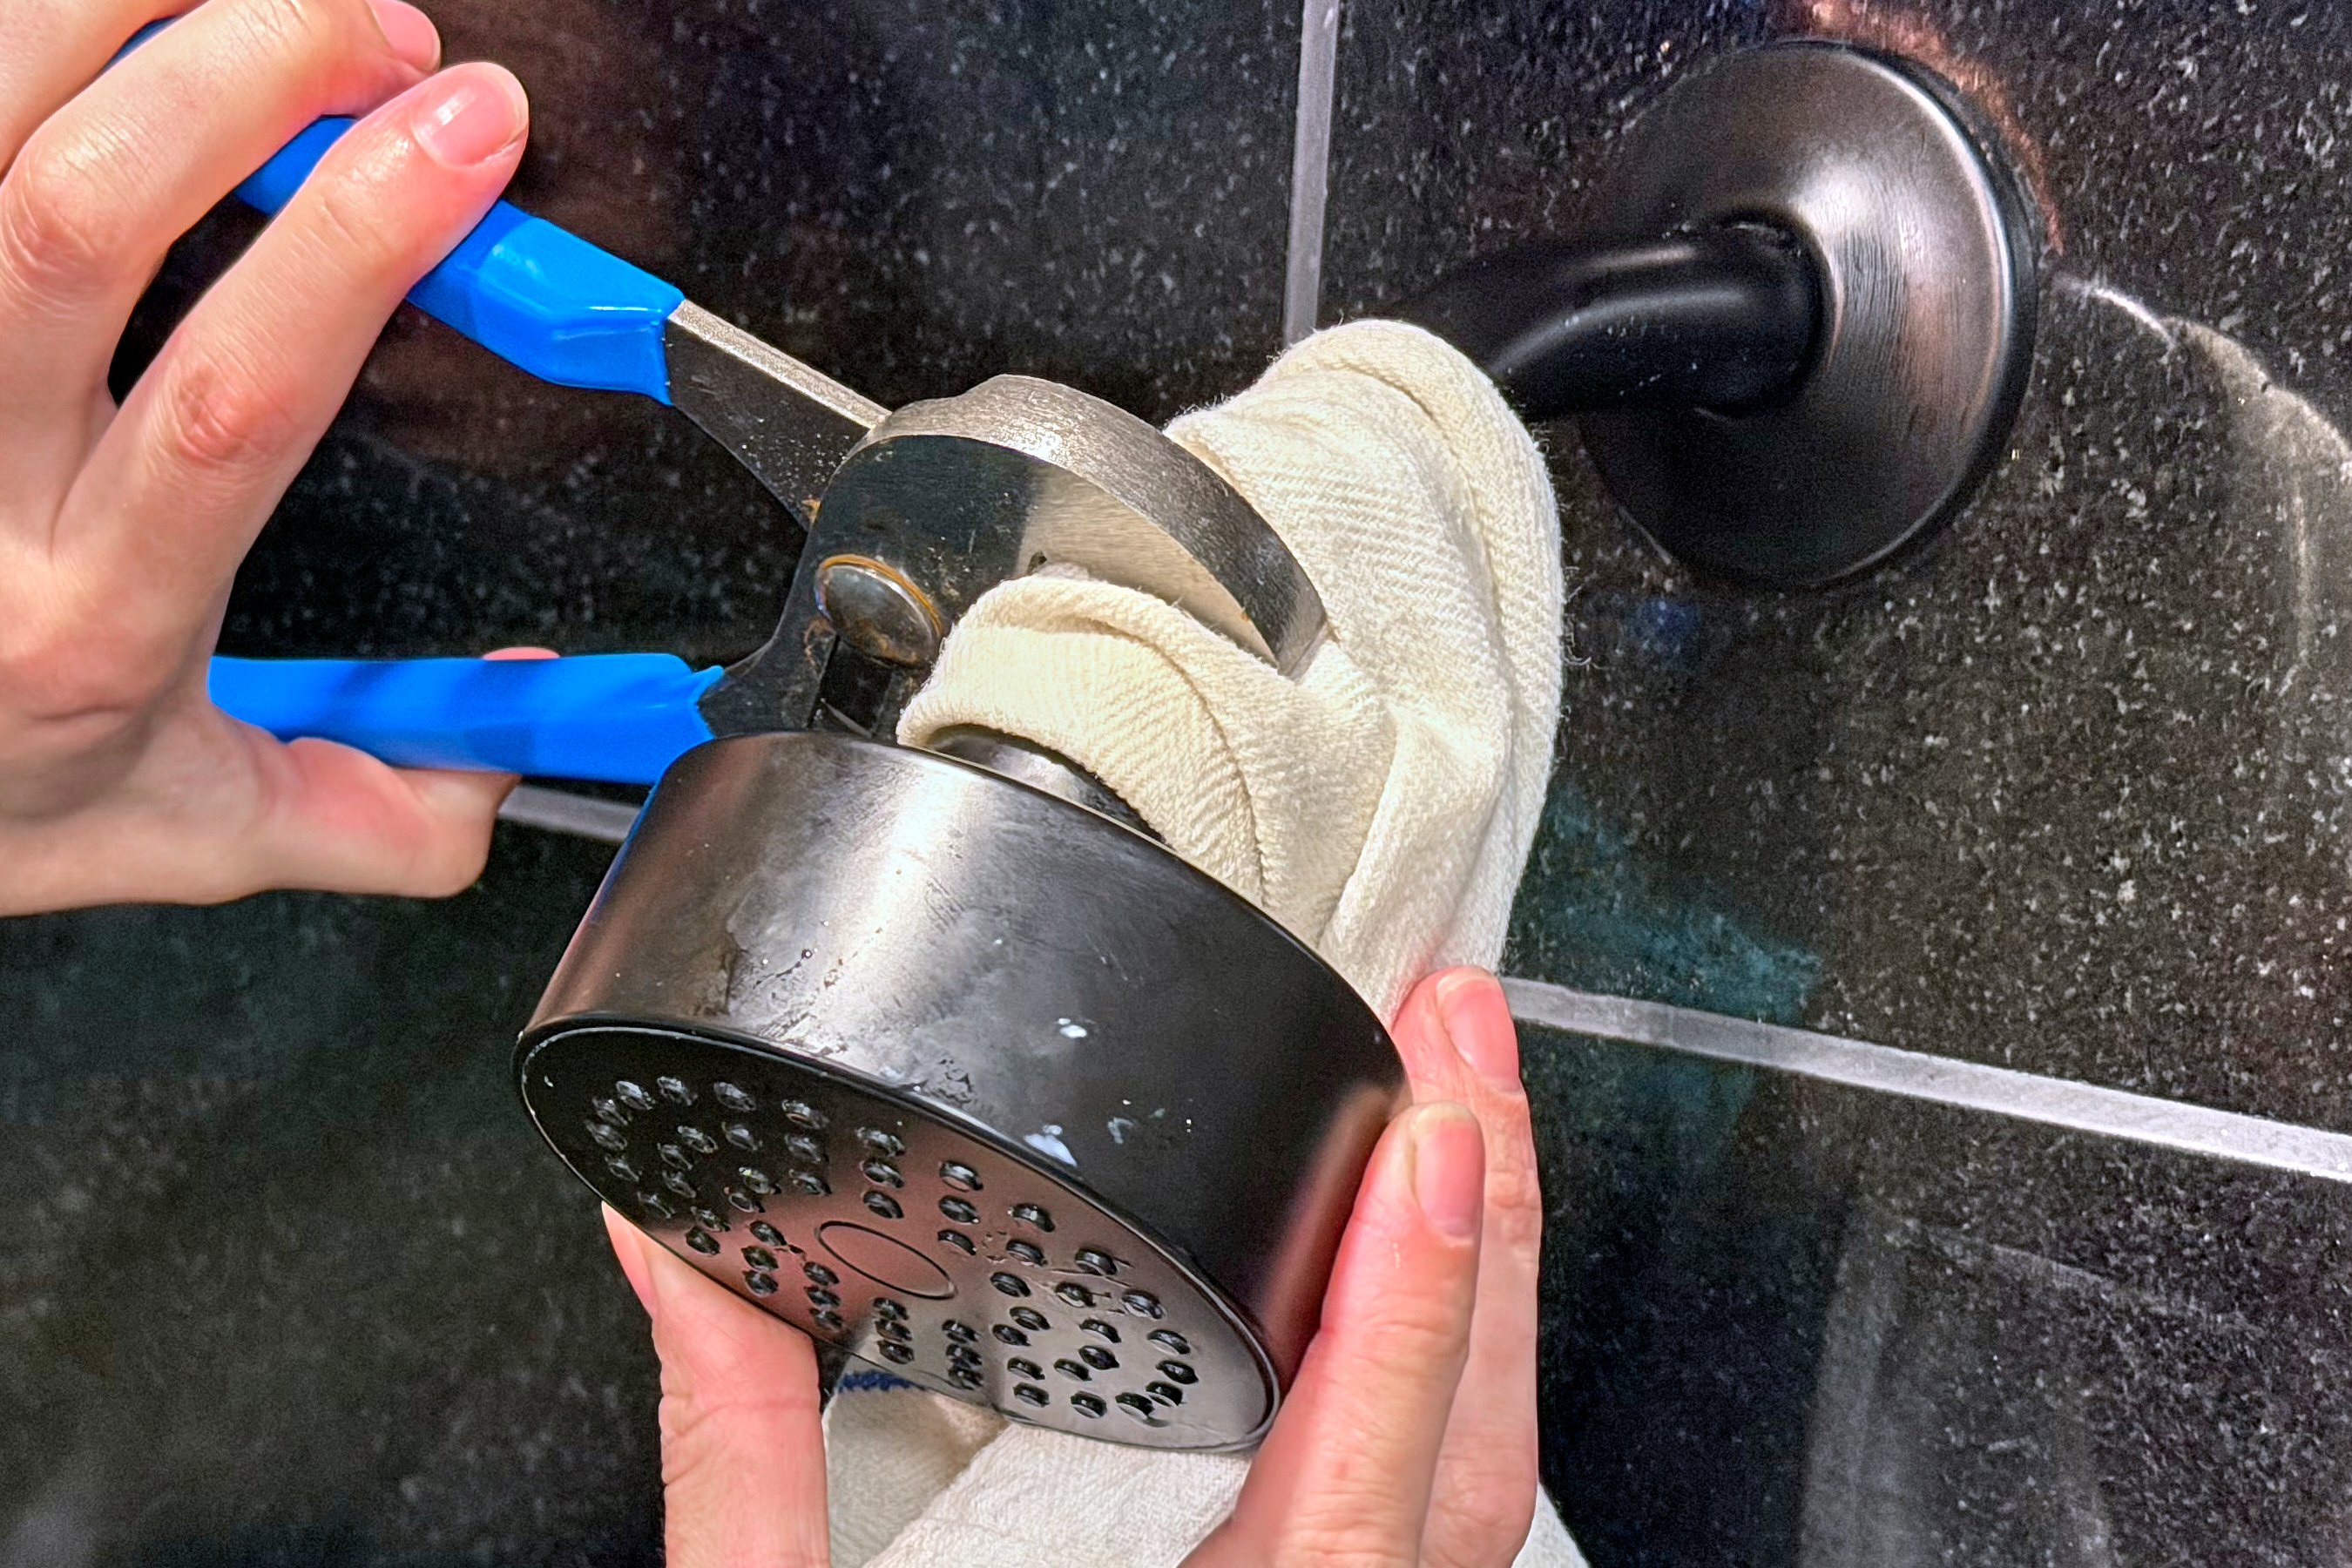
It is always best to check the manufacturer’s instructions first and consider the type shower head while removing it. Most either have a threaded arm screw out (hose in handheld models) or a nut that holds the head in place. First, try turning the head counterclockwise to see if it will unscrew easily.
If you need to use a wrench to unscrew a stuck shower head, secure the finish of the shower head by wrapping it in a rag or cloth and tying the cloth or holding it with pliers. Remove the shower head from the shower arm by twisting the threaded head or nut counterclockwise, holding the arm as you twist. Once the nut is loose, you can simply remove the head screw. Look for and set aside any screens or gaskets that may rest on the nut or shower arm.
Step 2: Clear the debris.
After disassembling the shower head, clean any debris on the threads of the shower arm and from the head if necessary. Cover your finger with a rag and gently scrape each nozzle to remove visible buildup, being careful not to damage the rubber surface. Insert your finger into the threaded interior of the shower head to remove any debris. Wash the debris with water.
Step 3: Remove the filter screen.
Again, consult the shower head manufacturer’s instructions on how to remove and clean the filter screen if necessary. If you haven’t already found the screen, look in the threaded part of the shower head that connects to the faucet pipe. Gently brush the screen, note its position. If it does not come out easily, use tweezers or needle-nose pliers to gently remove the filter. Clean the screen by rinsing it in water or gently brushing it with a toothbrush while rinsing to remove mineral deposits on the screen.
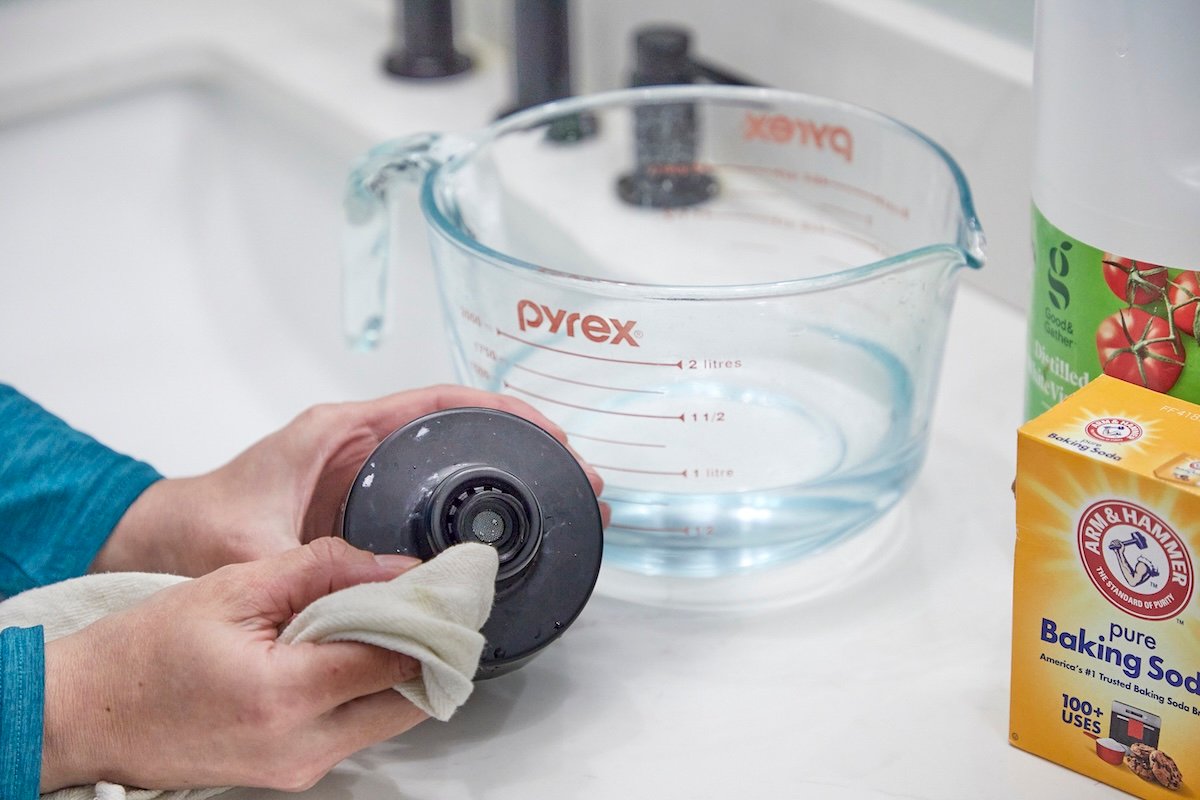
Step 4: Submerge the shower head in distilled white vinegar or a cleaner that is safe for the finish.
Find a bowl that is at least as deep and wide as the shower head. Distilled white vinegar in a bowl until the head is completely submerged (and a noticeable crumb appears). Fine fine fine fine fine fine fine fine fine fine fine fine fine fine glass 4. If the head is full or heavily dirty, let it soak for at least an hour and overnight.
Alternatively, you can use a shower head cleaner or a mineral deposit cleaner. Be sure to check the cleaner’s safety precautions and follow instructions for soak time. Harsh chemicals in some cleaners can damage the surface of the shower head and also emit fumes. For example, some types of rust and lime deposit-removing cleaners (and toilet-bowl cleaners) will permanently damage chrome.
Step 5: Clean the head and open any clogged nozzles.
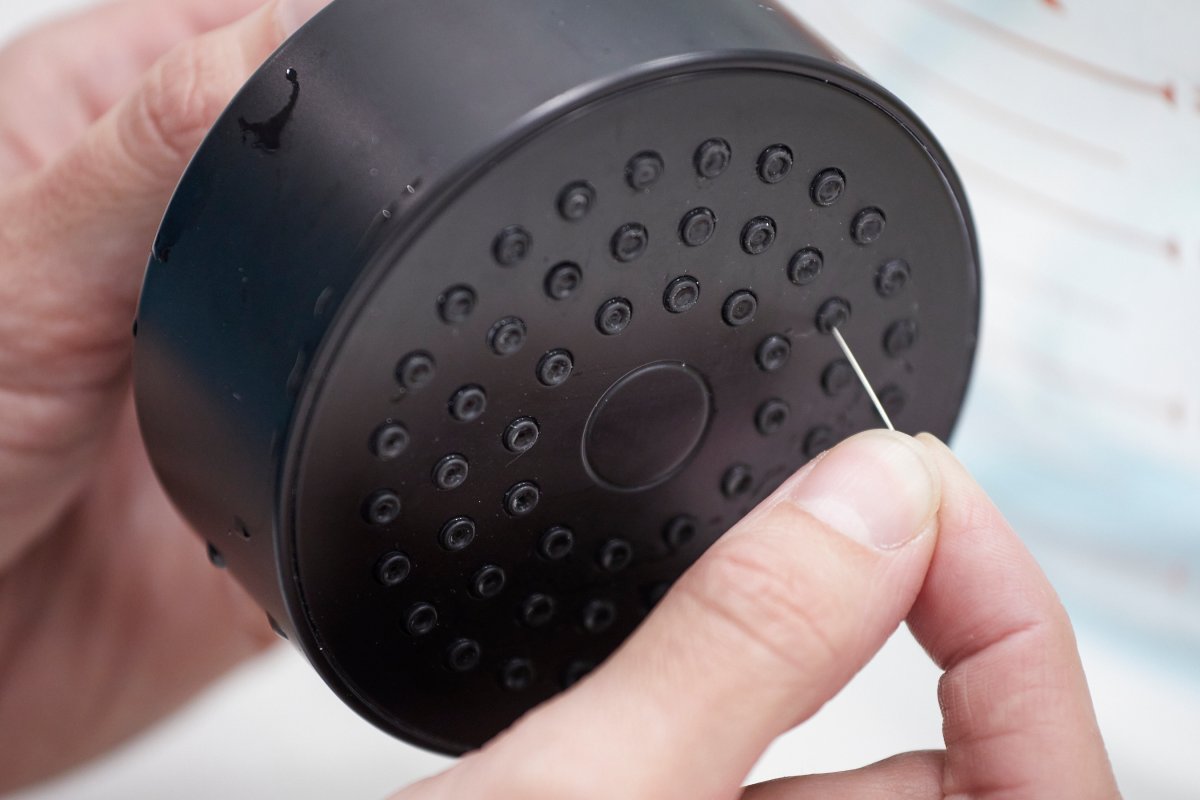
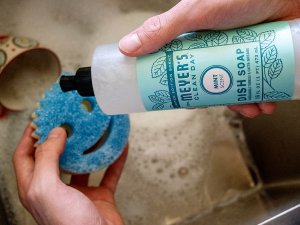
After soaking, you can gently brush the spray nozzle again with a toothbrush or soft nylon brush and baking soda paste or Quality shower cleaner Which is safe for surfaces. Make sure you remove deposits from inside the nozzle holes by carefully pushing a small pin, paper clip or needle through each hole. Rinse the shower head thoroughly again before reattaching it.
Step 6: Reinstall the shower head.
If you removed the filter screen for cleaning, put it back in place. Turn the shower head clockwise to screw it back into place as tightly as you can by hand. If you must use a wrench to tighten the head or nut, again protect the finish with rags and avoid over-tightening the shower head, which can damage and Shower head leaks. do the test Head the bath at high pressure for about a minute to clear the remaining debris and cleaners.
How often should you clean your shower head?
How often you should clean your shower head depends on how hard your water is and how quickly it builds up on your shower head and others. Bathroom fixtures. In general, clean the shower head with vinegar every 1 to 2 months using the method above that best suits your situation. This will prevent water flow issues and make it less necessary to scrub or soak overnight.
Shower Head Maintenance Tips
prevent Hard water stainsSoap scum, and scale buildup by spraying the outside of your shower head with vinegar and cleaning it as part of your regular bathroom cleaning. However, it’s only noticeable on the outside, so scrub the shower head and nozzle regularly to prevent scale. Use vinegar or a similar non-abrasive cleaner that helps dissolve deposits and a soft nylon brush. This reduces the number of times you have to remove the shower head and soak it to unclog the nozzle.
FAQ
Installing a water softener is an excellent idea if your home has naturally hard water. Not only will it help keep shower heads clean, but it will also extend the useful life of your dishwasher and clothes washer. Also, the sink, tub, and shower will all require less cleaning.
If you’ve seen a product called cleaning vinegar while shopping, you know that it looks a lot like regular distilled white vinegar that’s considered a staple for both cooking and cleaning. However, a product labeled for cleaning contains at least 6 percent acidity. A typical 5 percent distilled white vinegar in the food aisle of a grocery store. Most multipurpose cleaners are also around 5 percent acidity.
Cleaning vinegar packs more of a punch but isn’t as convenient to use, costs a bit more, and can prove too much for delicate surfaces. So, save money and confusion by using regular distilled white vinegar from the spice aisle.
Your complete guide to spring cleaning


