
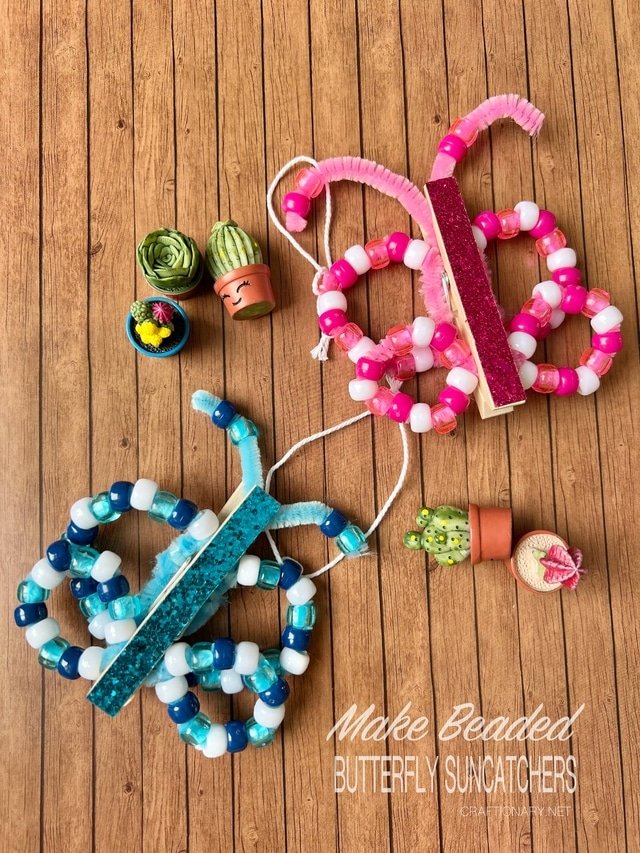
In an age dominated by digital distractions, finding non-screen time activities that hold a child’s attention can be a challenge. Enter the beaded butterfly. This is not just a simple craft; It is a gateway to mindfulness and a dynamic way to engage children in the creative process.
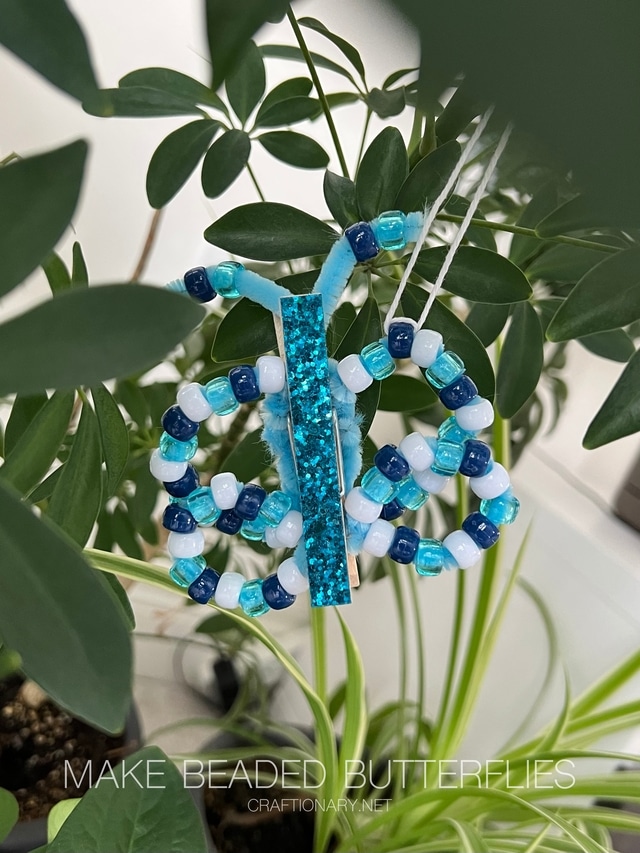
By swapping tablets for pipe cleaners and beads, families can engage in slow crafting. This rhythmic, tactile activity encourages children to focus on the present moment – the feel of wires, the patterns of colors and the satisfaction of creating something 3D. Moreover, when hung in a window, these translucent beads act as stunning suncatchers, spreading colorful light across the room and reminding children of their creativity whenever the sun shines.
Why do beaded butterfly suncatchers work for busy families?
- Intentional Mindfulness: The repetitive motion of the stringed beads serves as a moving meditation for children and adults.
- Creative Agency: Children feel a sense of ownership when they choose their own color palette.
- Functional Art: More than just a toy, this serves as a lovely home decor or sun-charming window ornament.

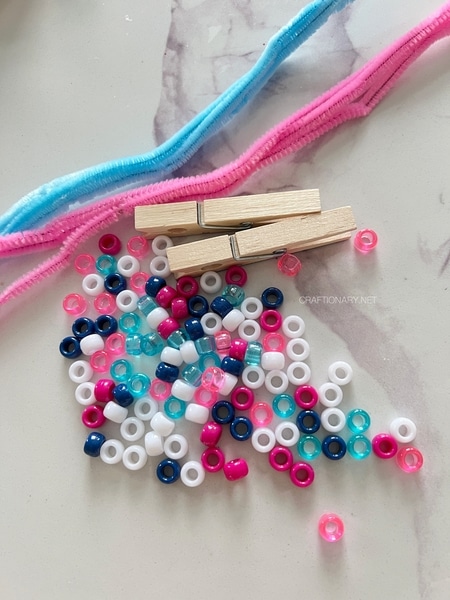
Materials you will need
To make the butterfly shown in our tutorial, gather the following:
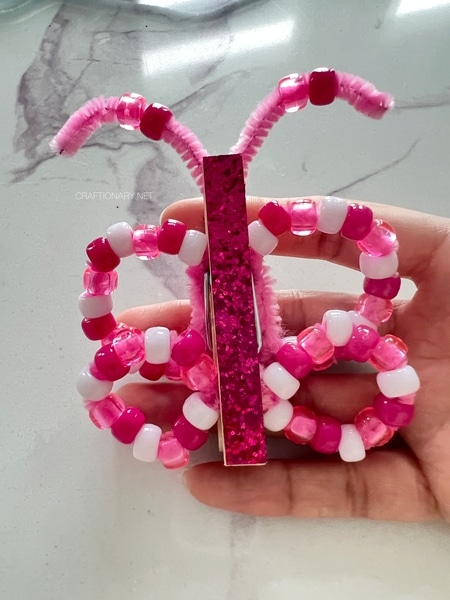
- Pipe cleaners (chenille stems): 3-4 stems per butterfly (pink is used here).
- Pony beads: Dark pink, light pink and white.
- Wooden clothespin: Standard Size (Plain or Glazed).
- Scissors
- Optional: Glitter tape or markers Clothespins to decorate the body.
Step-by-Step Tutorial: Making Your Butterfly Suncatcher
1. Prepare the wing base
Start by cutting two pipe cleaners in half. This gives you four equal lengths of pipe cleaner. These will serve as the structural bones for your four wings (two upper, two lower).
2. Draw patterns of beads
On each of the four pipe cleaner lengths, thread 12 beads. For example follow a repeating pattern:
Dark pink? Light pink? white
Repeat this four times until the length is full, leaving enough wire at the ends to twist.
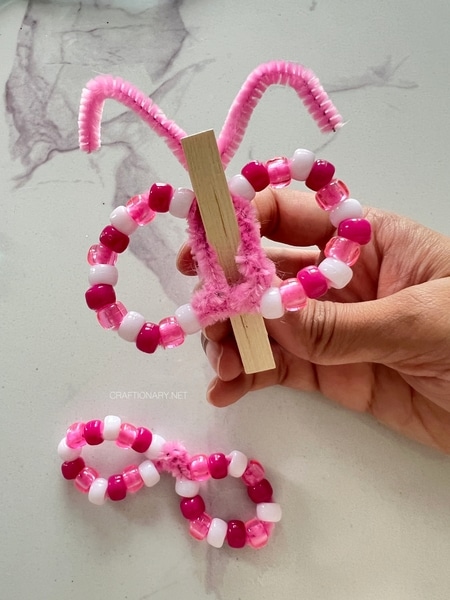
3. Attach the upper wings and antennae
- Take your two bead lengths. Take another pipe cleaner (cut in half) to serve as an antenna.
- Place the antenna pipe cleaner in the center and twist one around the top and bottom of the wing loop to make the right wing and do the same with the other for the left wing.
- Now attach the antenna parts by twisting them up and down to secure them together. This will create a loop in the center.
- This is what will slide on top of your clothes.
4. Make the lower wings
Take the remaining two bead lengths and twist them into loops. Twist the ends of the wire tightly and join them together in the center. Try not to leave any space so they fit snugly into the clip hole.
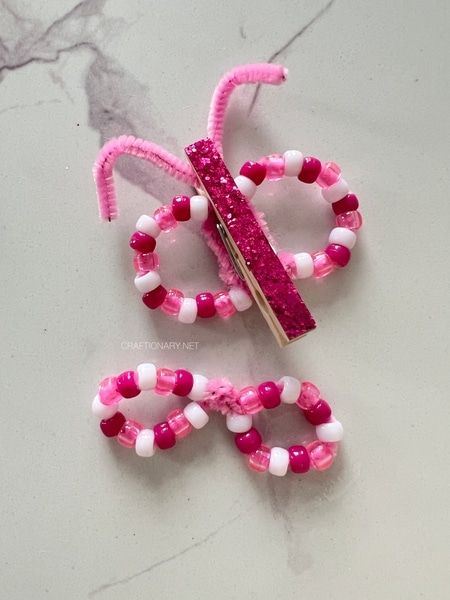
5. Assemble on a clothespin
Now, bring it all together:
- Slide the upper wing/antenna unit onto the top clip part of the garment.
- Take the lower wing unit and fix it to the underside of the clothespin hole (spring area) or clip.
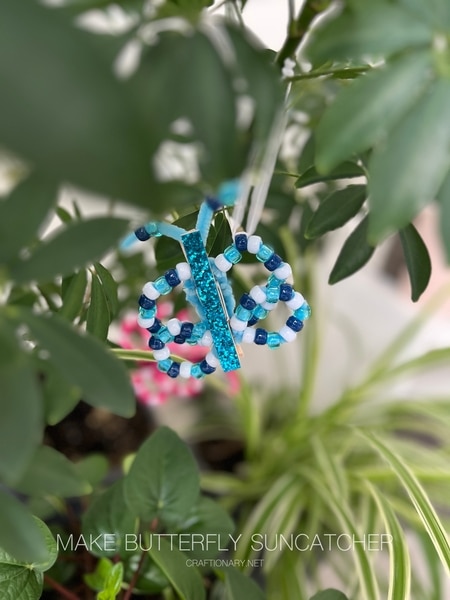
- Bend the antennae into curls and fan out the wings to give the butterfly a lifelike, 3D shape. Draw some beads on the antenna.
Tips for finishing touches
- Consistency is key: Use a 12-bead count for all four wings to ensure symmetry.
- Texture Matters: Add glitter clothespins or glitter washi tape to add a premium feel to the craft.
- Safety: Always bend the sharp end of pipe cleaners back into a bead to prevent scratches.
Commonly Asked Questions:
1. What is the best garland for pipe cleaner butterflies?
While we used pony beads (6x9mm) for this tutorial because they are easier for little hands to grasp, you can also use pearl beads (fuse beads) for a more delicate, intricate look.
2. How do you make the wings in place?
The secret is the tension of the clothesline. By sliding the pipe cleaner bridge into the mouth of the clip and the lower wings into the metal spring gap, the butterfly becomes a sturdy toy or a functional clip for bags and snacks.
3. Can you use this as a decoration?
Yes! These are popular as curtain clips, Christmas tree ornaments or gift toppers. Because they are on clothespins, they can easily be attached to ribbon or fabric.
- Ditch the Tech: Set up a basket for the phone rule during assembly to ensure total family connection.
- Celebrate imperfection: If the wings are slightly lopsided, call it “character”. The goal is the process, not just the product.
- Publish it: Always hang these where they can catch natural light to maximize the suncatcher effect.
- Hanging Loop: Thread the string through the beads to keep the butterfly shape intact and make a sturdy hanger.

These butterflies are not only fun to make with kids but also make a beautiful addition to your garden or indoor spaces.
You may also like:
Make cute pipe cleaner birds for a beaded birdhouse suncatcher
How to make a double-ring sunburst beaded suncatcher
Create beaded succulents: a lasting blend of craft and nature


