

Today I want to share with you a craft that involves a lot of ribbon.
Ribbon like this.
Now, I know some of you may have tons of ribbon. You can have a whole ribbon stash. You may already have a pile of ribbons waiting for a project. You don’t need a ton of each piece. In fact, the more varied the pieces of ribbon, the better.
But what if you don’t have a bunch of ribbon and want to make this craft I’m about to share?
Did you know you can buy a large set of mismatched ribbons?
That was news to me.
So shop your ribbon closet.
Collect your ribbon scraps.
And let’s make this.

A bunny tassel.
Can you believe it?
See what I mean?
Can you see it (And once you see it, you can’t unsee it)?
It’s a bunny pepper shaker.
I know he’ll hold the pepper now.

// Bunny Salt and Pepper Shakers (on sale) //
But instead?
He lives his best bunny life.
Going through this.

// Bunny Salt and Pepper Shakers (on sale) //
For this.
The secret to the tassel is the ribbon.
It makes the project so easy to make that the tassel almost makes itself.
Here’s a simple, easy step-by-step tutorial for making your own bunny tassels.

DIY Bunny Tassels: An Easy Step-by-Step Tutorial
Supplies:
Bunny Salt and Pepper Shakers (on sale)

1. Add wires through the loops
I started by separating all the ribbons into strands.
Each piece is about 24″ long.
I laid them all out lengthwise and wound the floral wire around them as tightly as possible.
Here’s what the tassel looks like (or actually, the beginning of the tassel after I wound the string).

2. Thread the wire through the top of the tassel
Take your bunny, remove the ends and flip it over.
Then take the end of the wire and thread it through the holes in the top of the bunny, where the salt or pepper will come out.
This is actually a lot harder than it looks.
There’s probably a brilliant way to do this, and I don’t know how, so if anyone has any suggestions, please leave them in the comments.
I finally got it off the top of the bunny, but it definitely took a few tries.

3. Twist the wire into a circle
Once the wire was threaded through the top holes, I made a loop, twisted it, and then threaded the rest of the wire back through the top holes of the bunny.
You can simply pull the end of the wire back over the top of the rabbit.
Here’s what your loop should look like after you’ve rethreaded the wire.

4. Cover the wire loop
Now I had a wire loop that wasn’t pretty at all, so I had to come up with a solution.
I added a drop of hot glue to the bottom of the wire and then started wrapping the small striped ribbon around the loop. You want to wrap it tightly so it doesn’t look angry.
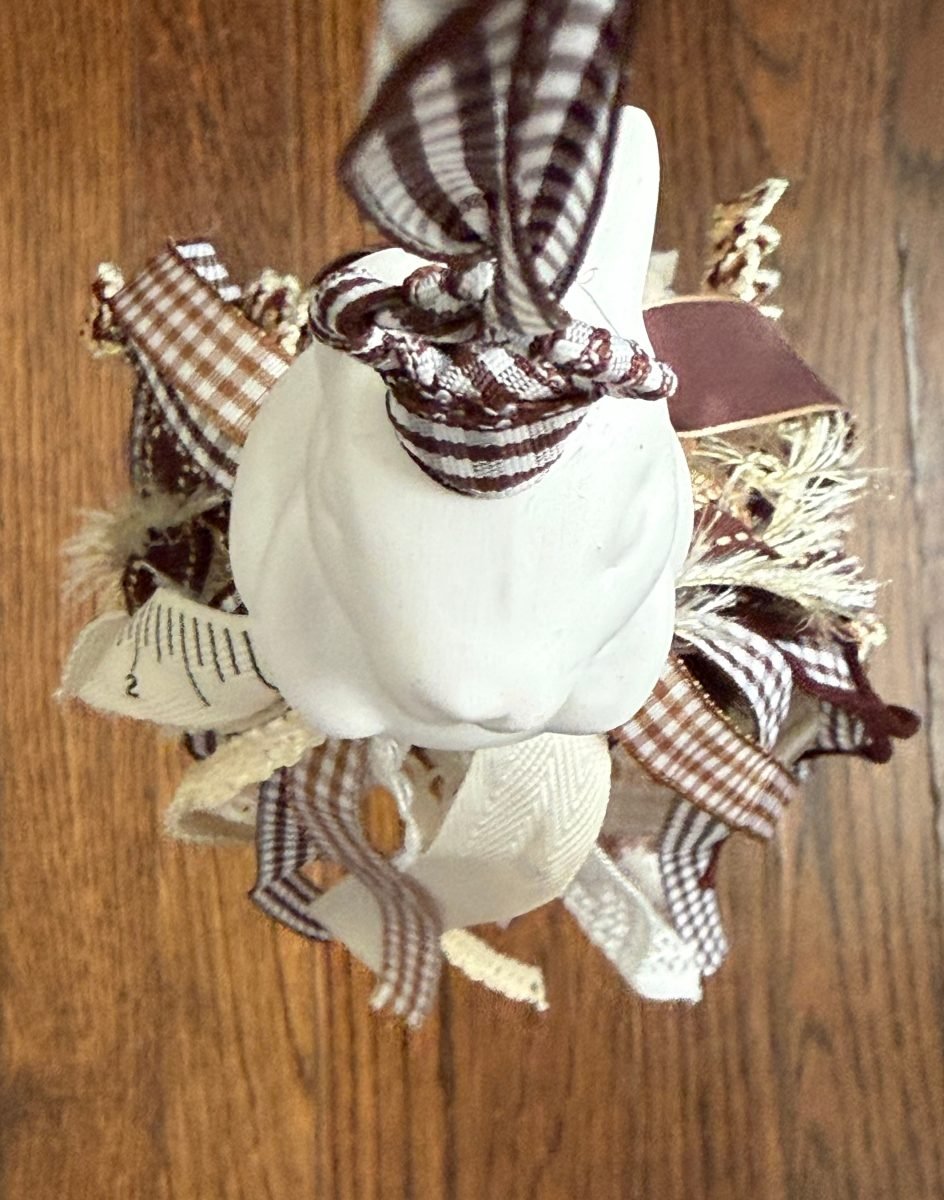
Here’s what my loop looks like after I wrapped the ribbon.

5. Trim the bottom of the tassel
After your tassel is finished, the ribbon will be twisted.
It’s not their fault.
They just need to out themselves.
Like bangs, they need a trim. Snip it here and there until it’s all even.
That’s it!
Mary was finished and ready to hang.
I hung a bunny tassel from a piece in the back hallway. We have a bunny theme going here.
But you can use this utensil anywhere. I think it would be lovely on a new post at the end of the stairs, tied to a wreath on the front door, or strung on a hook in the mudroom.
So what do you think?
When you look at those salt and pepper shakers, be honest, you saw a fizz, right?
Of course you did.
Because you are brilliant.

Here are some other salt and pepper shakers that I have found to be perfect for tassel projects.
(Or if you just need a bunny salt and pepper set, t00)
Disclosure: This post uses affiliate links
Want to learn how to decorate your home for free?
Click here to get my five best secrets.


