
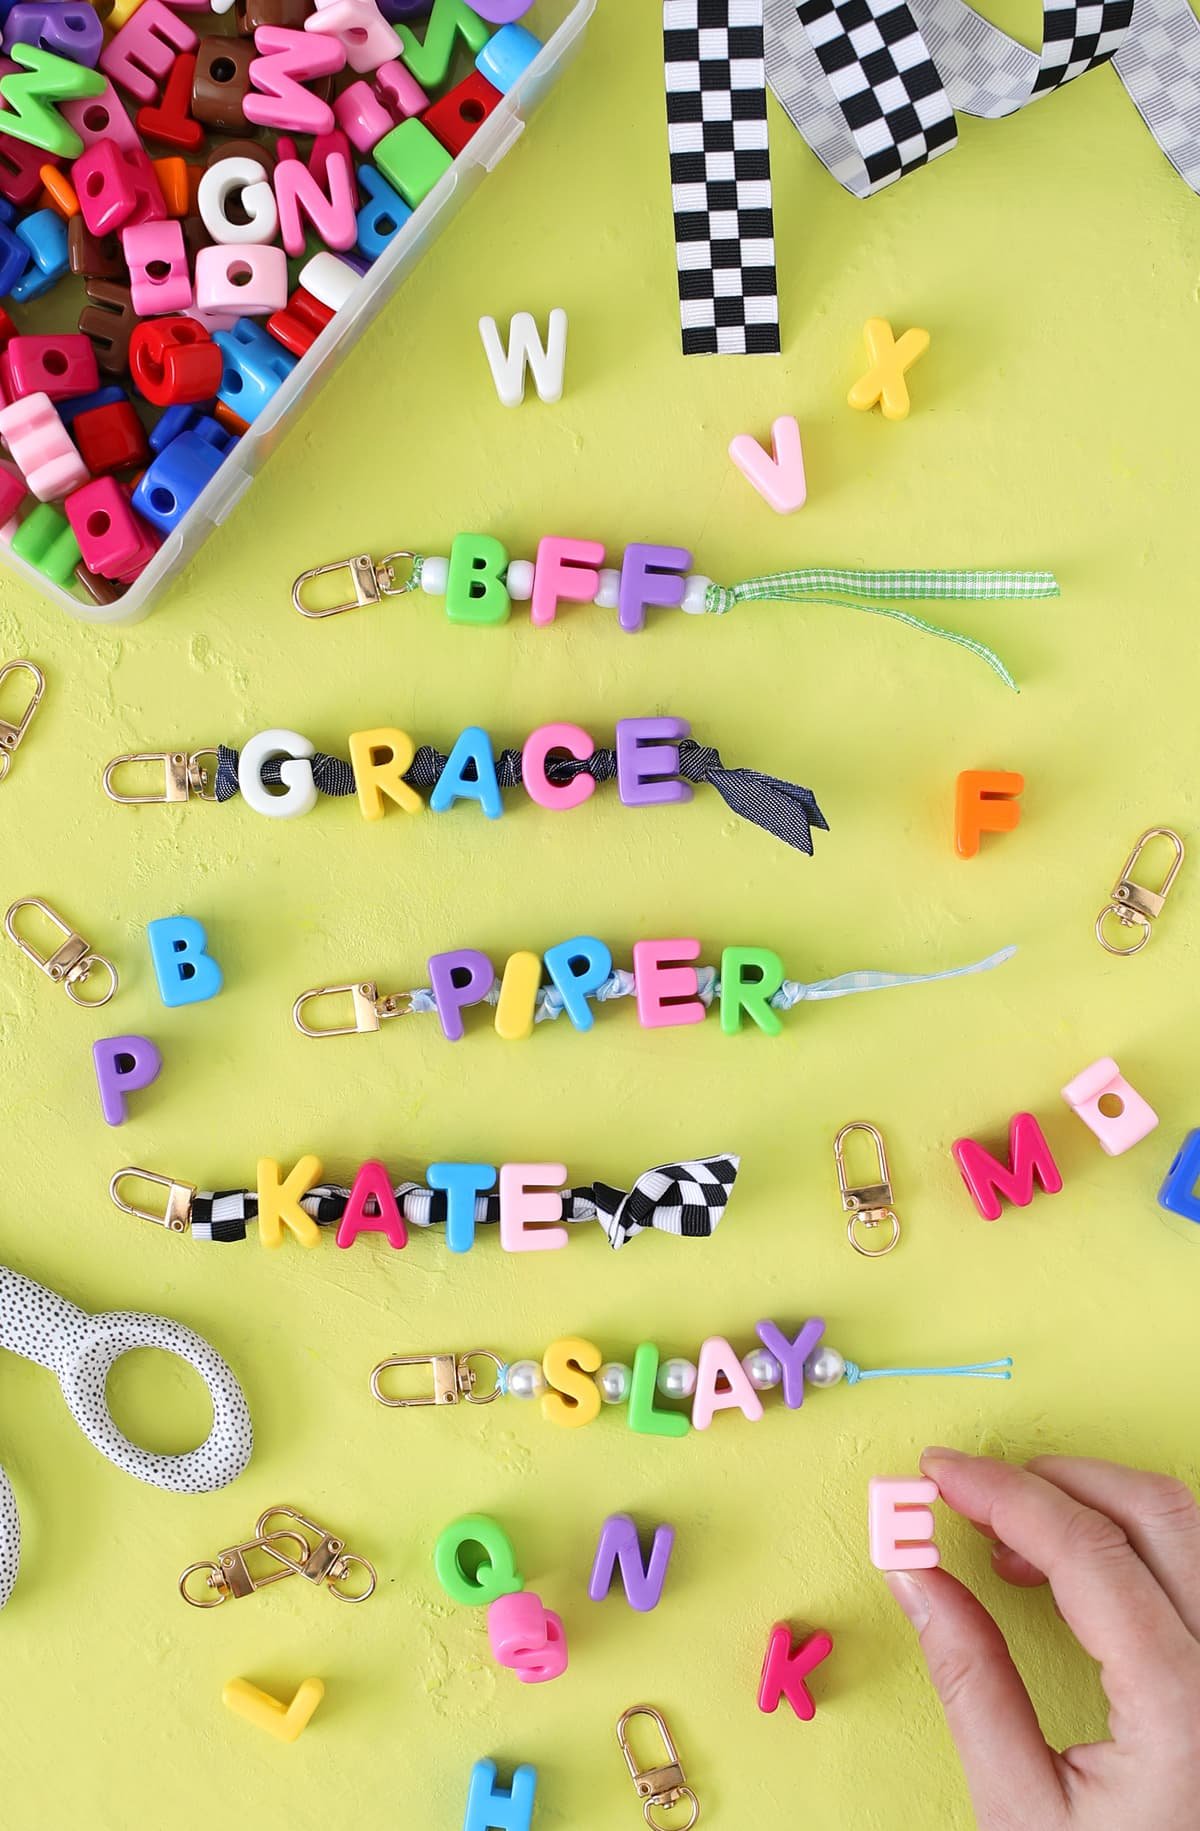
Learn how to make beautiful, custom bag charms using large and colorful acrylic letter beads.

Hey friends! I have a super quick and easy craft tutorial to share with you today. We are going to make the cutest bag ornaments using fun and colorful bubble letter beads.
This is an easy craft that you can make in 30 minutes and only requires a few supplies. Let me walk you through each step so you feel confident and ready to get crafty.
Here’s what you’ll need:

Materials needed
- Chunky Alphabet Letter Beads (or This is on Amazon)
- Lobster Claw Clasps
- Ribbon (see note below)
- extra beads, Optional (Anything with large holes will work, but I recommend pony beads)
- lighter
- Scissors
A note about ribbons: I tried using several different widths of ribbon and got them all to work, but the thinner 3/8″ and 5/8″ widths were definitely easier to get through the bead holes. I also used waxed cord and it worked well, but you have to finish the ends with small beads so that the knot at the end is big enough to hold all the beads in place. But they all work, so I say use whatever ribbon you like!
Instructions
Step 1: Cut a 12-18 inch piece of ribbon. If you choose to add knots between the beads you will need a longer piece. You will also need a piece that is as long as the width of the ribbon. It is better to keep the excess and cut off a little at the end than to cut the ribbon too short because then it is difficult to tie knots at the end.
Step 2: Fold the ribbon in half, then slide the end of the loop through the lobster clasp. Slip the two tail ends of the ribbon through the loop and pull tight, keeping the ends of the ribbon even.

Step 3: Slide the letter beads of your choice onto the ribbon. You can add spacer beads between each letter or tie a ribbon knot between each letter or place the letters all together without spacers. Anything goes! It’s fun to experiment with different variations.

Step 4: Once you like the way you place your beads, tie a knot after the last bead to hold them all in place. You may need to tie a double knot to make sure the beads don’t fall off. Cut off any excess length of ribbon, then use a lighter to melt the ends of the ribbon so they don’t fray. You don’t actually touch the ribbon to the fire—just get the heat close enough to melt the edges a bit.

Then your cute DIY bag charm is done! Give a friend or clip on your favorite tot and enjoy.

If you like this craft, check out my tutorials Beaded Bow Keychains And Beaded Heart Charms.
DIY Chunky Letter Bead Bag Charms Video


