Ever wondered how to make a butterfly wreath? You can make this butterfly wreath in under an hour. See step by step here.

// A group of butterflies //
If I gave you this set of butterflies and asked you to make a project.
what will you make
what will you make
I saw this set of butterflies and knew I had the perfect project for them. The best thing about them? They have a little clip on the back which makes them perfect for the craft plans I have.
So I ordered them.
They arrived home and I unpacked them and started down the path to the craft project I envisioned.
And then?
hey
It wasn’t cute at all. The most uncute of uncute. So I pivot. I re-imagined the project.
And now you won’t believe it.
If I gave you 10,000 guesses, you would never believe what these butterflies look like now.
Because I made this.

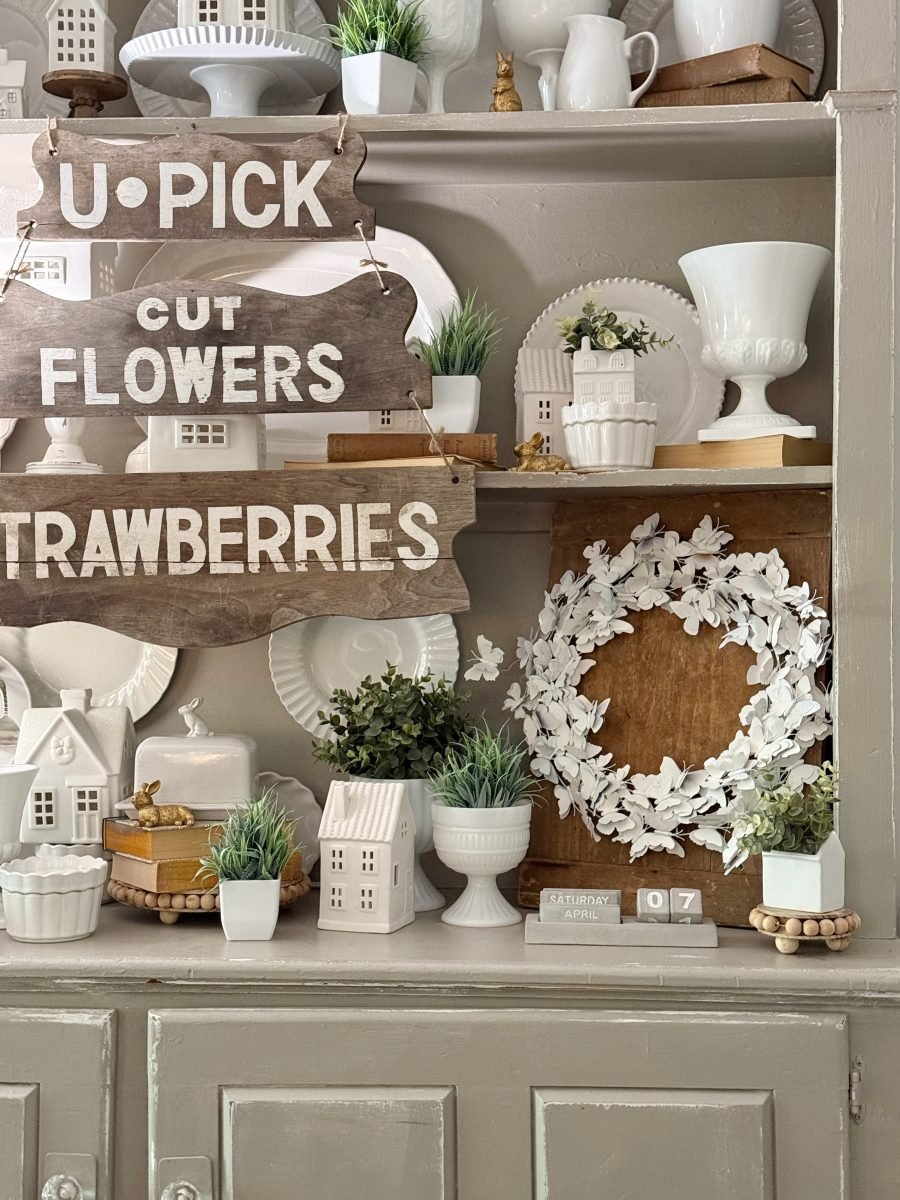
A butterfly wreath that looks like art.
And the best part?
I thought of little butterflies flying out of the nest.
Can you see them?
There are three butterflies flying.
Oh wait. I actually forgot the best part. It only took me about an hour to make the garland. And if you didn’t spray paint the butterfly? If you have just made a wreath with butterflies in their wonderful, beautiful, colorful natural state. You can make a garland in 20 minutes.
Want to make one?
Here’s how to make a butterfly wreath.

// A group of butterflies //
How to make a butterfly garland
Supplies:
A bunch of butterflies (I used two packs)

// A group of butterflies //

// A group of butterflies //
1. Order the butterfly
Let’s unpack the butterflies for a moment because they are at the heart of the project.
They come in sets of 50 and are made of plastic. They are actually 3-D and the second set of wings fold to give them the appearance of actually flying.
3/4 of them have clips and the other 1/4 have this safety pin on the back (that just pops off).
I used two sets of them in the project and please note – if you don’t want them all white, you can always make this project and skip the spray paint step.
you Butterflies can be seen here.

// garland form //
2. Prepare the garland form
Here are the wreath forms I used for this project.
They measure 14″ and come in sets of two.
The wreath form was spray-painted white to blend in with the butterflies.
you You can see the garland form.

// garland form //
3. Clip on the butterfly
Spray paint butterflies. Be sure to lift the wings so you can spray paint underneath so the butterfly is completely white.
Total here.
You might be wondering why you didn’t just buy white butterflies?
right?
It would be amazing if I could find them. The only ones I could find either didn’t clip or looked lacy or didn’t come in different sizes or were more expensive.
So spray painting them was the best option.
Also make sure you use flat spray paint with several light coats.
Let them dry and start cutting them onto wire beads.

// garland form //
Continue cutting out the butterflies until you have completely covered the wreath.
It’s easier if you start spacing it around the bead like this.
Then clip another round and another round.

4. Glue the butterfly
Now you have a bunch of butterflies that don’t clip.
So you want to hot glue them.
I used white hot glue sticks, so the glue just blended into the butterfly.
Continue gluing the butterfly until you have filled all the holes.

5. Make a flying butterfly
Take a piece of fine gauge wire and twist it around the bead.
Add a drop of hot glue to hold it in place.
Then?
Open the butterfly clip, add another drop of hot glue and clip it in place.
Twist the wire around to make the butterfly appear to be flying.
Repeat this step with several other butterflies around the wreath.


That’s it.
A craft that started as a colossal failure turned into something I never imagined.
It now looks like a piece of art.
My hutch is flying in the spring.
Just like this butterfly.
PS A bird has built a nest on our back porch and laid eggs. We’ve been watching her all weekend. She is the best bird mama.
PPS you can See the complete supply list for making this craft here.

Disclosure: This post uses affiliates.
Want to learn how to decorate your home for free?
Click here to get my five best secrets.