Physical Address
304 North Cardinal St.
Dorchester Center, MA 02124
Physical Address
304 North Cardinal St.
Dorchester Center, MA 02124

If you’ve been collecting sea glass on beach walks or have a little stash hidden in a jar, this is an easy way to turn it into something beautiful and meaningful. Instead of storing those little pieces of sea glass somewhere, you can easily create DIY art that feels personal and beautifully handcrafted.

I love how budget friendly this craft is. You only need a few basic supplies and you can customize the design to match your home decor style. I’ll walk you through the steps and share some creative ideas to make your sea glass artwork truly unique.
To be honest, I tend to skip the small pieces of sea glass and focus on the larger, more impressive beach glass. While my kids collect pieces no matter the size. If it weren’t for them, I wouldn’t have the little pieces that make this particular DIY sea glass art so cute!
Join our crafting community to find more nature-inspired DIY and recycled craft ideas. It feels good to repurpose, repurpose and create with nature!

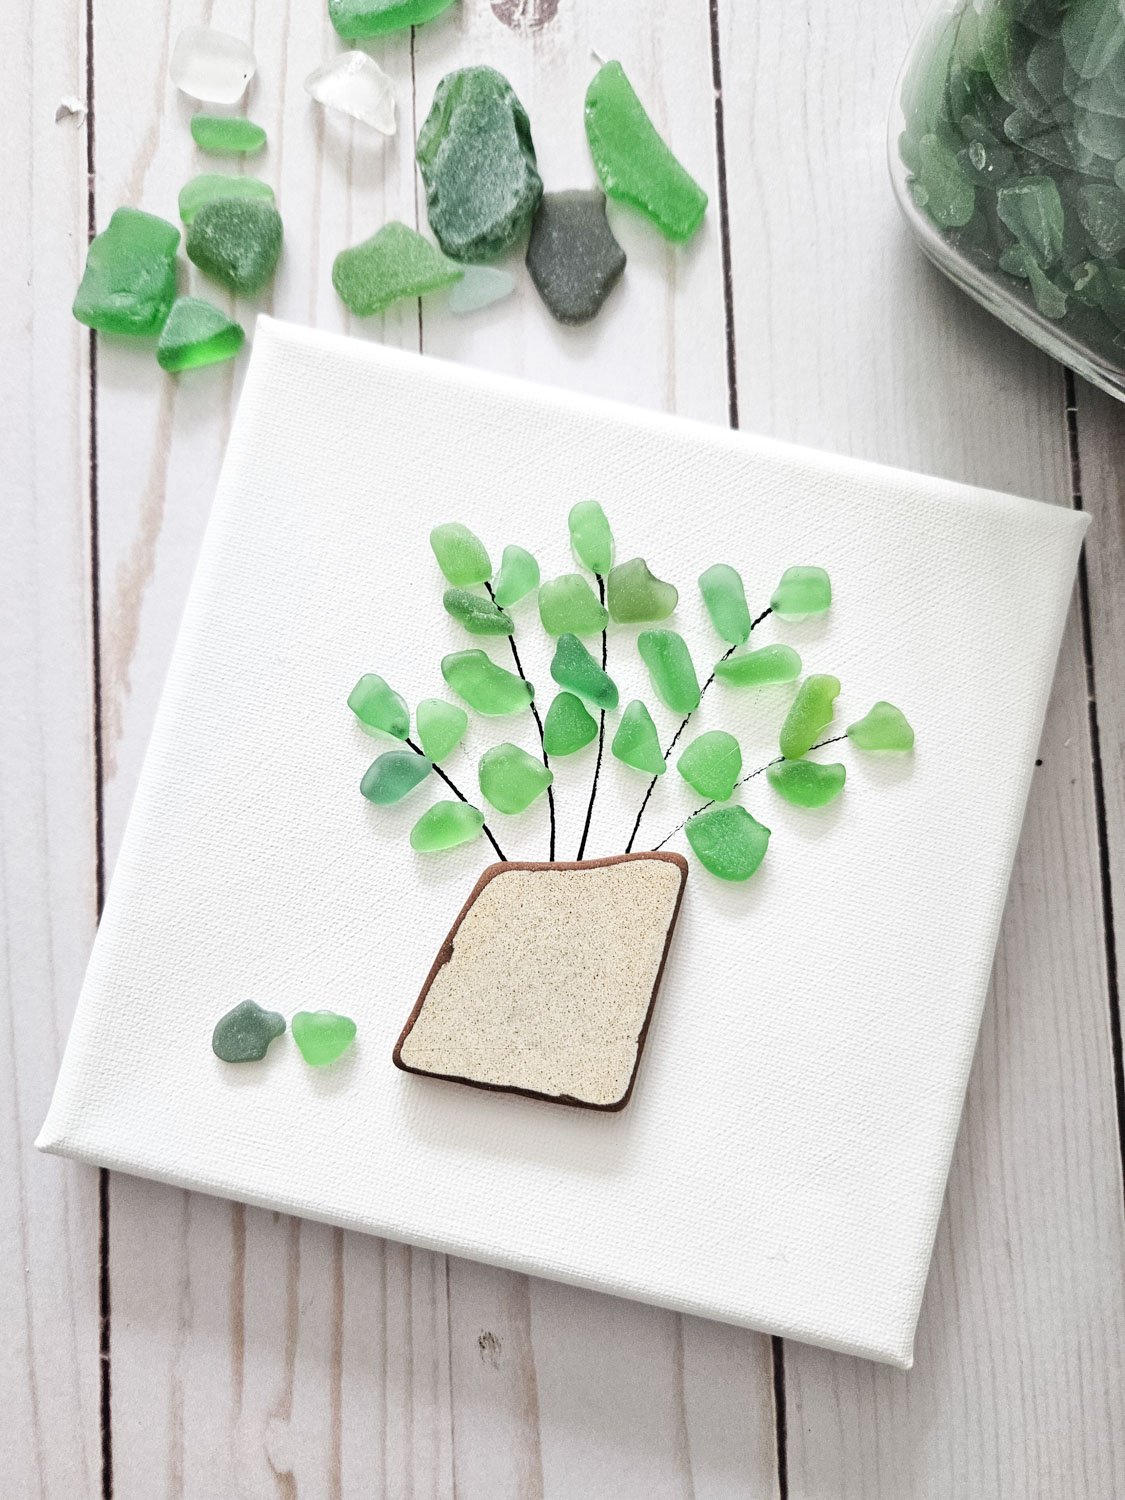
Paint the surface of the canvas white. Leave to dry.

Form the design directly onto the canvas. In our case, we wanted to create an image of a small houseplant, so we positioned the ceramic piece for the vase in the bottom half of the canvas. Leaving plenty of room for the stems and pieces of beach glass on top.
With the fine point pen, draw lines on the canvas for the stems coming out of the ceramic piece.

Then use a hot glue gun to glue the vase part to the canvas.

Next, add glue to the back of the smaller piece of green beach glass and press it down onto the canvas.

Continue until you are satisfied with the appearance of the art.

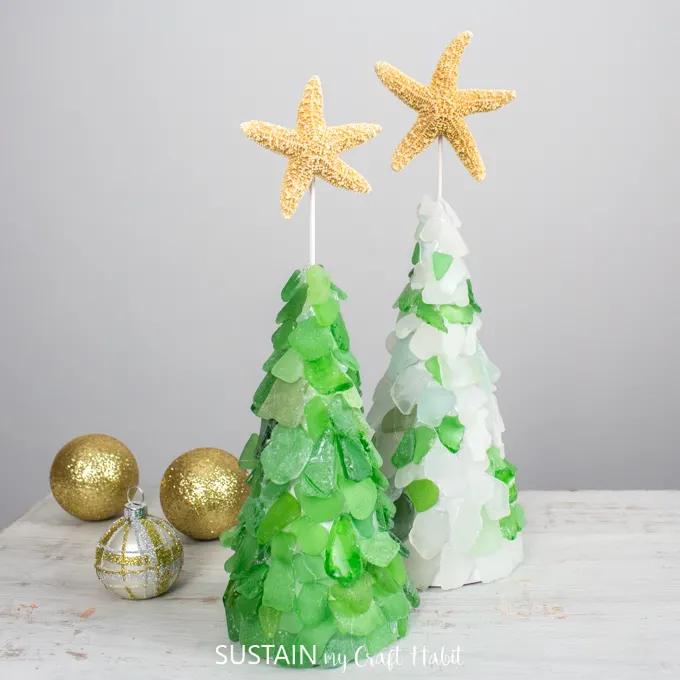
One of my favorite approaches is creating simple silhouettes. Arrange pieces of sea glass into shapes such as hearts, sailboats, birds or small seaside cottages. First sketch your outline lightly with a pencil to give you a guide.
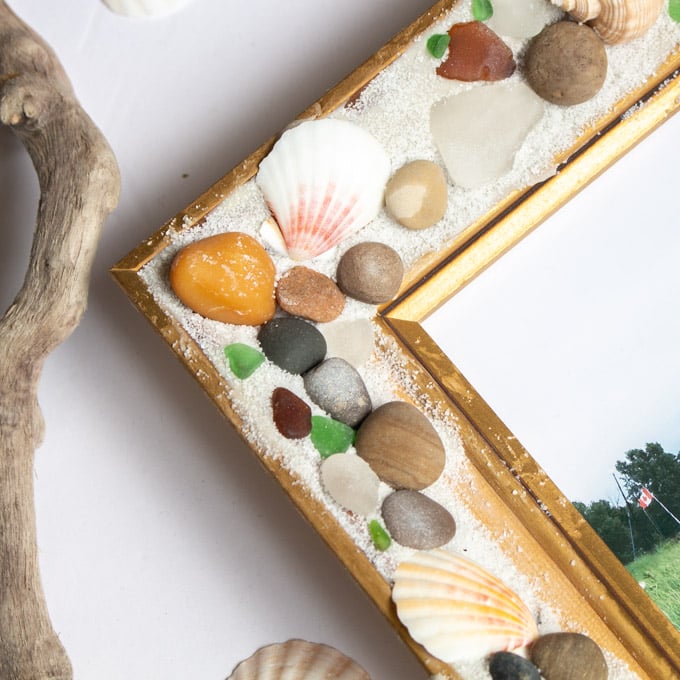
The shadow box frame is perfect for thicker pieces of sea glass. Adds depth and protects your design. For a softer look, use white cardstock or linen-textured cardstock as the background.
If your style is more rustic, try a distressed wood frame. For a clean coastal vibe, stick to white, light oak or soft gray tones.
Use a strong clear drying glue suitable for glass. Craft glue is often not strong enough for heavier pieces. Allow the glue to fully cure before moving the frame.

DIY sea glass art works beautifully as a coastal home decor idea in a hallway, bathroom or bedroom. Hang it near natural light to highlight the frosted texture of the glass.
For a more effective look, frame your framed artwork on a shelf alongside wood, seashells, or a small glass vase filled with additional pieces of sea glass.
We have lots of other sea glass ideas to make at home! Check out these posts for inspiration:


Stay informed about our latest crafts, special offers and freebies from joining our mailing list.
Do you like it? Pin for later!


Instead of storing those pieces of sea glass somewhere, you can easily create DIY art that feels personal and beautifully handcrafted.
Paint the surface of the canvas white. Leave to dry.
Form the design directly onto the canvas. Leaving plenty of room for the stems and pieces of beach glass on top.
With the fine point pen, draw lines on the canvas for the stems coming out of the ceramic piece.
Then use a hot glue gun to glue the vase part to the canvas.
Add glue to the back of the smaller piece of green beach glass and press it down onto the canvas. Continue until you are satisfied with the appearance of the art.


