
Most office bins are either plain plastic or overpriced metal. But if you’re curating a home office, every detail matters—even the wastebasket.
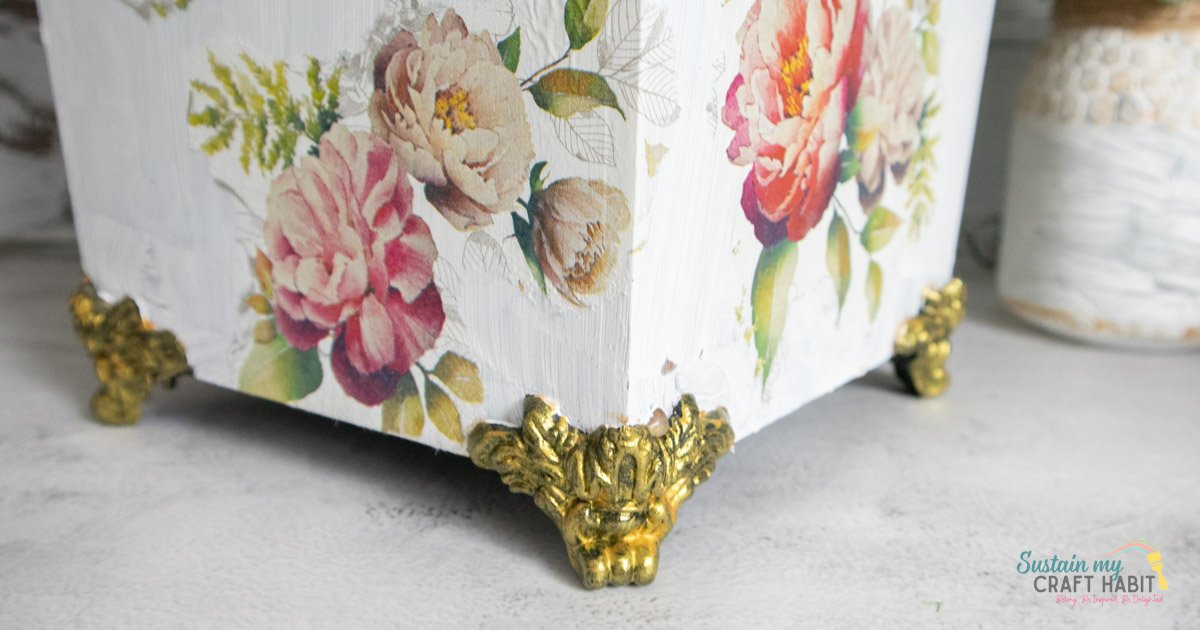
In this project, we’re taking a dated, ‘hard’ wooden thrift store and giving it a sophisticated makeover using decoupage. By combining the durability of wood with the delicate beauty of vintage floral paper and gold accents, we’ve created a piece that looks like it came not from the clearance aisle, but from a high-end antique shop.

This step-by-step guide shows you how to achieve a professional, vintage-inspired finish for a fraction of the designer price.
So if you need home office decor on a budget, this upcycled waste basket idea might inspire you to make a trip to the thrift store.
With a few simple supplies and a little creativity, you’ll transform a basic waste basket into custom decor that perfectly matches your room.
Let’s get started!
Why you’ll love this high-end furniture flip
- Uses simple, inexpensive materials that you may already have at home or can easily find at a second-hand store
- A complete step-by-step tutorial that is suitable for beginners
- A brilliant eco-friendly craft idea that reduces the need for plastic storage solutions
- Fully customizable with different decoupage papers and paint finishes
Decoupage is one of those crafts that seems almost magical. A few layers of paper and glue can completely change the look of an everyday object.
Join our crafting community To find more DIY and upcycled craft ideas. It feels good to reuse and upcycle!
Materials needed
- Wood waste basket (we upcycled one from a thrift store)
- Paintbrush
- Mod Podge in matte
- Paper napkins with vintage floral patterns
- paper scissors
- Chalk paint in white
- Antique gold metallic paint

How to upcycle a waste basket with decoupage
Brush the surface of the waste basket in white chalky matte paint and leave it to dry completely. Add an additional coat of paint if necessary for better coverage.
We love the versatility and durability of using natural wood pieces over the plastic option.

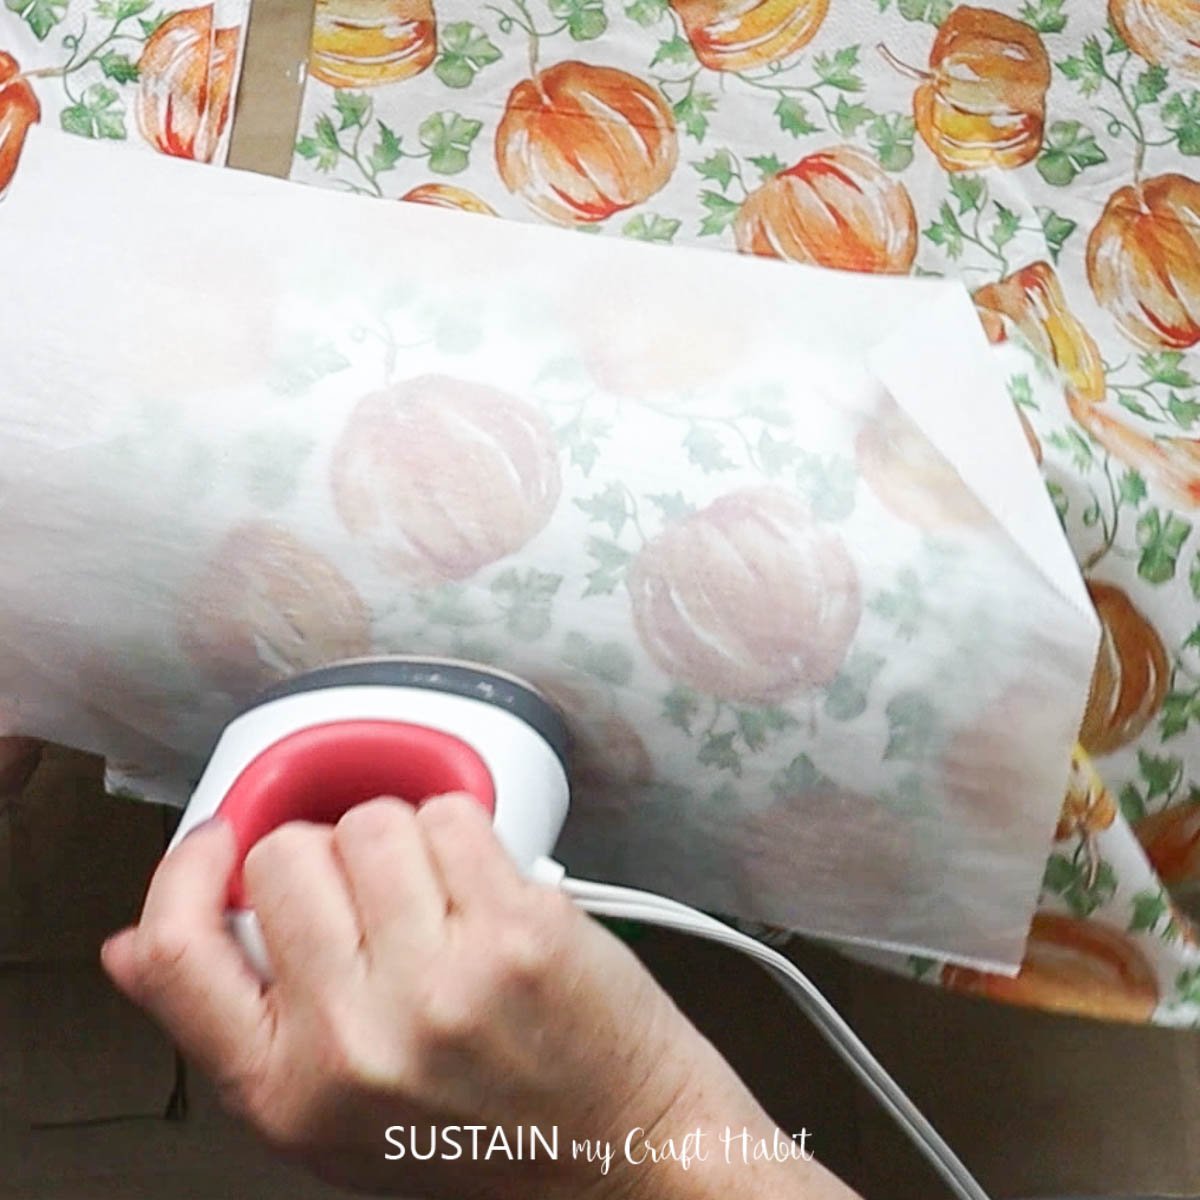
Separate the paper napkins please, you will only need the top printed layer of paper.
Cut out a portion of the napkin design that you want to add to the waste basket.
Apply a coat of Mod Podge to the waste basket and press the prepared napkin on top.


Smooth out the paper and gently press any bubbles down. Check out our tips and techniques on how to Decoupage without any wrinkles.


Apply another coat of Mod Podge to the top of the waste basket to seal the surface. Leave it to dry.
And finally, for an added look of luxury, paint the legs in antique gold metallic paint.

Design secret: choosing the right paper
- Floral patterns create a soft vintage look that works beautifully in a A home office, bedroom or even a craft room.
- Try black and white scrapbook paper for a sleek look Home Office Decorations The idea but remember that geometric prints work well on straight-sided bins and curved-edged pieces.
- Use comic book pages, colorful wrapping paper, or printed coloring pages when working on the pieces. For a child’s bedroom.
Upcycling Furniture with Decoupage Pro Tips
Avoid wrinkles and bubbles
Use thin layers of glue and work in small sections. Smooth gently from the center outwards and if you are new to this technique, check out our tutorial How to decoupage napkins without wrinkles.
Working with curved bins
For round or tapered cans, small pieces of paper help wrap the design easily without creasing or tearing the paper.
How to style your upcycled waste basket
Pair your decoupage bin with matching desk accessories for a cohesive workspace: like a desk lamp or photo frames with antique gold accents and vintage flower notebooks and wall art. It instantly makes the area feel more stylistic than functional.
This project is a great example of how to achieve a designer look with a thrift store without spending a fortune.
A simple upcycled waste basket DIY can create the perfect aesthetic home office storage solution you need. If you try this project, take a photo and share it — and don’t forget to pin it for inspiration later!
More DIY home office refresh ideas


Want tons of inspiration and money-saving ideas for decorating, gifting, and crafting? join up here!
like? Pin it for later!

Upcycled waste basket with decoupage
Learn how to transform a basic thrift store wooden waste basket into a stunning, high-end piece of home decor using simple decoupage techniques.
- Wood waste basket Thrifty
- Paintbrush
- Mod Podge In Matt
- Paper napkins
- paper scissors
- Chalk paint in white
-
Paint the surface of the waste basket white and let the paint dry completely.
-
Separate the paper napkins please, you will only need the top printed layer of paper.
-
Cut out a portion of the napkin design that you want to add to the waste basket.
-
Apply a coat of Mod Podge to the waste basket and press the prepared napkin on top.
-
Smooth out the paper and gently press any bubbles down.
-
Apply another coat of Mod Podge to the top of the waste basket to seal the surface. Leave it to dry.


