


Steps to grow your own mushrooms
Step 1: Add the spores to the growing medium.
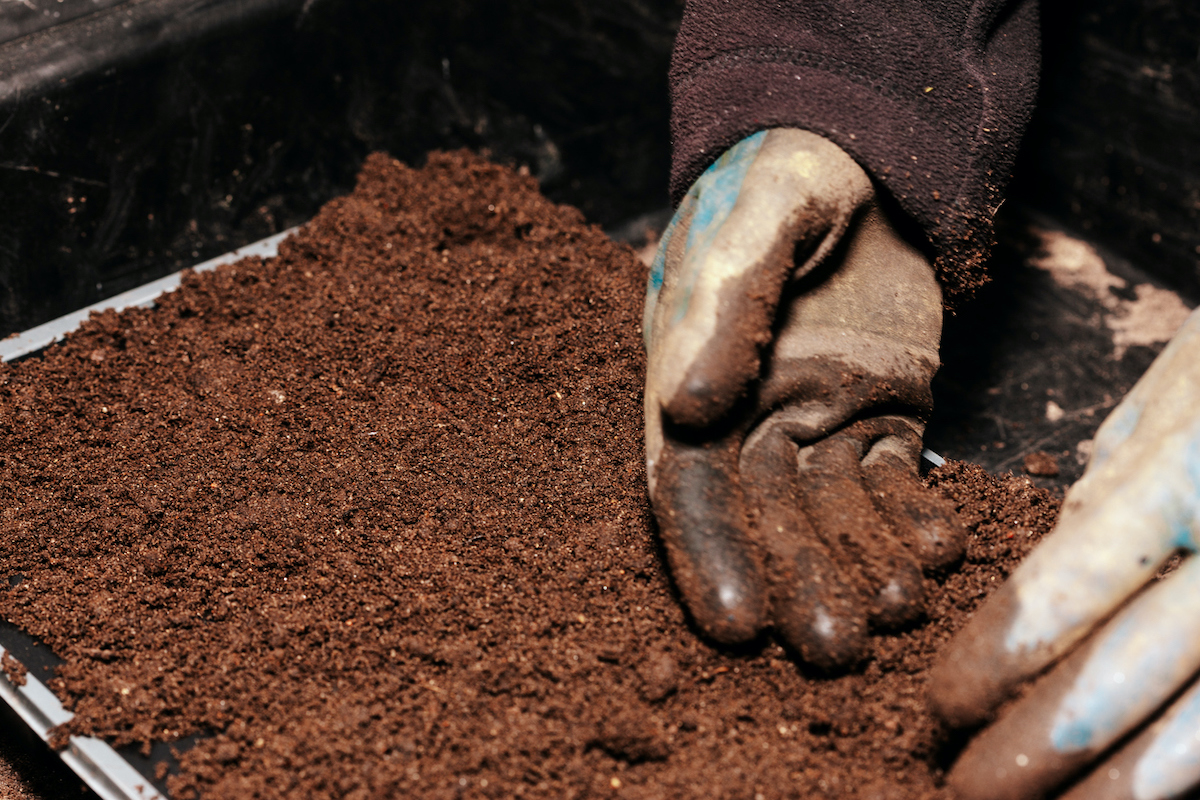
The first step is to set up the substrate or growing medium. To do this, start with a planting tray measuring approximately 14 by 16 inches with a 6-inch depth. Trays can be made of wood, plastic or metal. Fill the tray with compost and compost mixture, leaving an inch of space at the top of the tray. After that, spread the spores on top.
For best results, try to keep conditions sterile during this step to prevent other types of mold and fungus from entering the substrate. Be sure to clean your hands thoroughly before working with the substrate, for example, and sterilize the knife and any other tools used.
Step 2: Keep the soil moist.
Mushrooms thrive in moist environments, so keep the soil moist during the growing process. Spray or mist it once or twice a day or cover it with a damp towel.
Step 3: Boil the spores.
For the first three weeks, the soil temperature must be kept at 70 degrees to promote growth. This can be done by keeping the tray in a warm area of the house or you can place the tray on a seed heating mat. Choose a heating pad with specific temperature controls and place it under the tray. Using a soil thermometer, make sure the soil temperature never rises above 70 degrees because higher temperatures can kill the spores.
Step 4: Lower the temperature to between 55 and 60 degrees Fahrenheit.
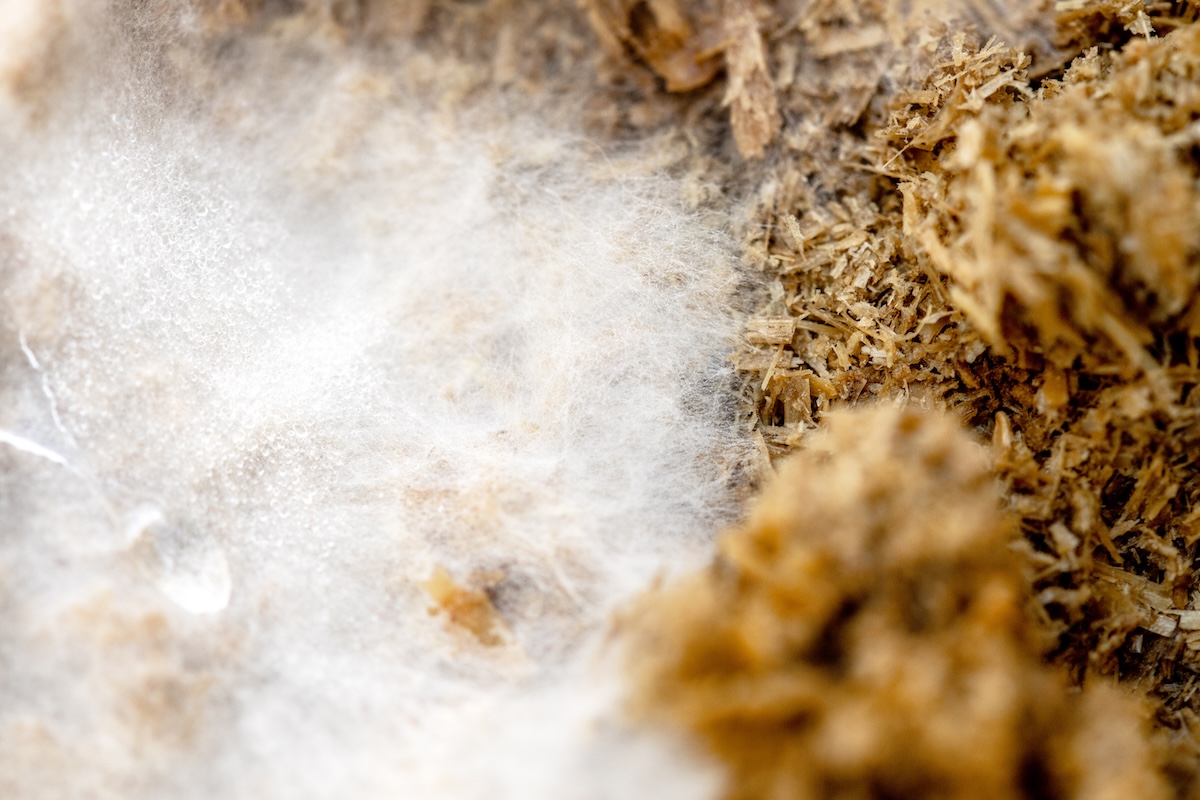
Soon white, root-like growths or mycelium will appear on top of the soil. When the entire tray is covered, it’s time to lower the temperature. While many vegetables have to be grown in the summer, growing mushrooms is a great winter project because they thrive in cooler temperatures. Lower the soil temperature to between 55 and 60 degrees (to do this, you may need to remove the heating pad from under the tray), and cover the mycelium with about an inch of potting soil.
After a few days at this temperature, tiny mushrooms called primordia will begin to sprout.
Step 5: Cut the mushrooms.
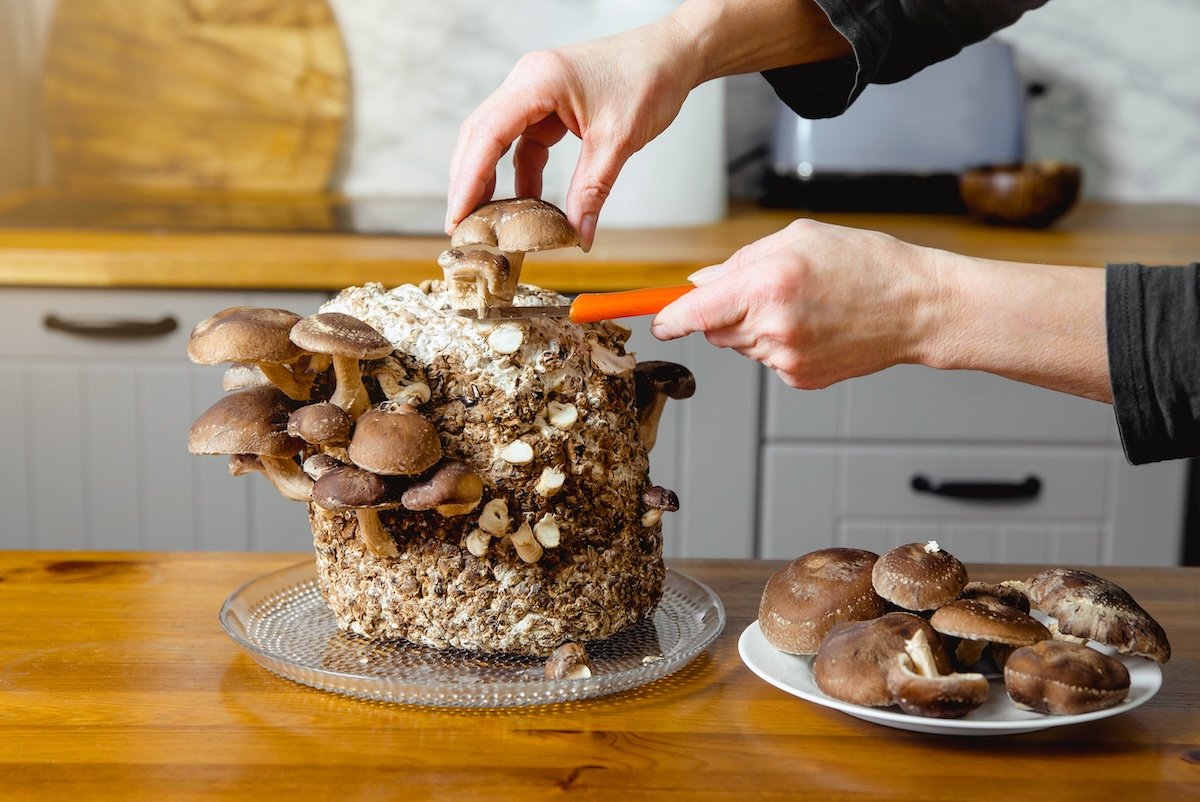
Button mushrooms should be fully grown after three or four weeks. You’ll know they’re ready to harvest when the caps fully open and separate from the stems. If they are allowed to grow long enough, they will turn brown and be classified as cremini mushrooms. In their final stages of growth, they become much larger portobello mushrooms. To harvest mushrooms, use a sharp knife to cut the stems. Do not pull the mushrooms from the soil as the surrounding growth may be damaged in the process.
If harvested daily the mushrooms will grow continuously for about 6 months as each mushroom will release its own spores. When growth stops, more mushroom spawn can be added to the existing growing station. It is important to note that fresh mushrooms do not last long after harvesting, so they should be cooked or eaten within a few days.
Use this method to easily grow delicious mushrooms for topping pizza, turning into creamy soups, or eating in salads.
Meet the tools of the year 2025



