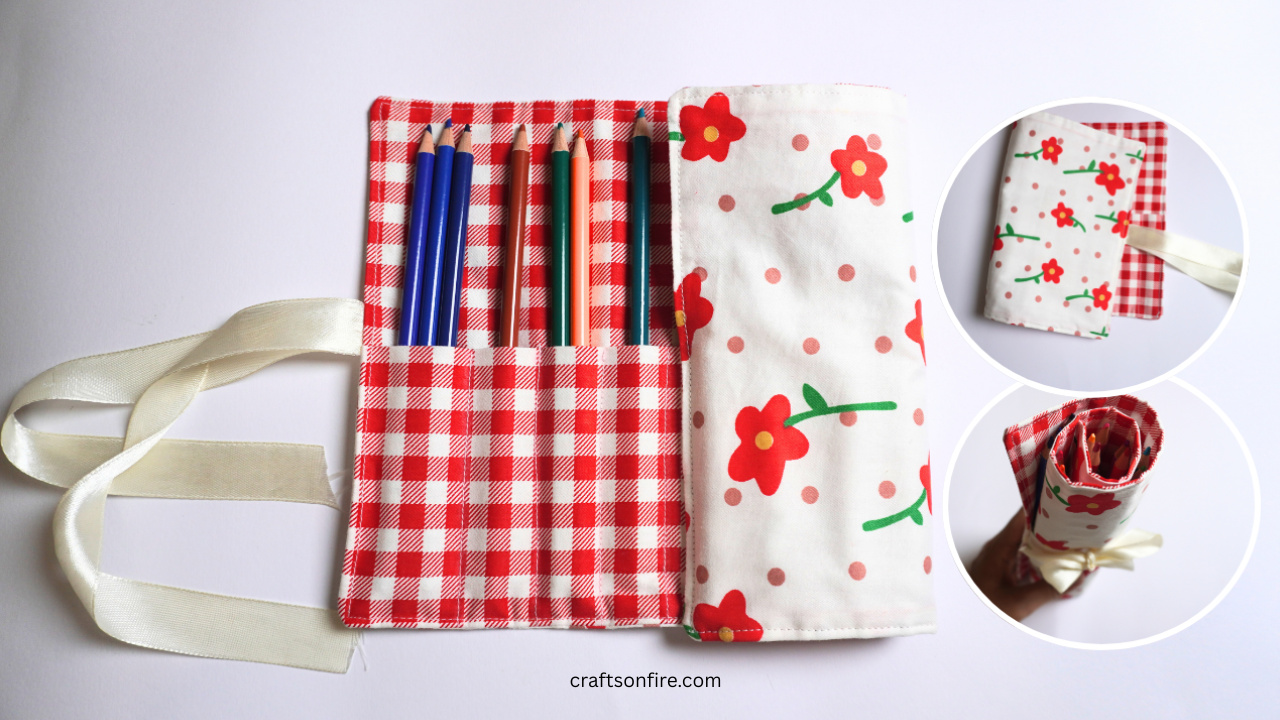
If you want to store your pens, pencils or makeup brushes neatly in one place, you will want to sew this roll-up pencil case. With its slim design and various pockets, you can easily store multiple pens/pencils in each compartment.
I really like how compact this case is. It can easily fit into any bag.
This roll-up case has 12 pockets, with the first slightly larger. However, you can change the pocket size by making it the same or bigger.

*This post may contain affiliate links. If you use any of our links we will earn a commission at no extra cost to you. Please read our advertisement for more details.
This roll-up case is also a fantastic beginner sewing project. It’s easy to sew and a quick project too!
All you need is 3 pieces of patterned fabric and the interfacing, and we can get started.
Finished Size: 31 cm x 19.5 cm (12.20 inches x 7.68 inches)
If you want high quality, Ad-free version This sewing guide with step by step instructions under each picture for better understanding, You can find a printable PDF guide here!
Roll Up Pencil Case Tutorial

Before we begin, prepare the following pieces:
supplies
- Outer fabric – 22 cm x 34 cm / 8.66″ x 13.39″ (1 piece)
- Inner fabric – 22 cm x 34 cm / 8.66″ x 13.39″ (1 piece)
- pocket piece – 22 cm x 34 cm / 8.66″ x 13.39″ (1 piece)
- Fusible interfacing/batting – 23 cm x 35 cm / 9.06″ x 13.78″ (1 piece)
- Strip/Ribbon – 28 cm / 11 inches (2 pieces)
- Sewing machine
- Scissors
- ruler
- Iron
Video tutorial
Instructions
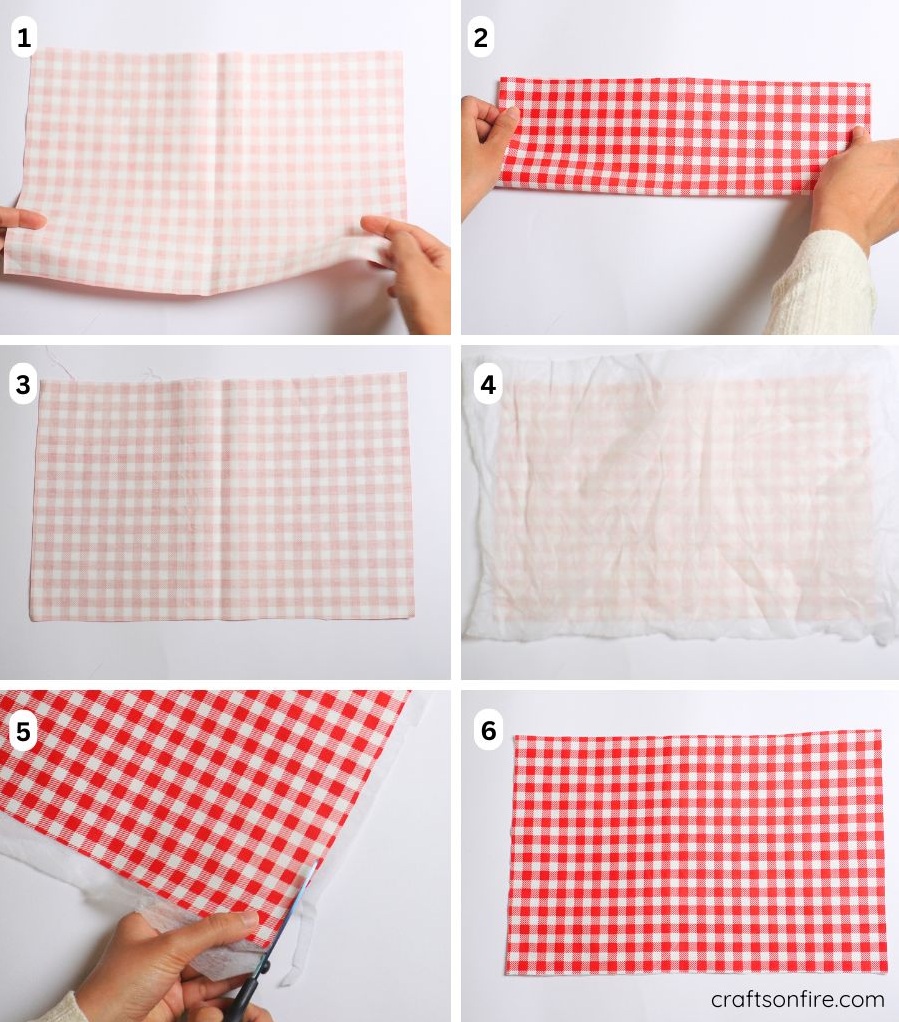
Step 01 – 02. Begin by folding a piece of pocket fabric in half with the right side up. Then, press the fabric with an iron.
Step 03 – 04. Iron the villain or interfacing of your choice onto the opposite side of the inner fabric piece.
Step 05. Remove excess valance from the edges of the inner fabric piece.
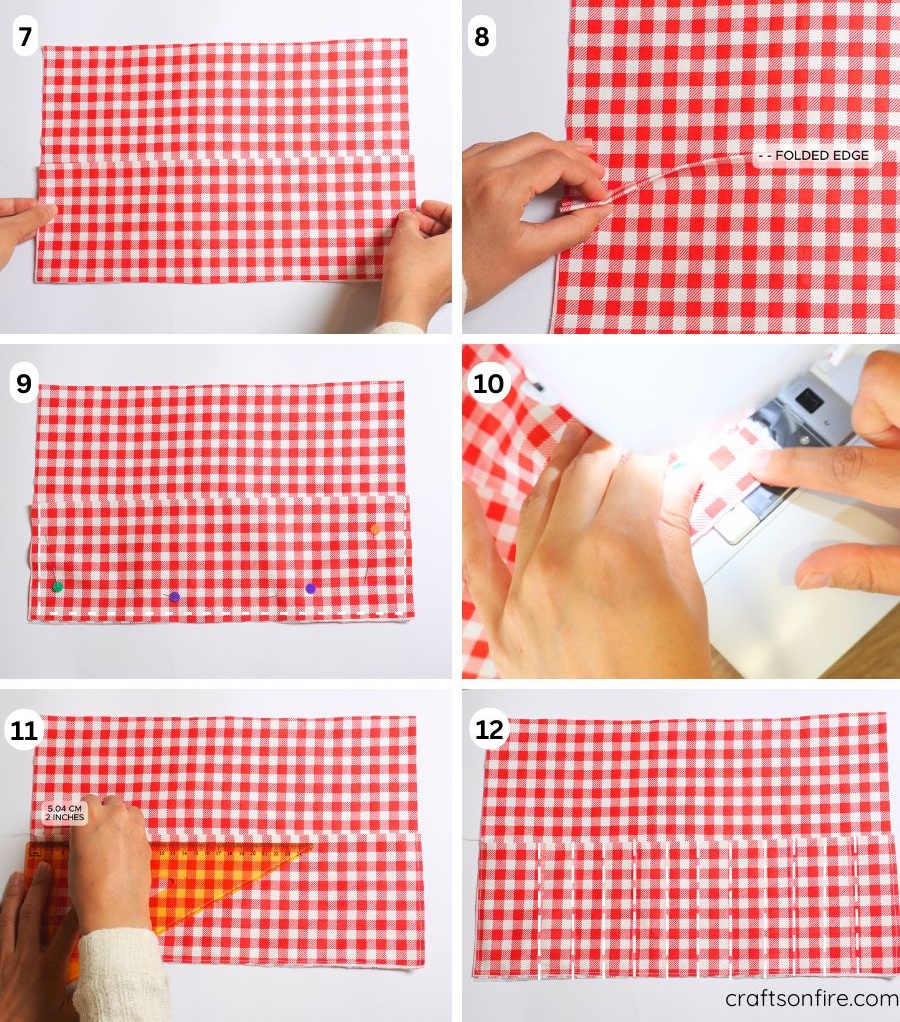
Step 07. Place the folded pocket piece on top of the inner fabric piece as shown above. Make sure the edges are aligned correctly.
Step 08. The folded edge should be at the top.
Step 09 – 10. Sew the sides and bottom of the folded pocket piece to the inside.
Step 11. To make the pocket, measure 5 cm (2 inches) and mark the point using a fabric marker or chalk.
Step 12. For the rest of the pockets, use an interval of 2.54 cm (1 inch).
Step 13. Sew along each specified line until all pockets are completed
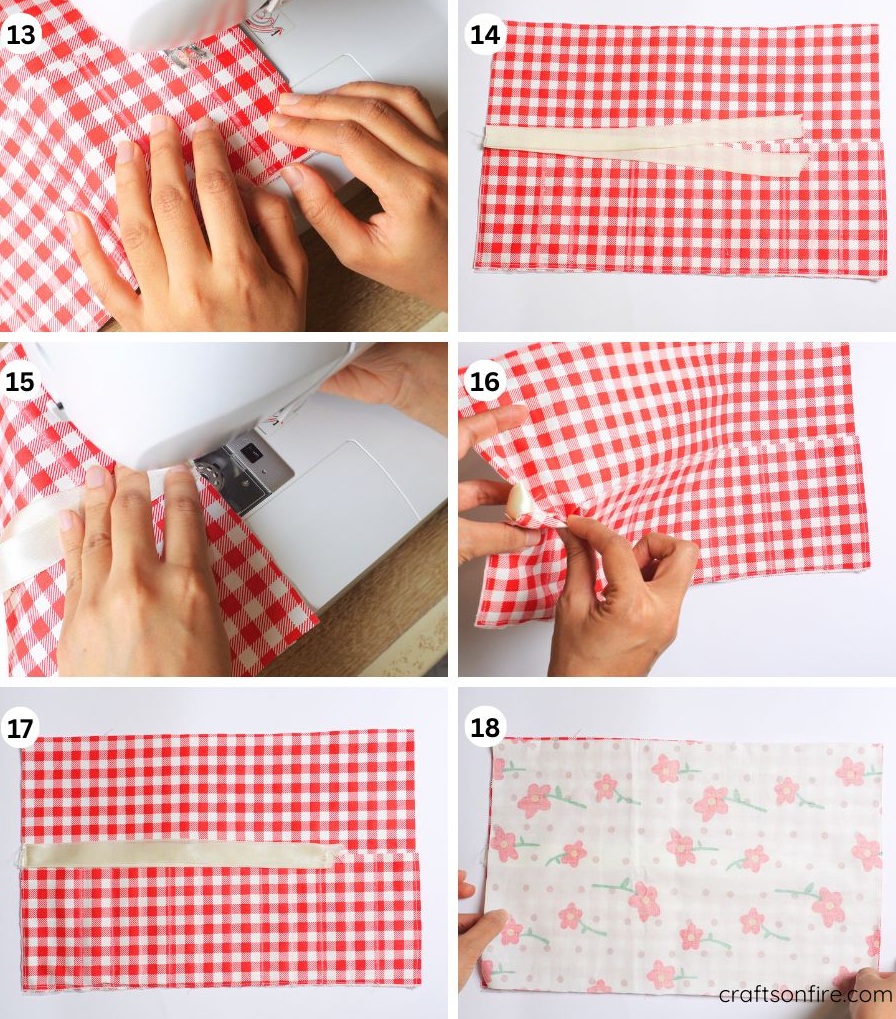
Step 14. Place your ribbon or strap piece on the left side of the inner fabric piece (right sides facing each other).
Step 15. Now sew the strap on the inside.
Step 17. Place the strap piece neatly on the inner part.
Step 18. Next, take a piece of outer fabric and place it on the underside.
Step 19. The right sides of the fabric should be facing each other.
Step 20. Stitch around the entire piece, making sure to leave a small section (about 9 cm/3.54 inches) unstitched on one side.
Step 21. Proceed to the sewing machine and stitch the fabric with a seam allowance of 1 cm (0.39 inch).
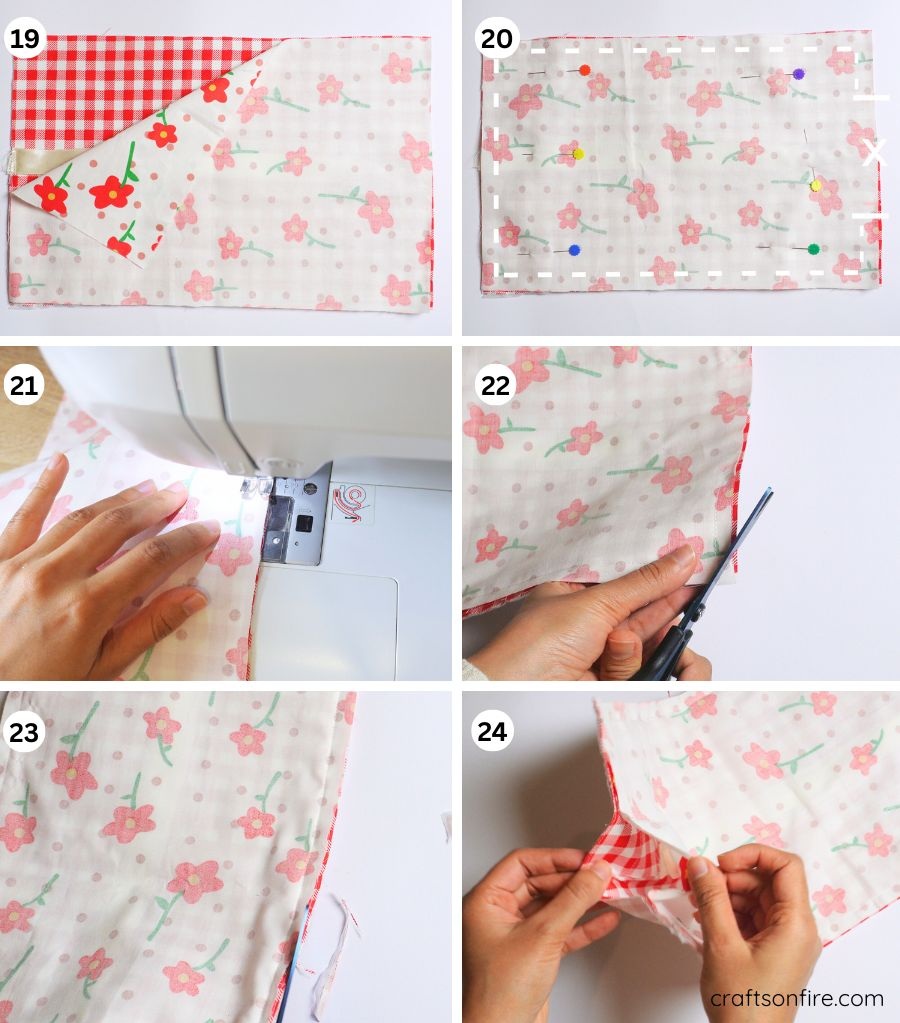
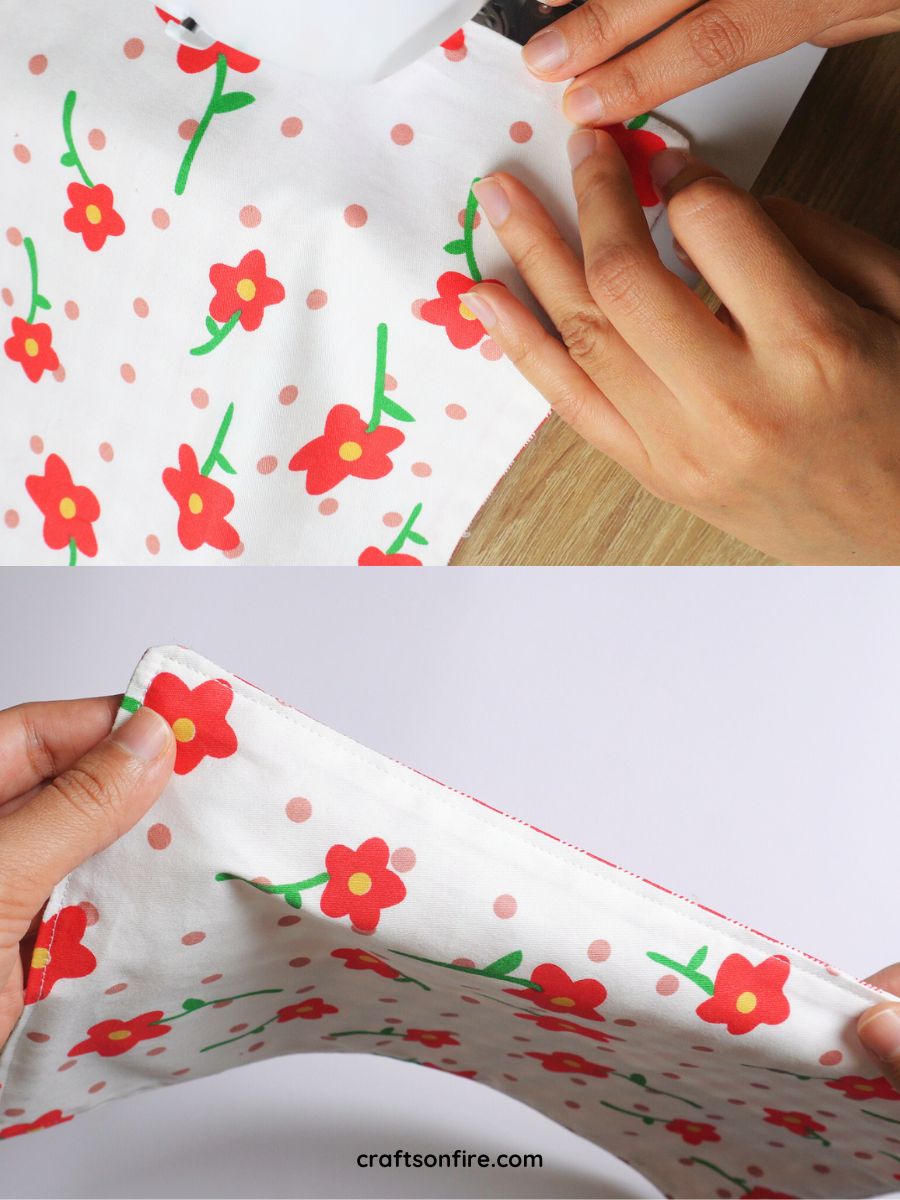
Step 22. Trim the corners.
Step 23. Clean up the sides by cutting off any excess seams.
Step 24. Find the beginning section and peel back the layers.
Step 25 – 26. Gently pull the right side of the fabric through the opening, then use your finger or a pen to carefully open each corner of the fabric.
Step 28. Fold the raw edges of the opening and secure the fold with a pin.
Step 29 – 30. Press the fabric quickly with an iron, then topstitch around the entire roll up case
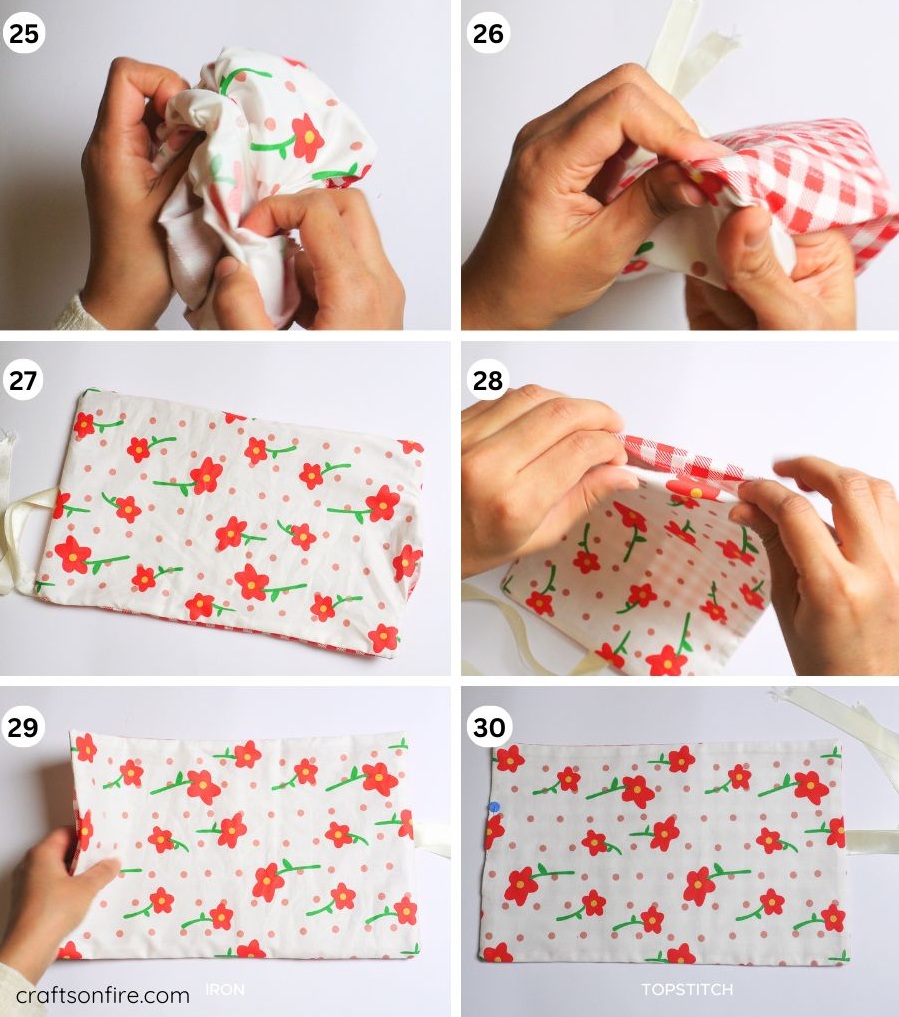
Your pencil roll up case is now complete.
Here’s what my case looks like once rolled up:

It’s so cute and I love how the ribbon ties into the bow nicely!
You can use any cotton patterned fabric for this sewing project.
If you prefer a simple design, stick with a patterned outer fabric and a solid colored inner fabric instead. I am sure she will still be as beautiful.
This project was very satisfying to make. I enjoyed every minute of it.
It’s the kind of stress-free sewing project that goes smoothly. It’s a super-easy project, which is why I love it so much.
I can’t wait to sew more of these pencil roll-up cases soon.
So, if you’re still unsure if this should be your next sewing project, here’s your permission slip to get you started!
You definitely won’t regret this.

With that said, if you want to check out some of my other sewing tutorials that are just as easy as this one, here are some you might like: