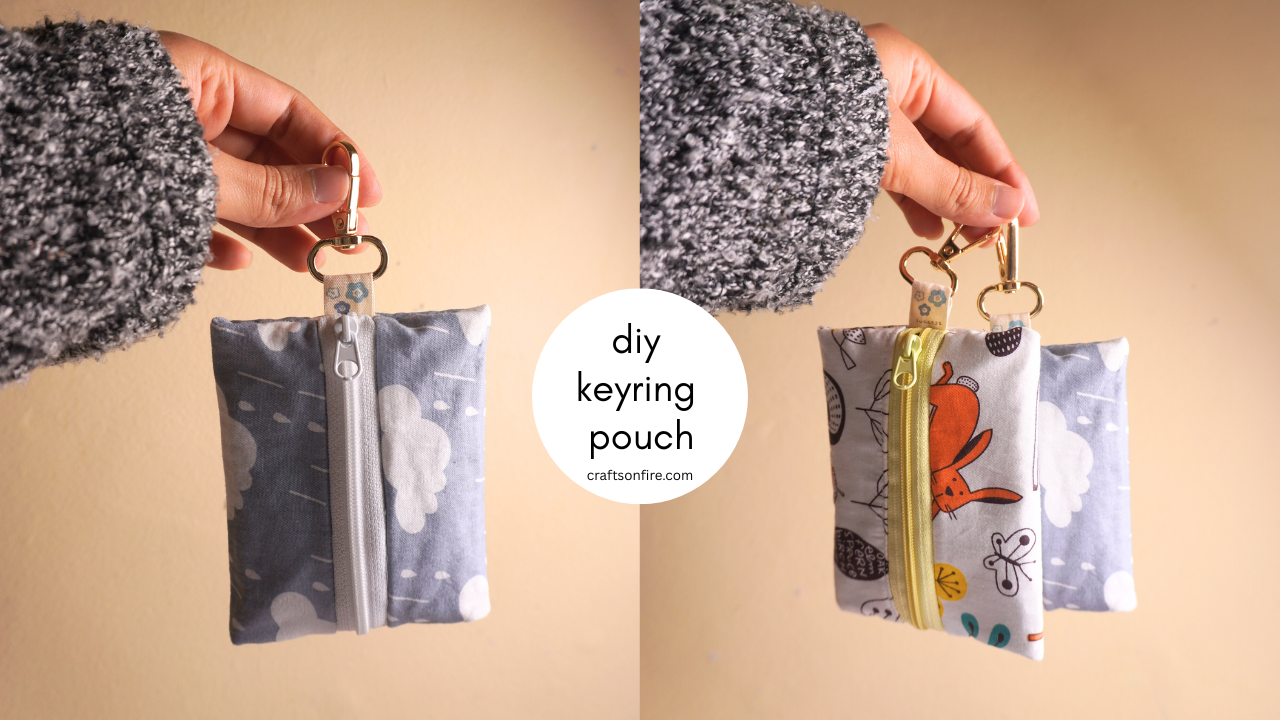
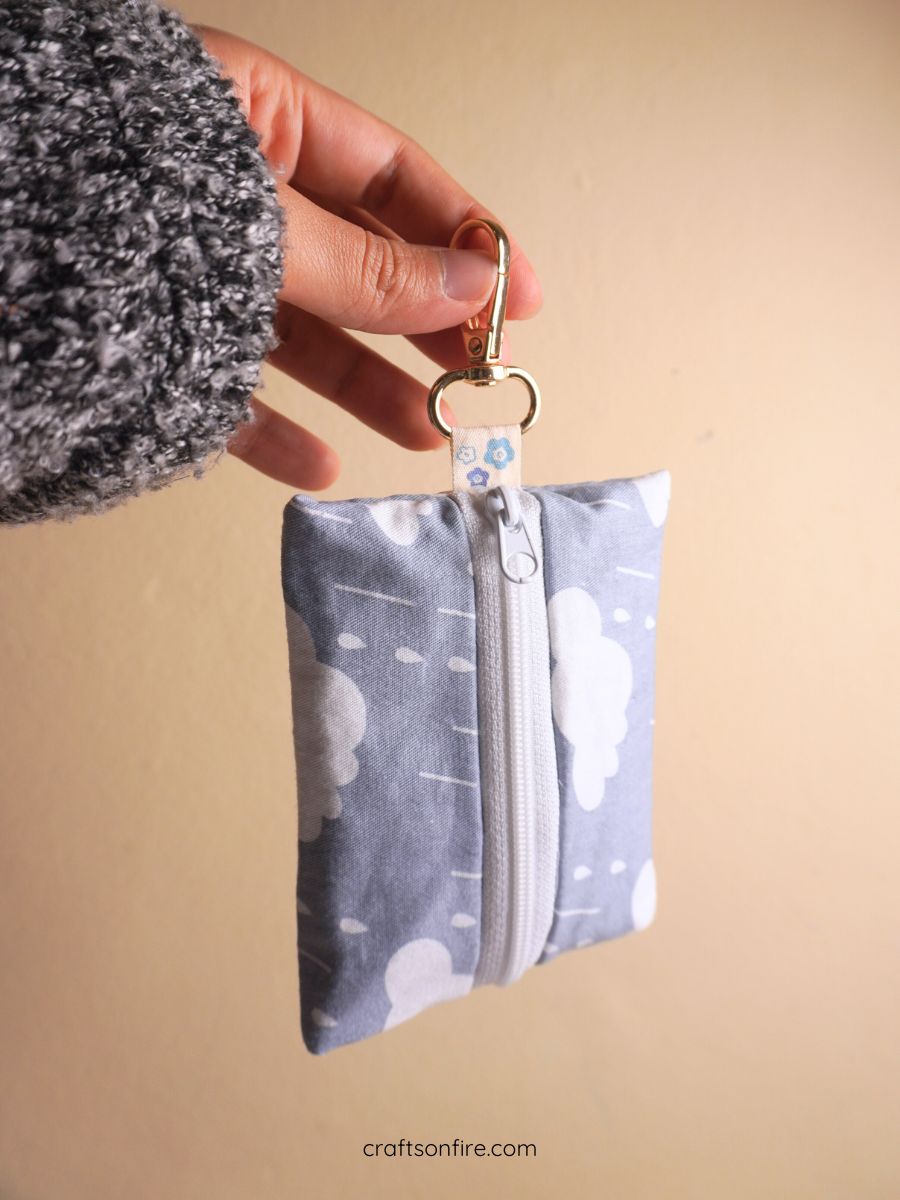
If you’re looking for a super cute item to hang on your purse or car keys, this keychain pouch is just what you need to sew right now!
This small, compact pouch is great for keeping tissues, coins, lip balms and more in one place!
It’s so easy to sew and if you follow my step-by-step tutorial, you can easily make this keychain pouch in 15 minutes or less!
This is definitely one of those quick sew projects that you’ll want to sew over and over again.

*This post may contain affiliate links. We will earn a commission at no additional cost to you if you use one of our links. Please read our disclosure for more details.
I’ll also demonstrate the French seam method, which allows you to skip the bias tape altogether. This method works so well and you will have super clean seams on the inside of the pouch.
I would also like to mention that you can make these pouches in almost any size. The method remains the same and all you have to do is simply increase the sizes of the fabric and zipper you will be using!
Finished Pouch Size: 11cm x 9cm (4.33″ x 3.54″)
If you’re excited to get started, let’s get started.
DIY keychain pouch
Consumables
- Cotton fabric – 14cm x 18cm / 5.51″ x 7.09″ (2 pieces)
- Interface – 20cm x 20cm / 7.87″ x 7.87″ (1 piece)
- Zipper – Between 15 – 20 cm /5.91″–7.87″
If you want high quality, AD-FREE version of this sewing guide with step-by-step instructions included below each photo, you can find the printable PDF guide here!
Video tutorial
Instructions
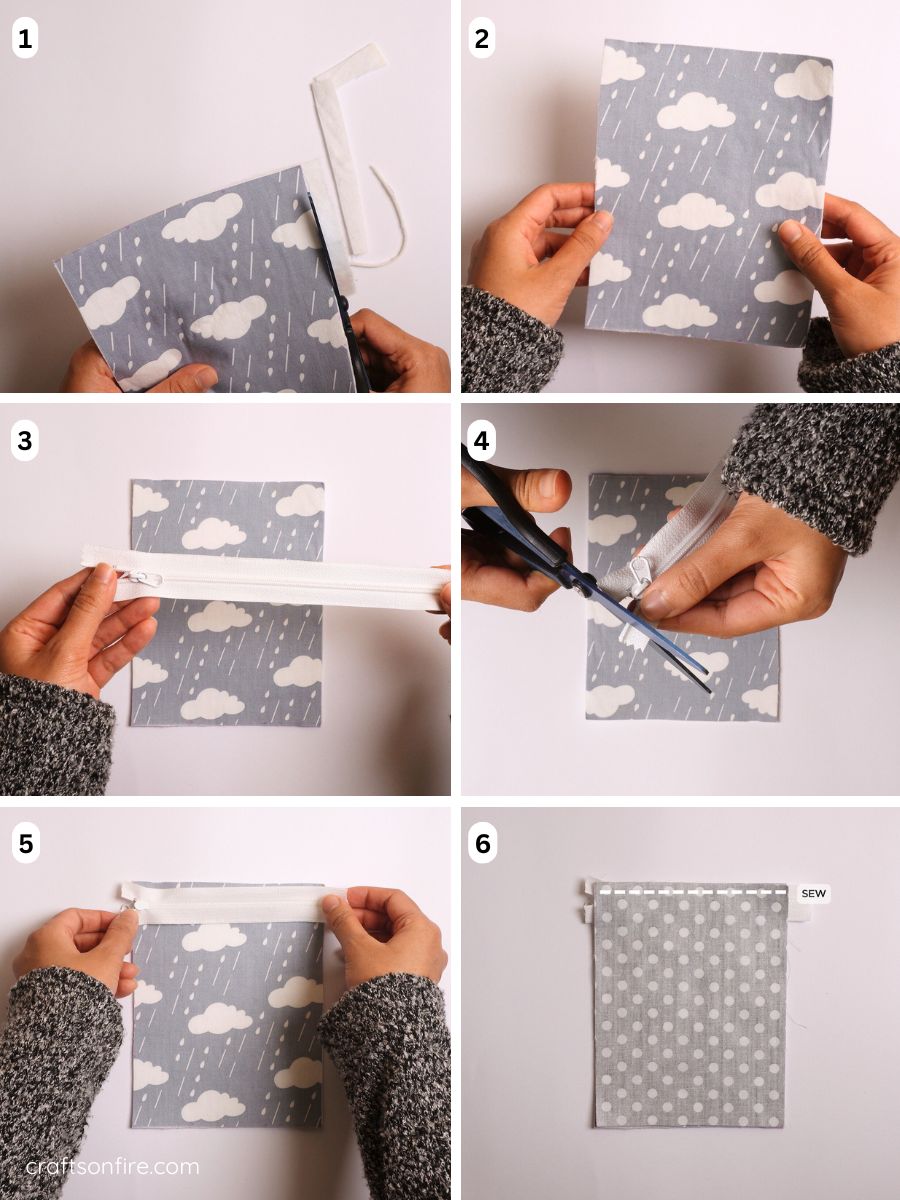
Step 01 – 02: Start by pressing the outer cotton fabric onto the fusible (or other type of bond) and then trim the excess from the edges.
Step 03 – 04: Now we will attach the zipper to the outside. Cut the ends of the zipper to match the size of the outside, but leave a little extra length at the end.
Step 05: Place the zipper right side down.
Step 06: Place the lining fabric over the zipper, right sides in. Make sure the fabric is lined up with the top edge of the zipper. Sew all 3 pieces together.
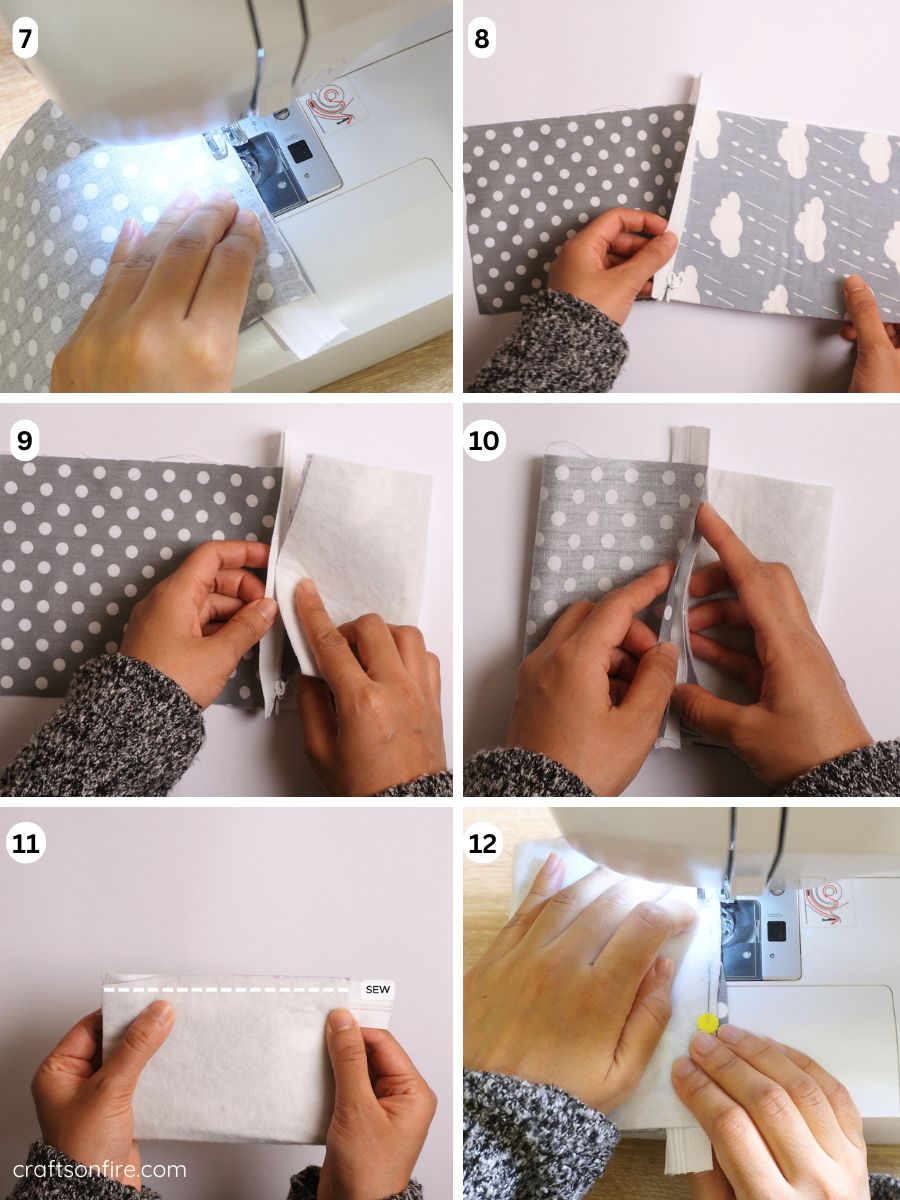
Step 07 – 08: After sewing, open the joined piece so that the right side of the fabric is facing you.
Step 09: Move the outer piece of fabric to the zipper.
Step 10: Fold the opposite side to the zipper.
Step 11 – 12: Go to the machine and sew the pieces together.
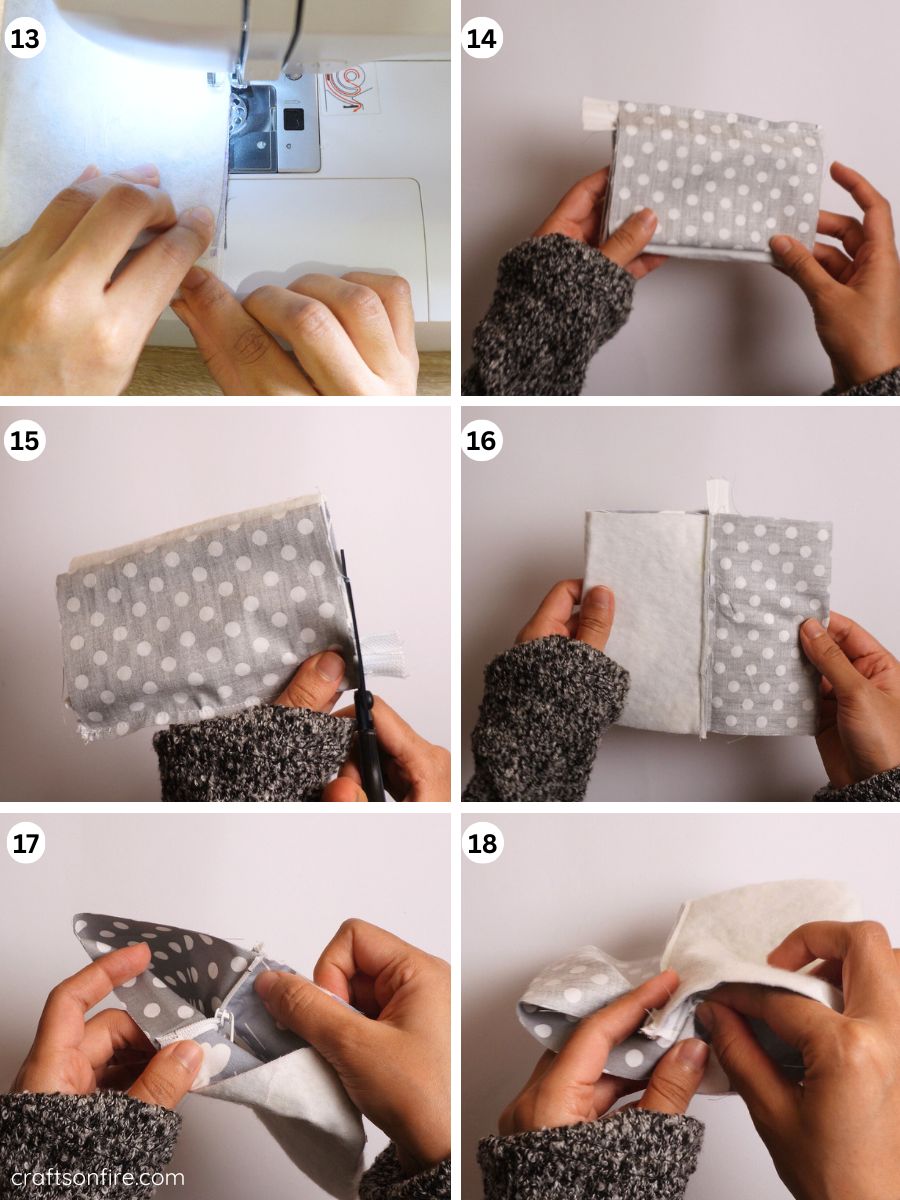
Step 13 – 14: After sewing, unfold the fabric.
Step 15: Make sure you cut off the excess zipper pieces on the side.
Step 16: It should look like this.
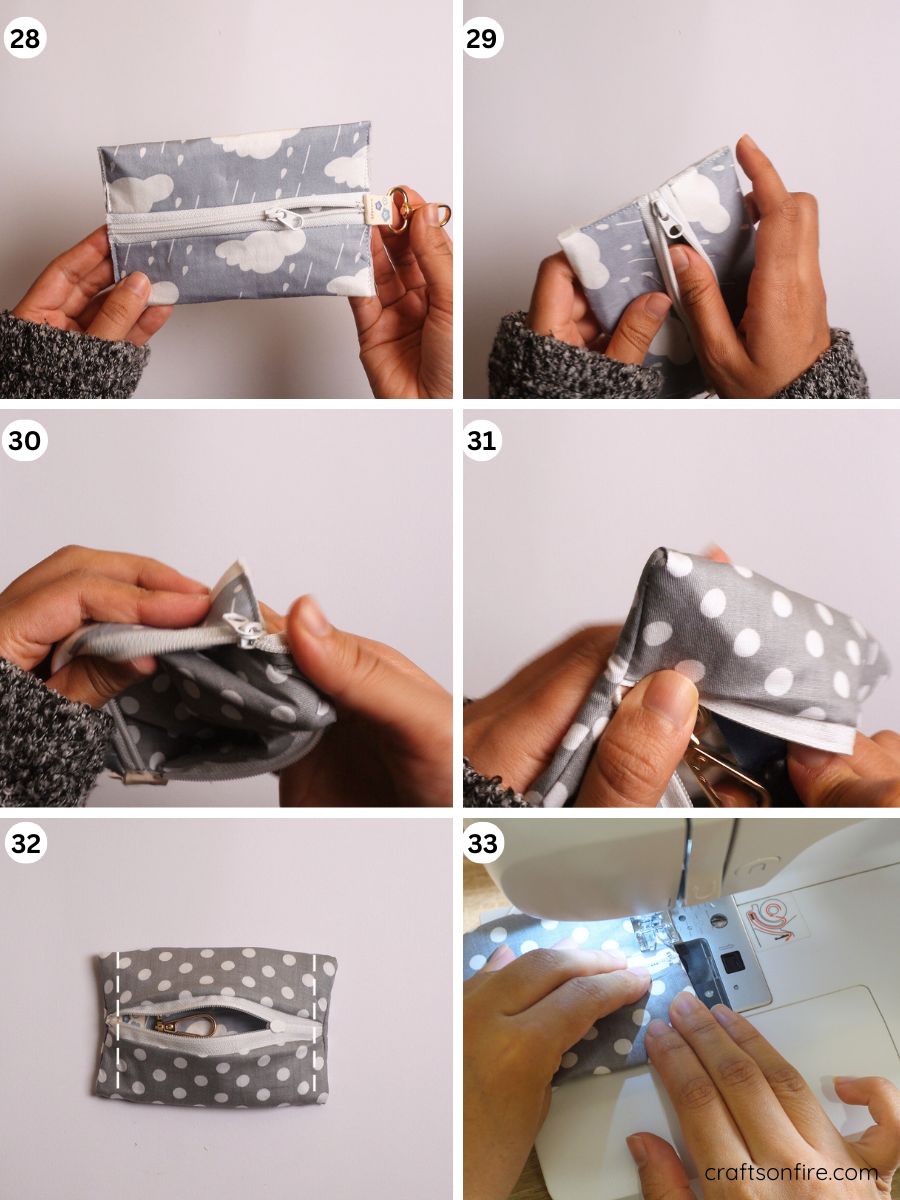
Step 17 – 18: Open one side of the fabric and then unbutton it.
Step 19: Once it’s unzipped, fold the inner fabric inside out so the right side of the fabric is facing out.
Step 20: Adjust the fabric so that the inner fabric fits well. If you prefer, you can add topstitching on either side of the zipper.
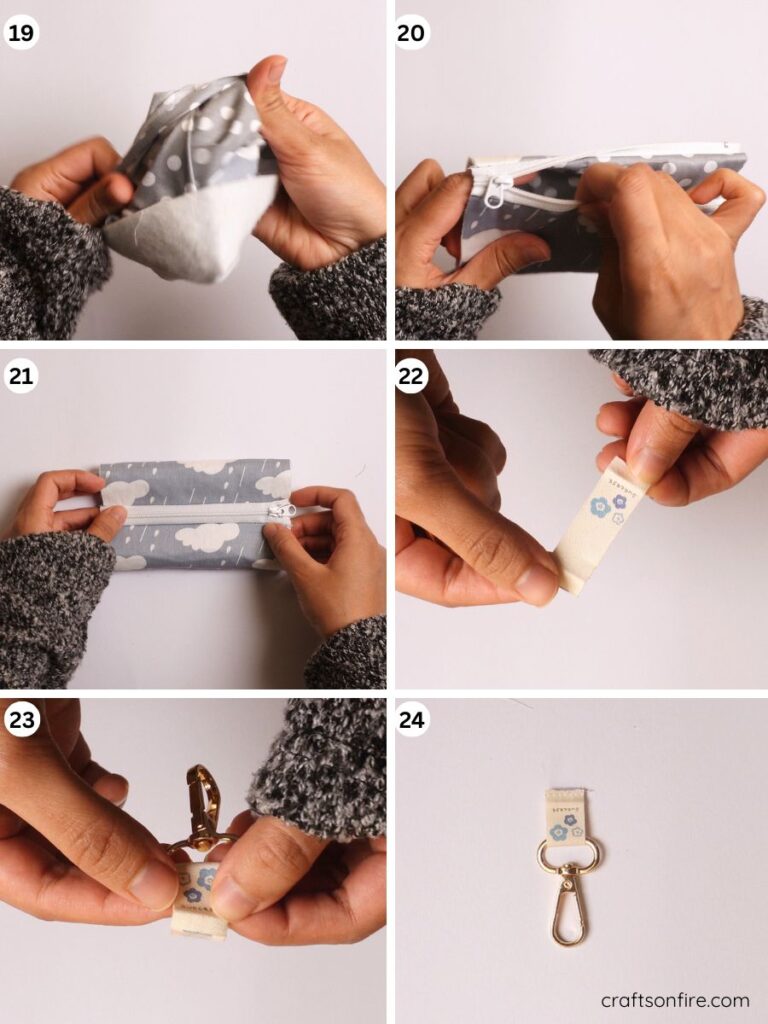
Step 21: Fold the entire piece so that the zipper is in the center as shown above.
Step 22 – 24: To attach the key ring, take your tag or a strip of ribbon and thread it through the key ring. Then sew the bottom two ends of the label.
Step 25: Place the key ring (right side down) where the zipper is. Next, you’ll want to stitch the fabric close to the edge on both sides.
Step 26: This is how the piece should look after sewing.
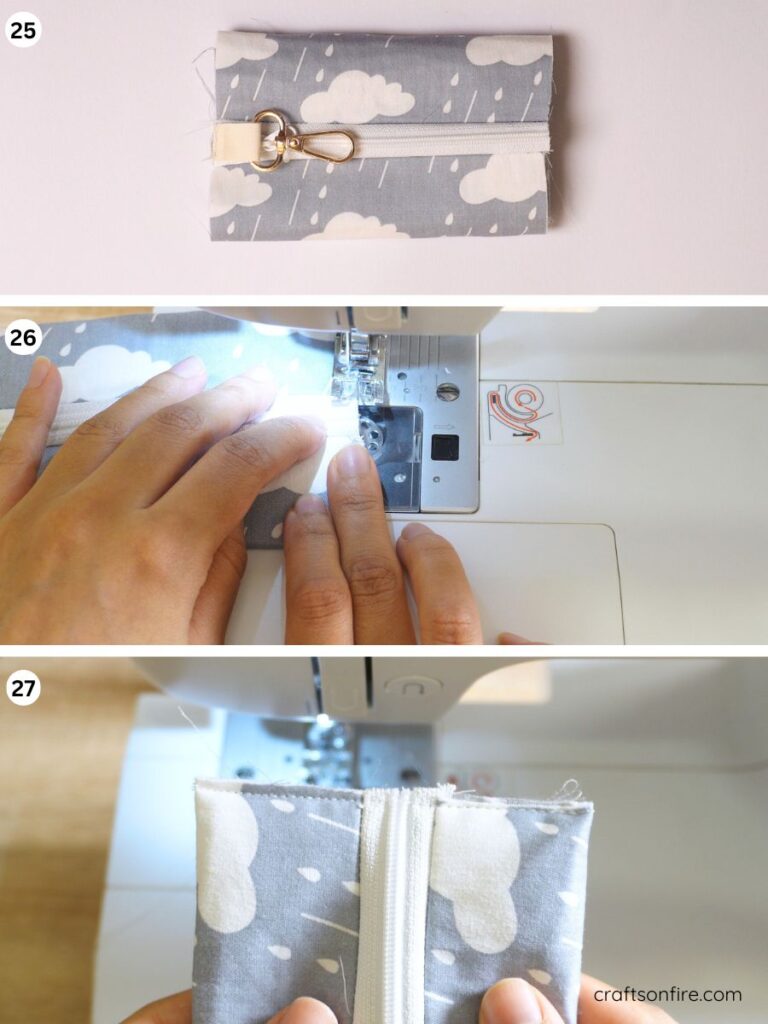
Step 27: Continue sewing the opposite side. Don’t forget to attach the keychain to the pouch!
Step 29: Open the zipper and fold the fabric to the wrong side.
Step 30 – 31: Carefully unfold each corner using a pen or sharp tool.
Step 32: Sew both sides of the pouch as indicated.
Step 33: Use 0.8cm or 1cm seam allowance.
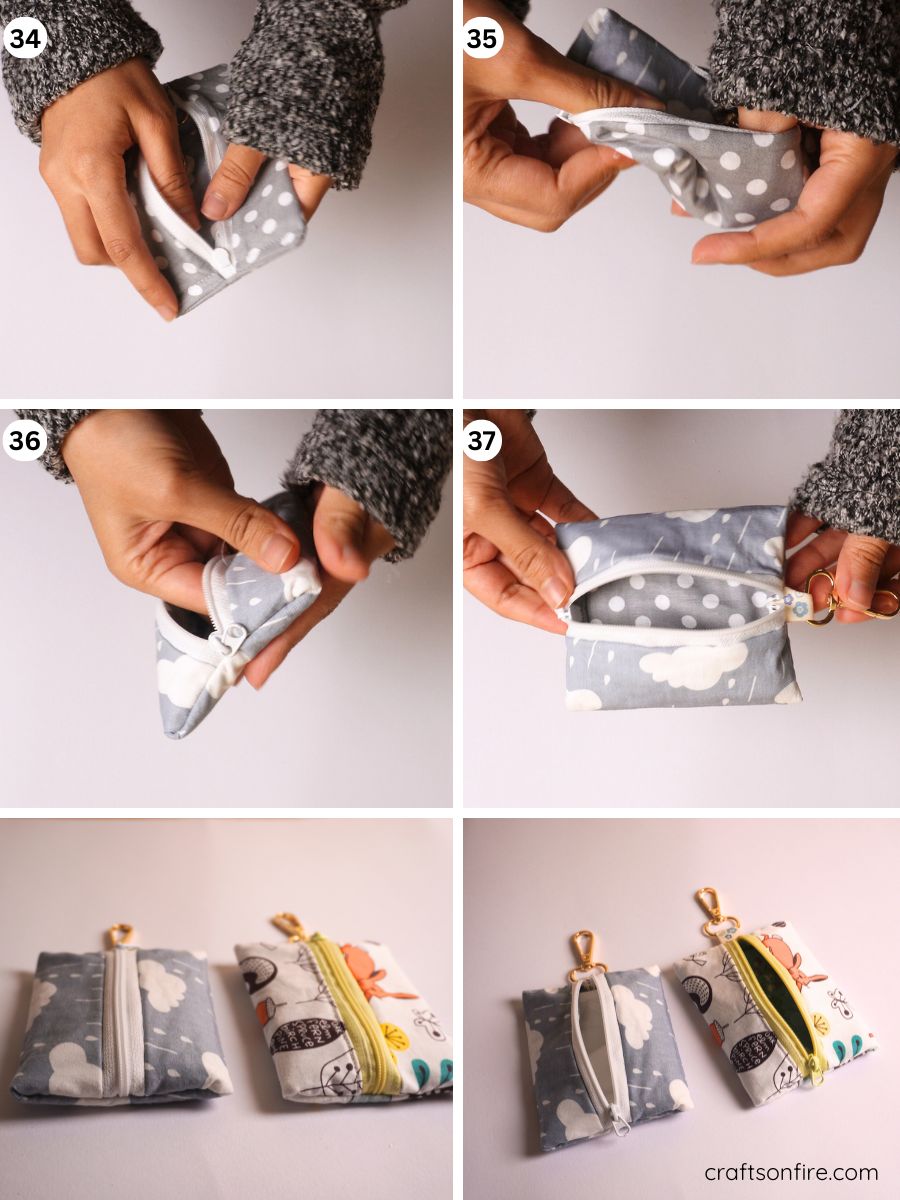
Step 34: Then turn the bag right side out.
Step 35 – 37: Reopen each corner and you’re done!
Your ziplock bag is now ready!
Completion
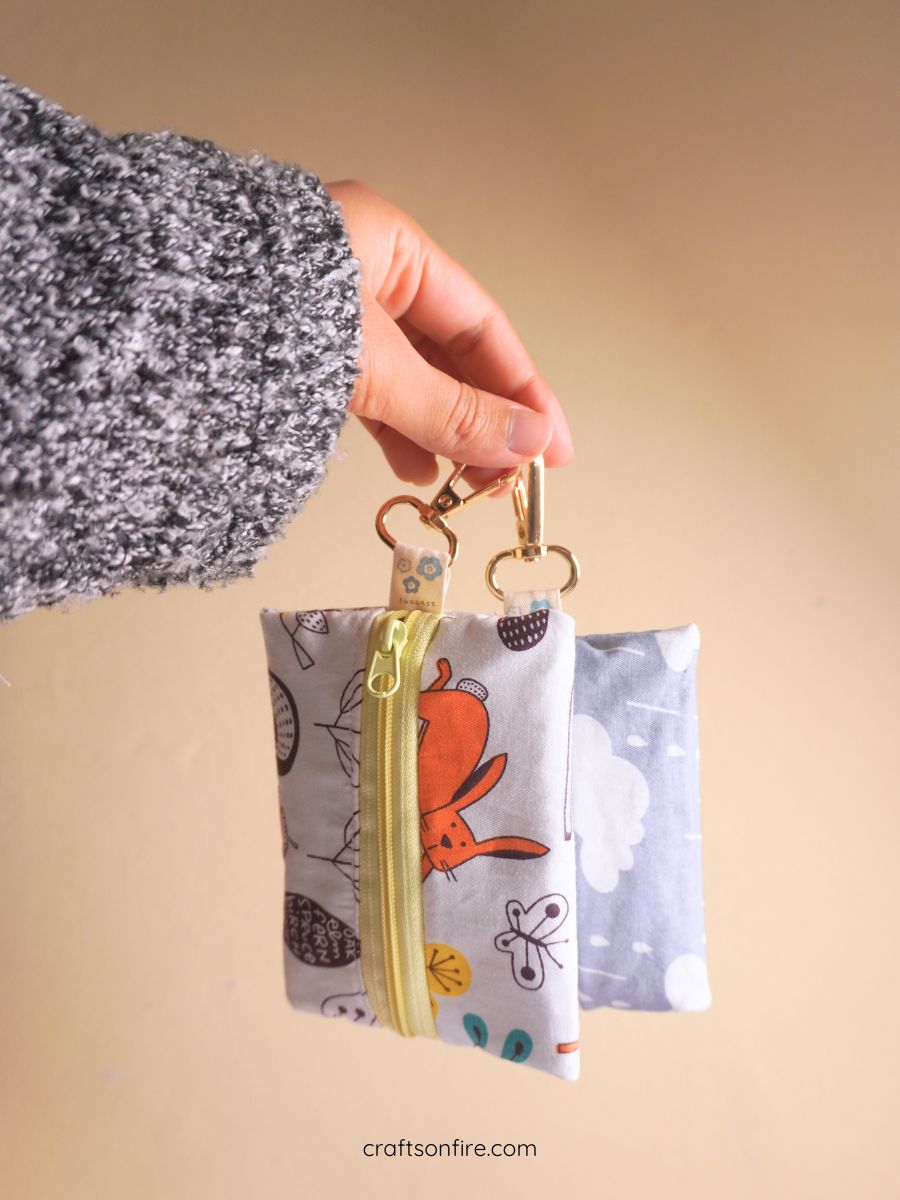
This keychain pouch was so easy and fun to sew. I have already made quite a few and want to give them away. I think they make the perfect little gift for all ages.
The clasp is also quite useful. You can hang them on anything or just leave it as a decorative element.
The wadding gives this pouch some stability, making it quite pleasant to hold and use.
I hope this sewing guide and pattern are easy to follow. I’ve tried to break down and include every part of making this pouch so you can recreate it with ease.
As always, if you found this tutorial helpful, please leave a comment below.
Also, be sure to check out some of my other sewing tutorials below:
This is from me. Happy sewing everyone!
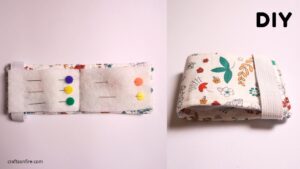
How to sew a needlebook (easy pattern)