

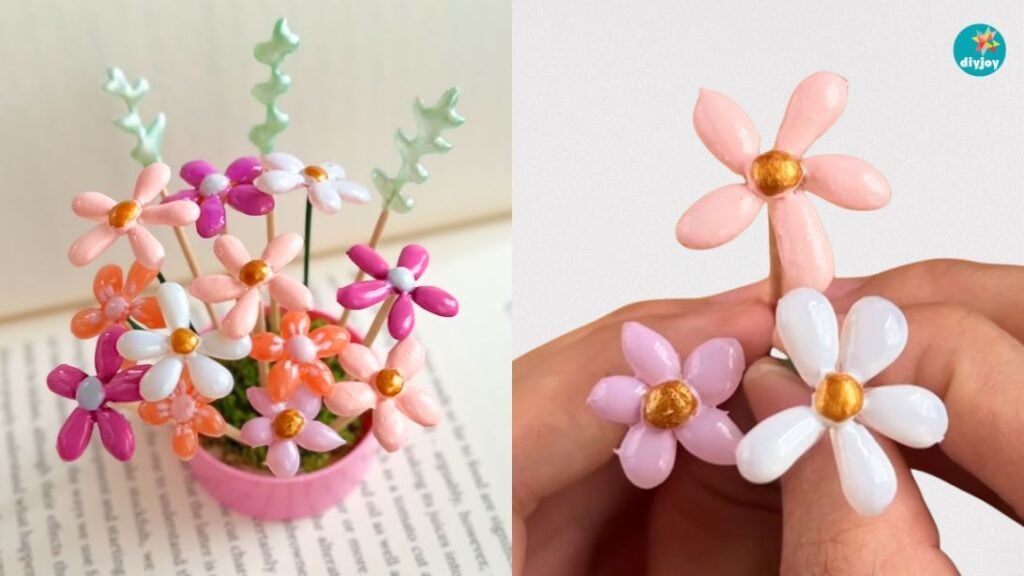
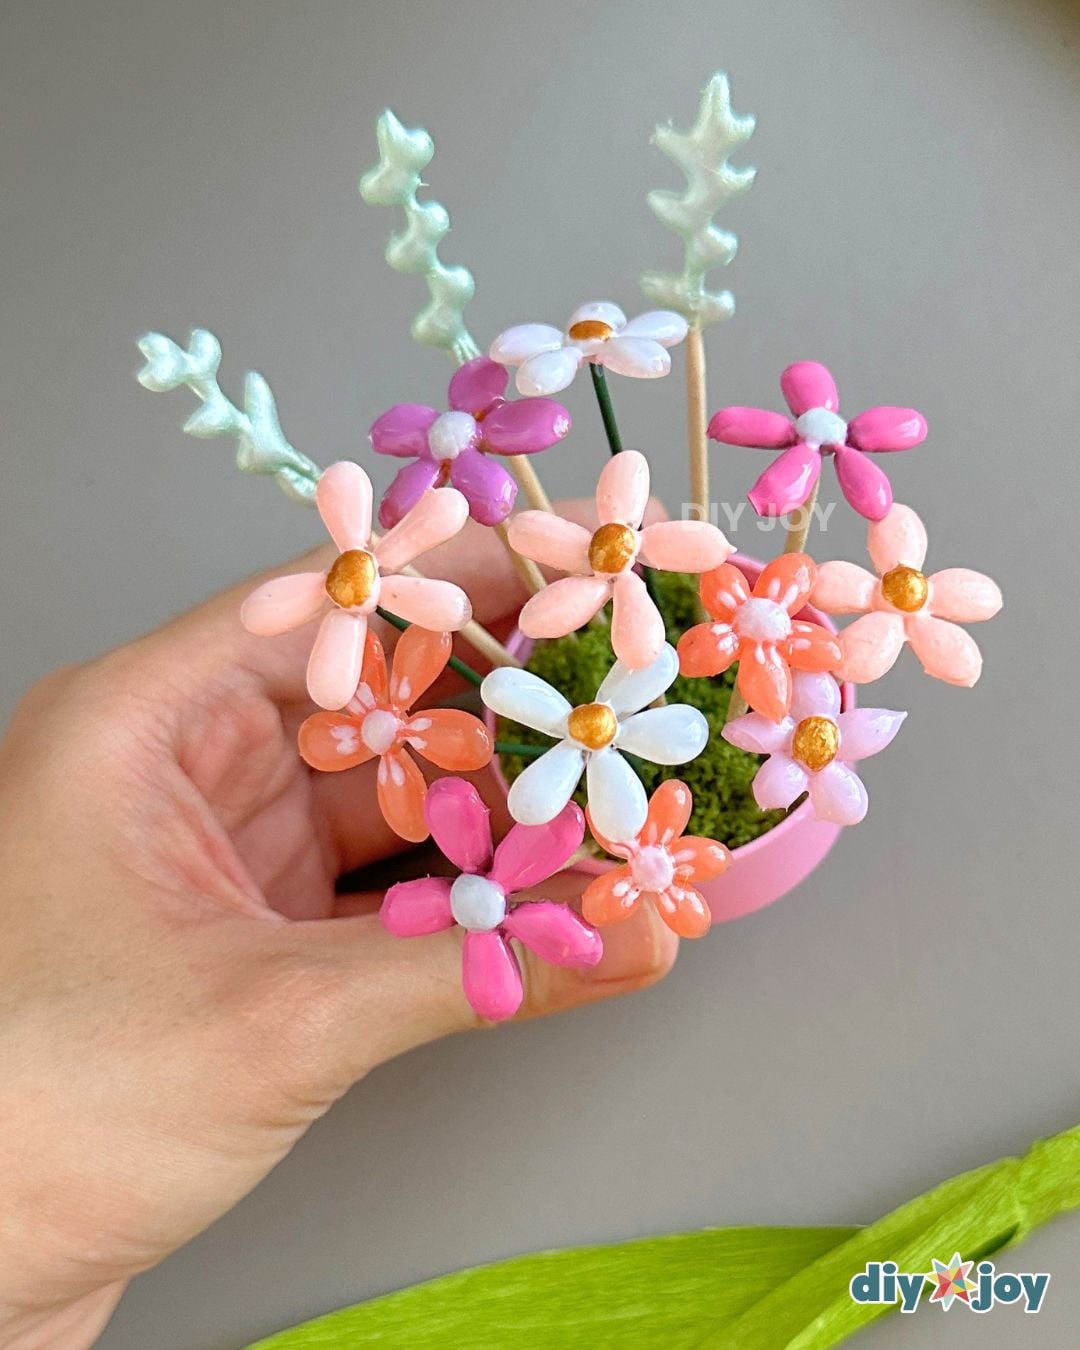
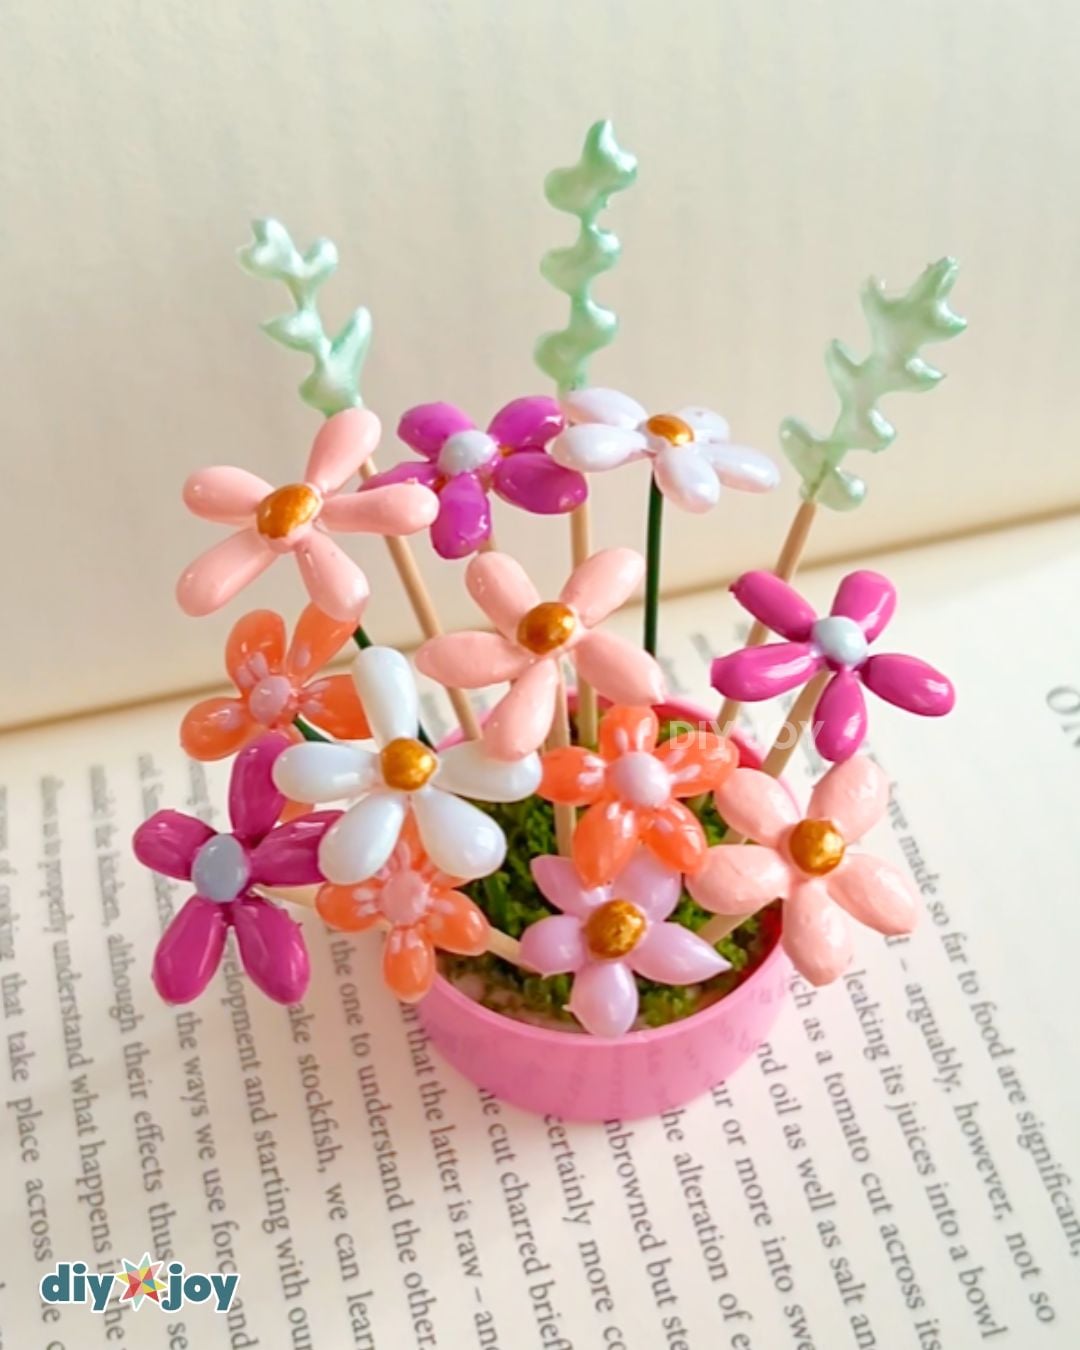
Did you know you can make flowers using hot glue? Yes, you can, and it’s not only beautiful but also easy and fun to make. If you are looking for Glue gun craftsTry these hot glue flowers! I bet you will enjoy making them.
Related: Mini Hot Glue Photo Frame Magnets
Related: Mini Hot Glue Photo Frame Magnets
As we all know, glue gun is mainly for bonding materials such as cardboard, plastic, wood, fabric or paper. It is commonly used in crafts because it creates a faster and stronger bond than other types of glue. But did you know there are a ton Hot glue craft That you can easily try at home? You can create textured vases, 3D canvas art, hot glue snowflakes or these glue gun flowers. Hot glue is the perfect material for these gel-like flowers because they can be molded when heated and fully hardened when cooled. We will make petals one by one, glue them together to make a flower, and then paint with nail polish for that glossy look. Follow the step-by-step tutorial below to learn how to make flowers with a hot glue gun.
Supply list for hot glue flowers
All of these products are listed on our DIY JOY Amazon store, so you can order and know what you’ll get and when. We earn a small commission on these links and greatly appreciate your support ❤️
Glue gun flowers
Learn how to make flowers using hot glue with this step-by-step guide.
-
Prepare your work surface
Place the sheet of parchment paper on a flat surface and tape the corners to keep it from moving. Pre-heat your glue gun.
-
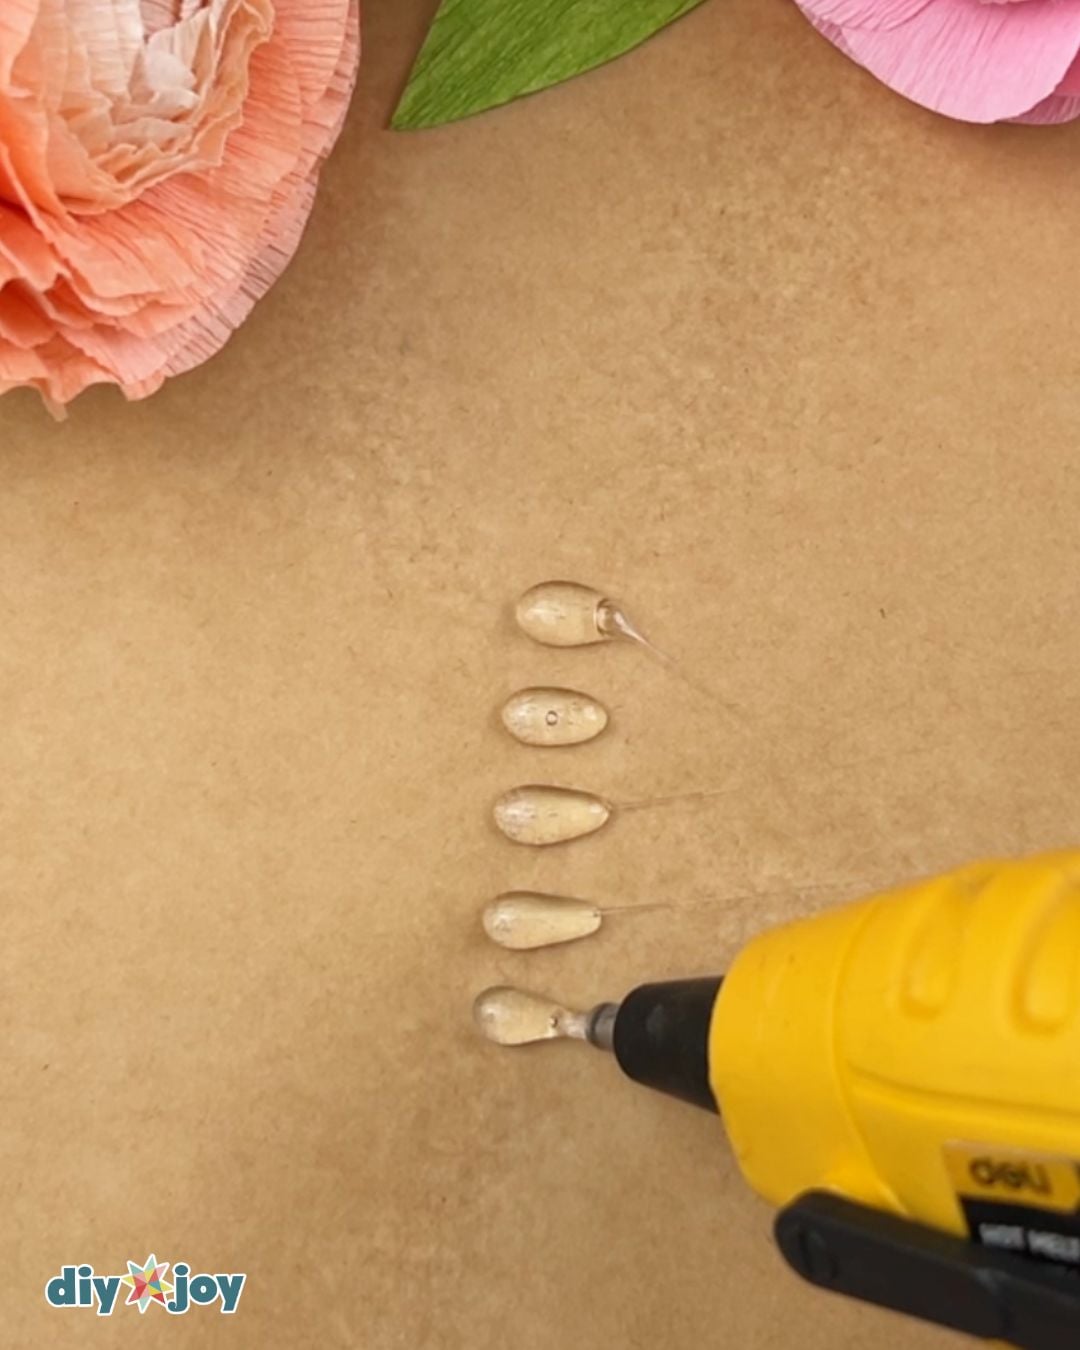
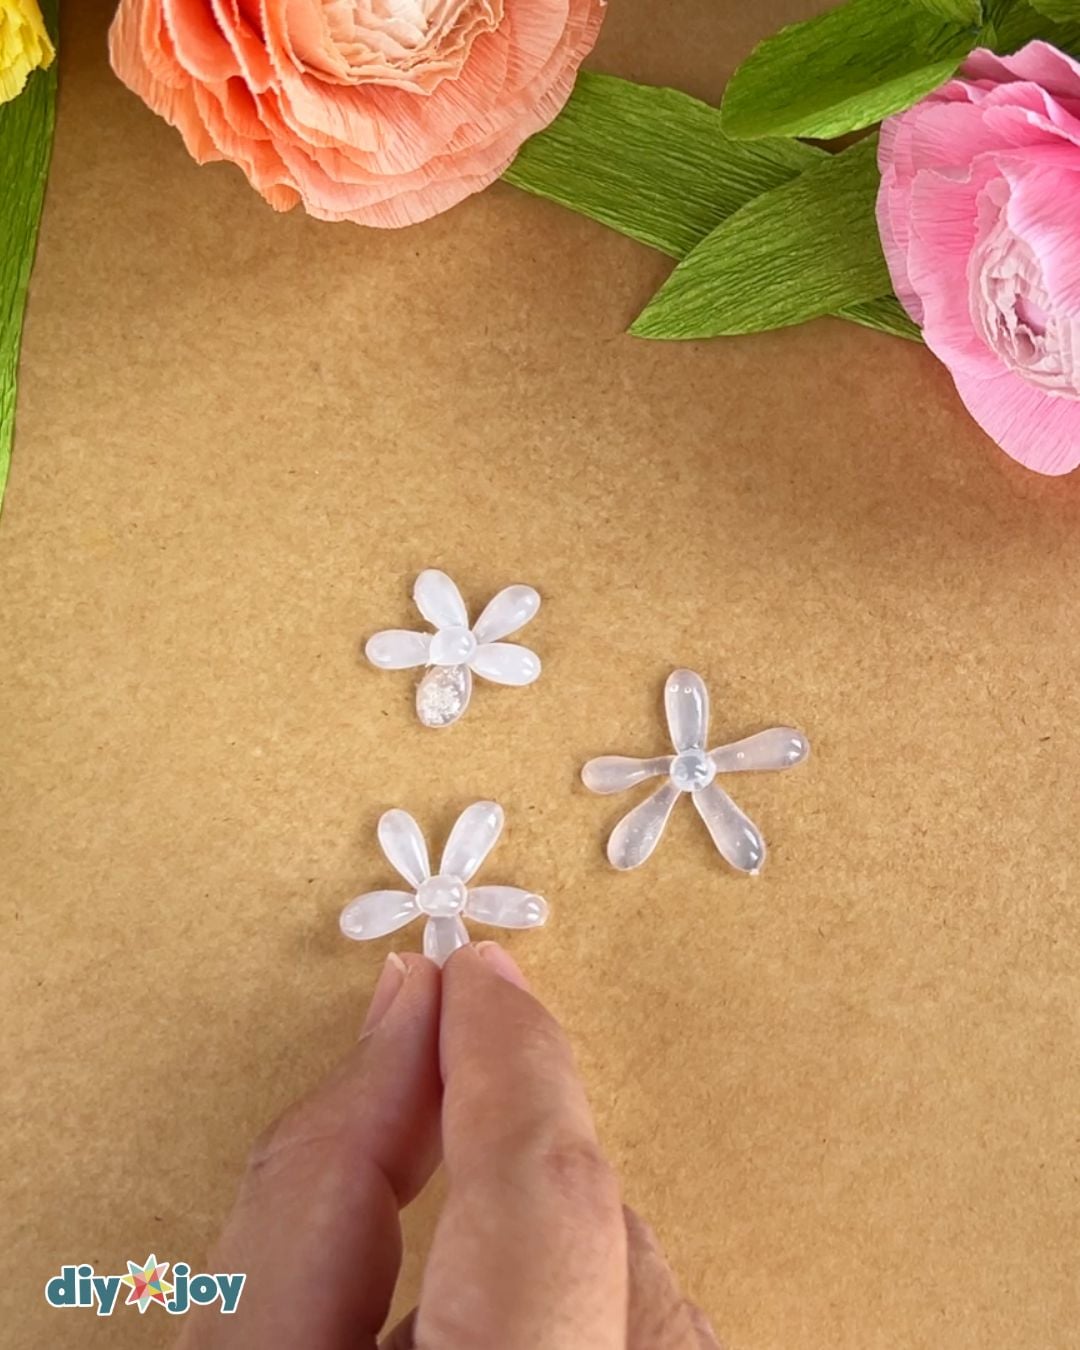
Structure of Petals
Once the glue gun is hot, squeeze out a small amount of glue and carefully pull the nozzle to the right to create a teardrop shape. Repeat this five times. Let them dry for a while.
-
Adding the center
Once the petals are dry, carefully peel them from the parchment paper and remove any glue strings. Arrange them into a flower, leaving a little space in the middle, then fill in the space in the middle with hot glue. Let it dry completely.
-
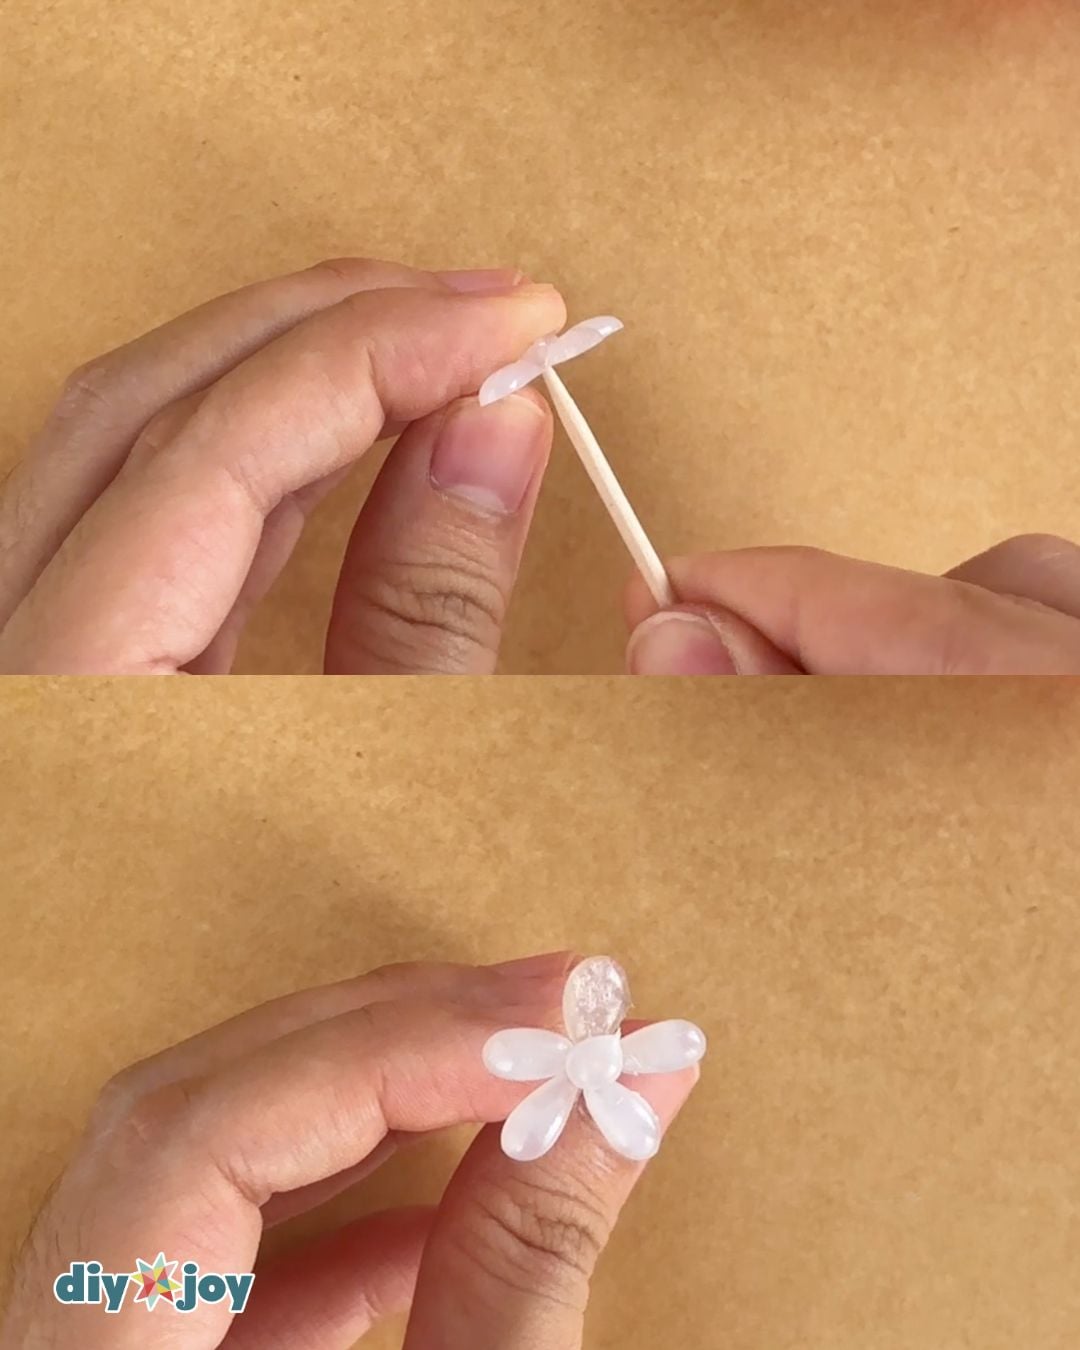
Adding the stem
Carefully remove the flower from the parchment paper and insert a toothpick into the back of the flower.
-
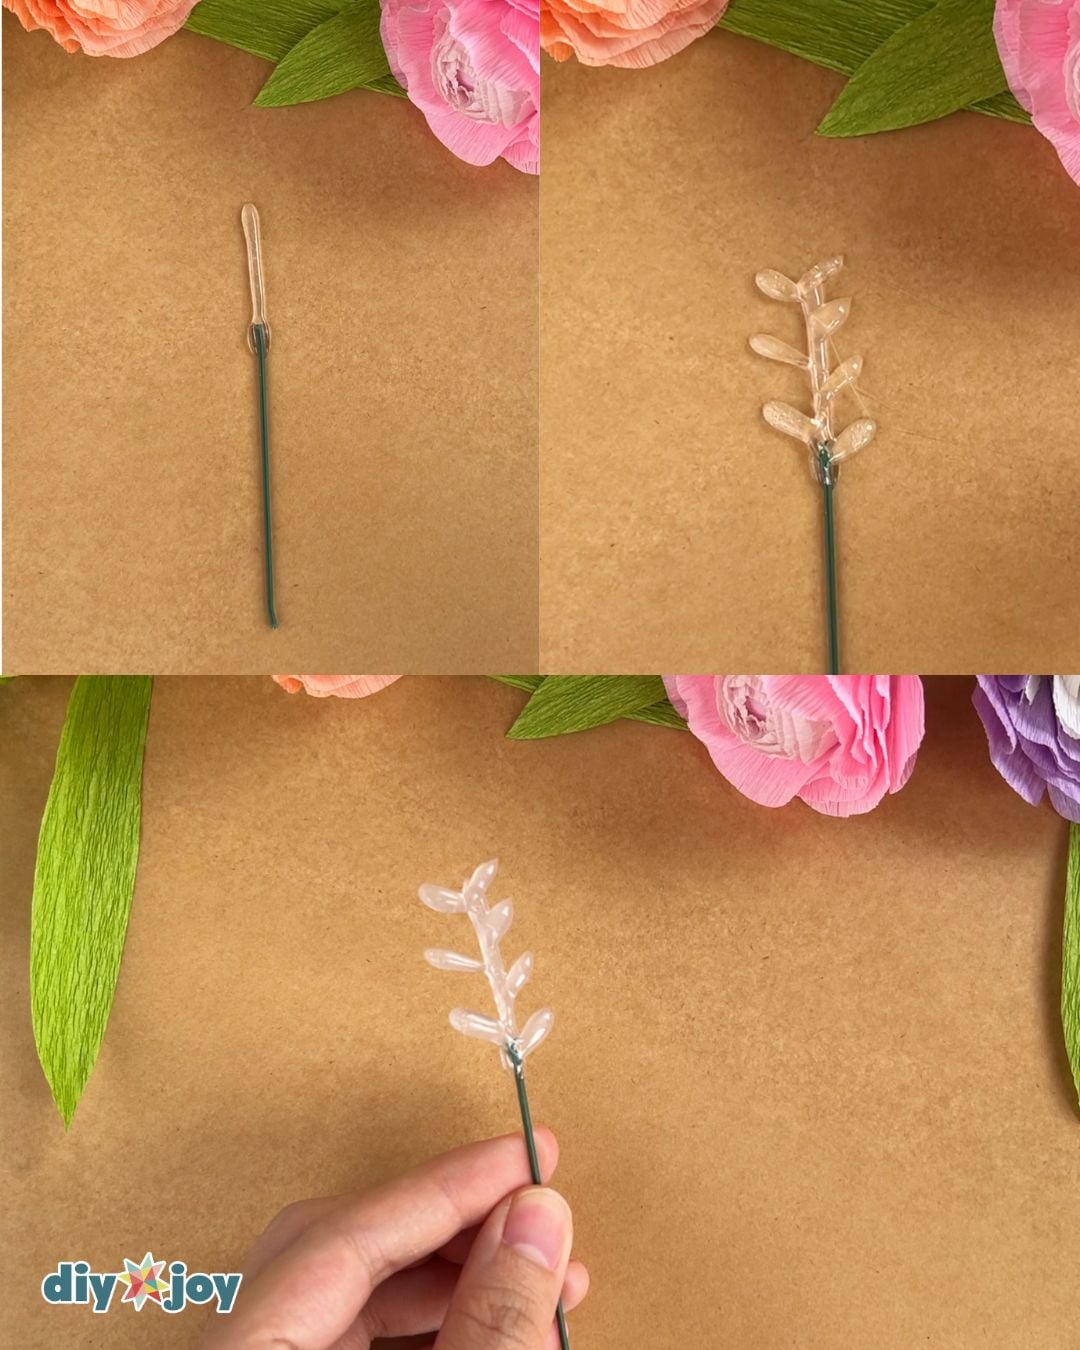
Make leaves
Apply a strip of hot glue to your parchment paper, place a wire or toothpick on the end, and then add the leaves.
-
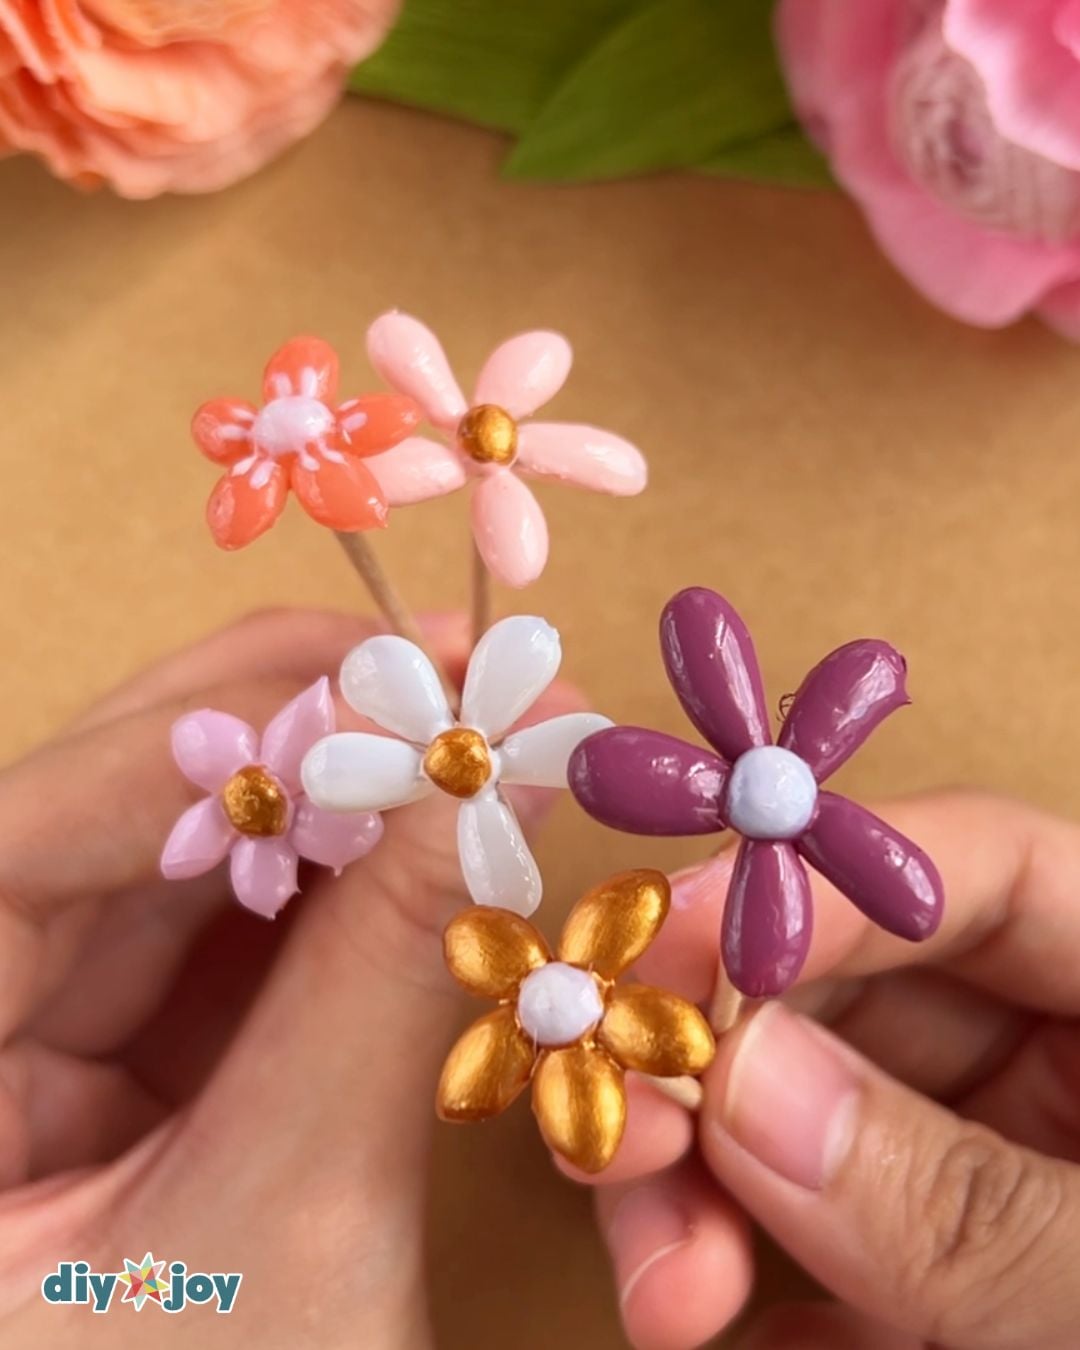
Painting flowers and leaves
Color the flowers in your favorite colors and the leaves in green. Some nail polishes may require several coats. Allow them to dry completely after each layer. Drying time will depend on what you are using.
-
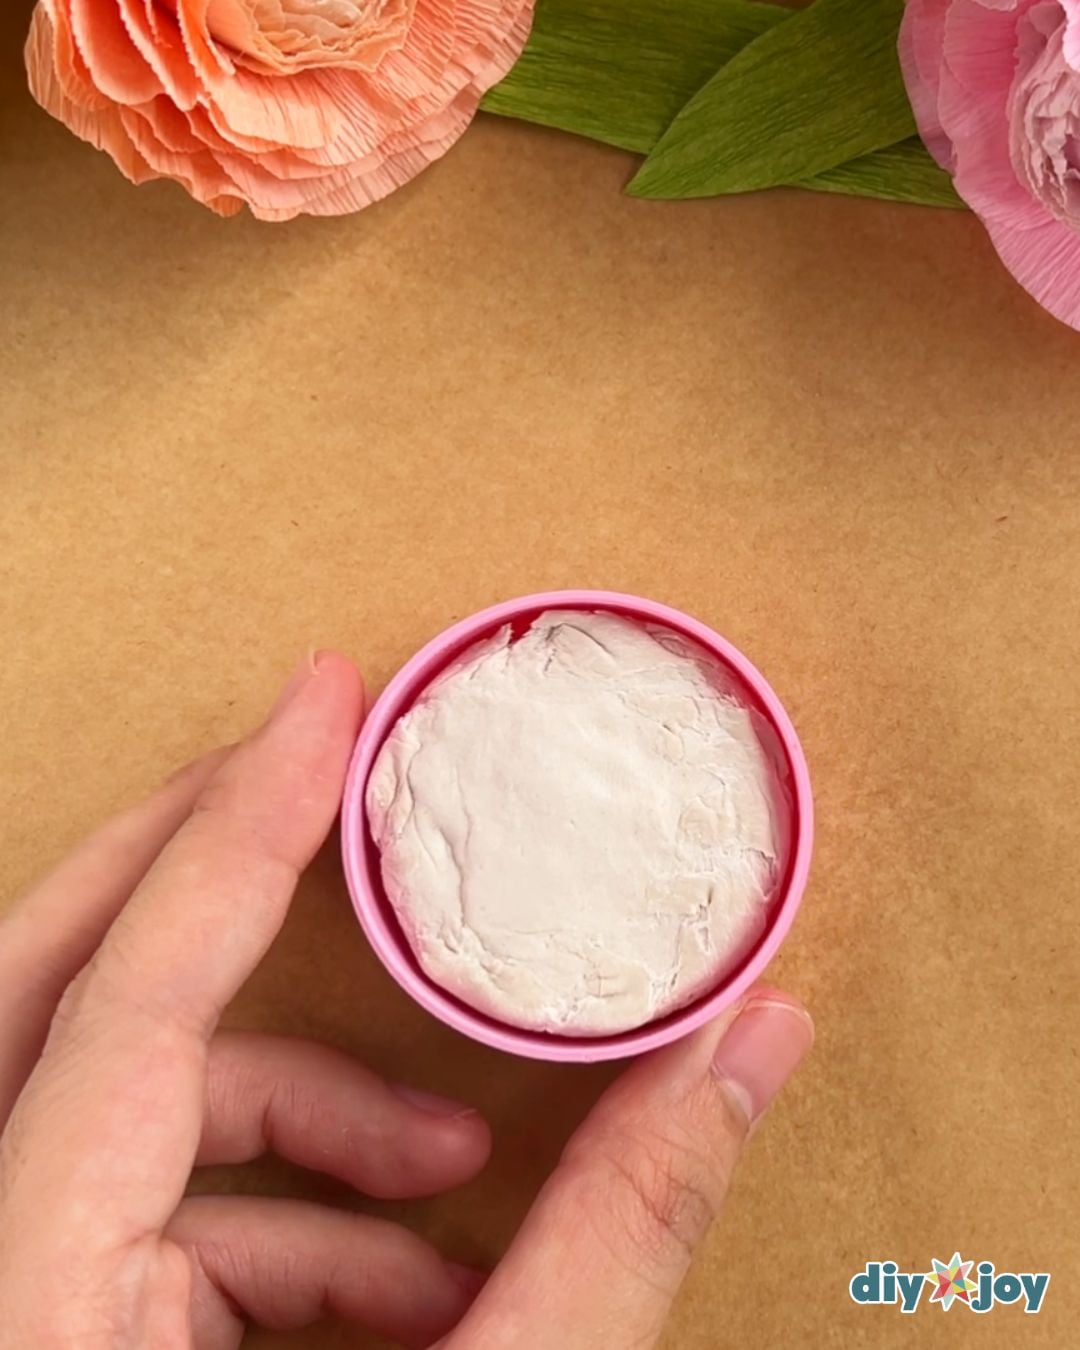
Make a flower pot
Take a small plastic cap and fill it with air dry soil.
-
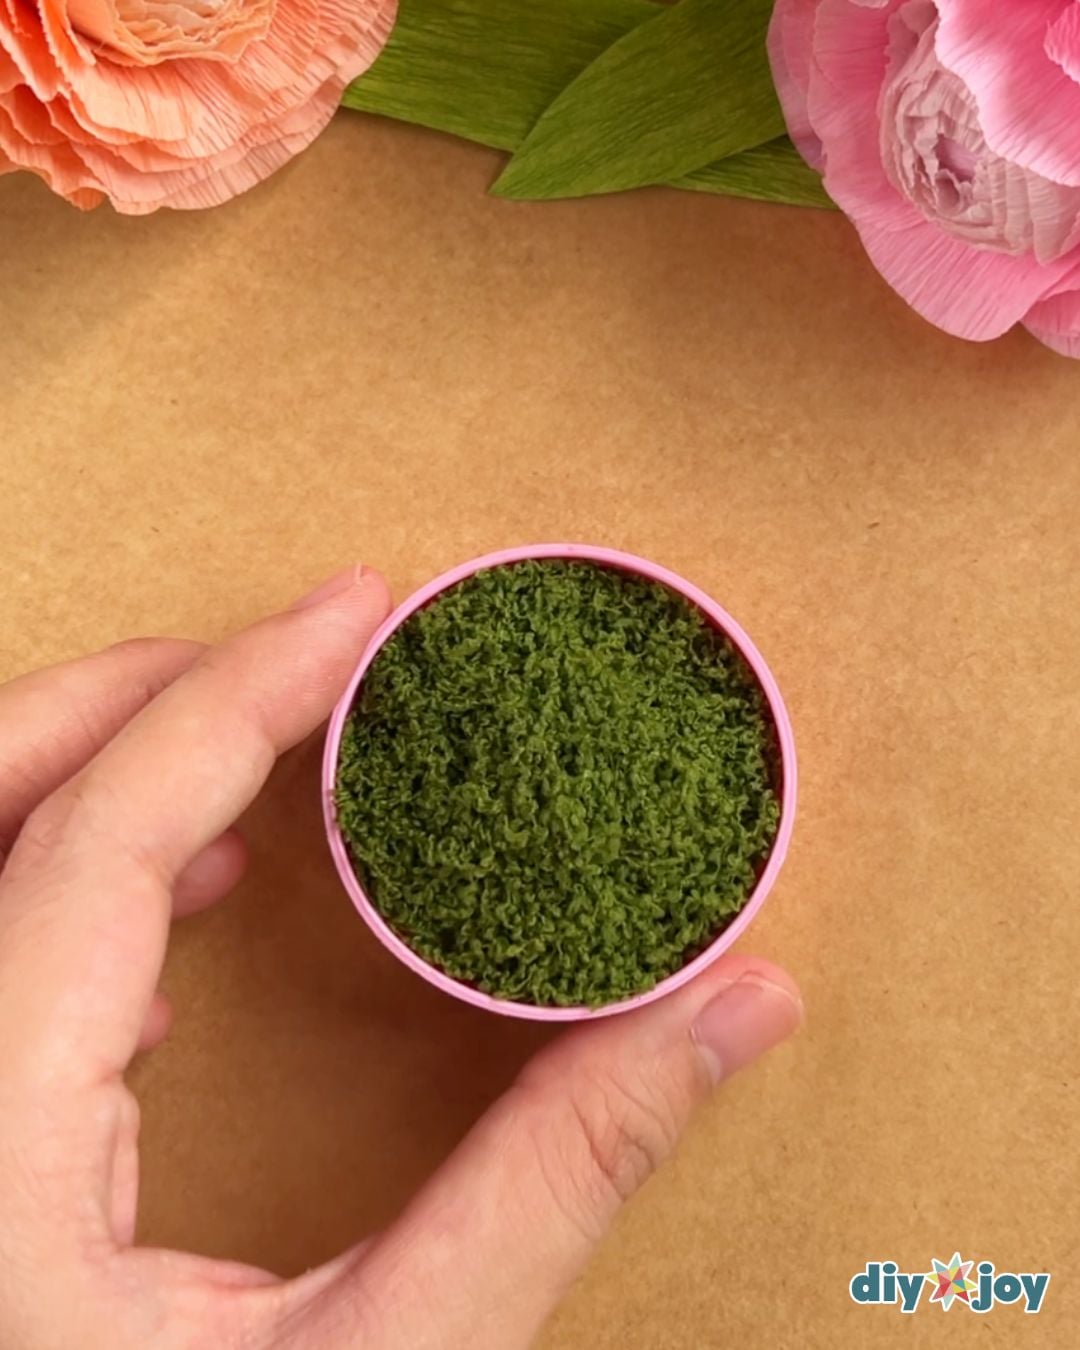
cover the top
Cover the soil with fake moss.
-
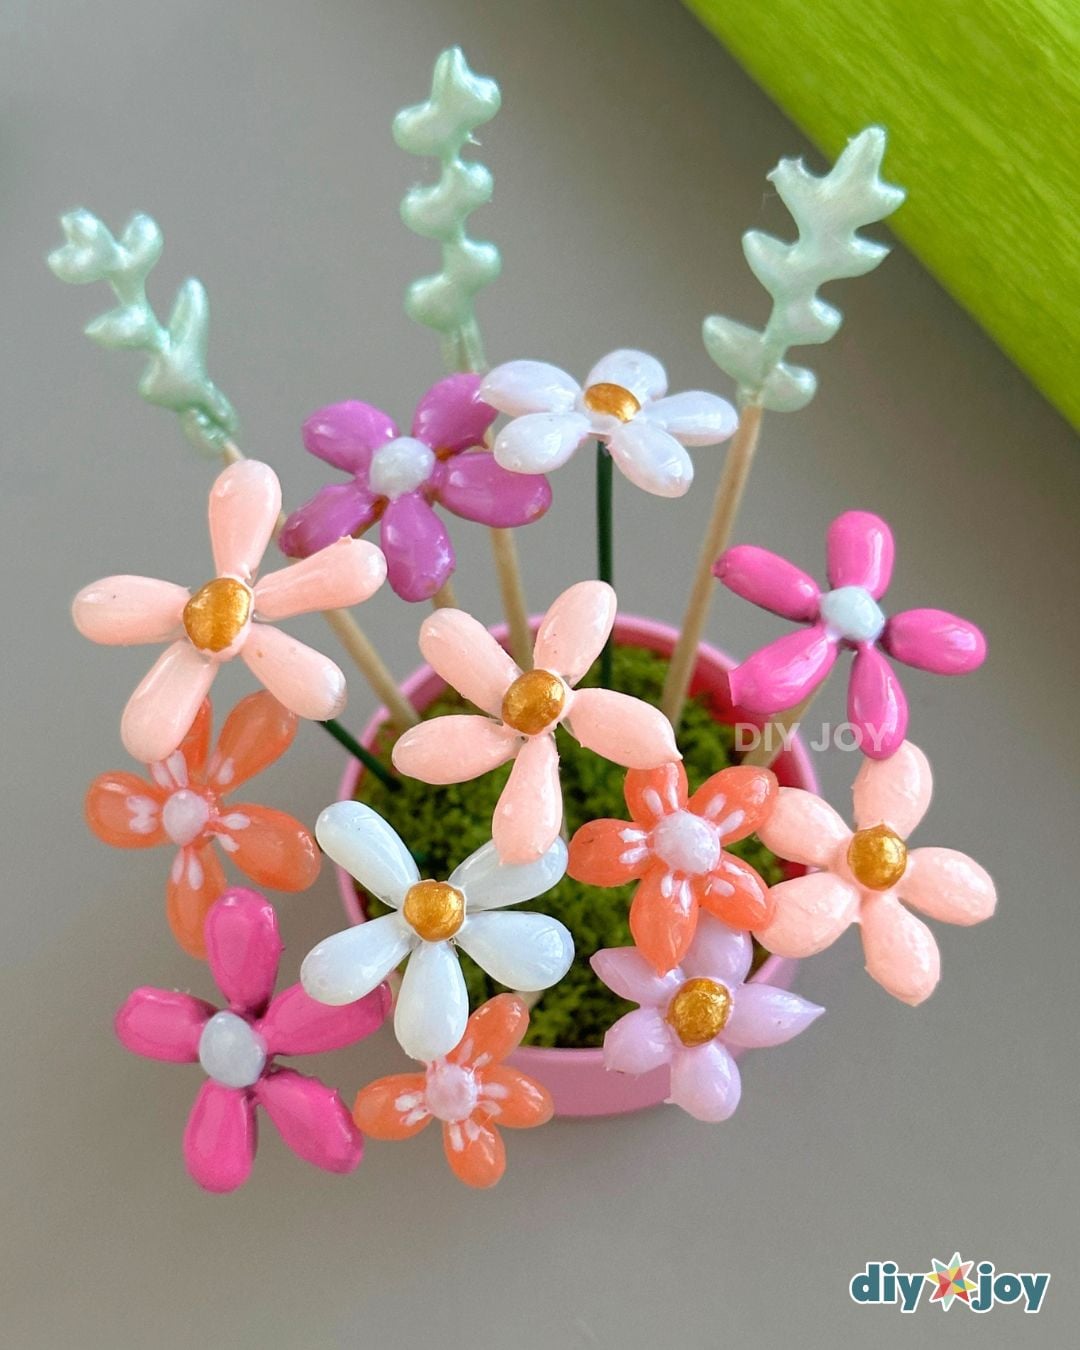
Add flowers
Arrange the flowers as you like.
material
- Nail polish
- A toothpick or wire
- Glue stick
- Small plastic cup (optional)
- Air dry clay (optional)
- Fake moss (optional)
![]()
Crafting tip
To cure gel nail polish faster, use a UV nail lamp. For regular polish, apply quick drying drops or use a cooling fan.
Creative ideas and diversity
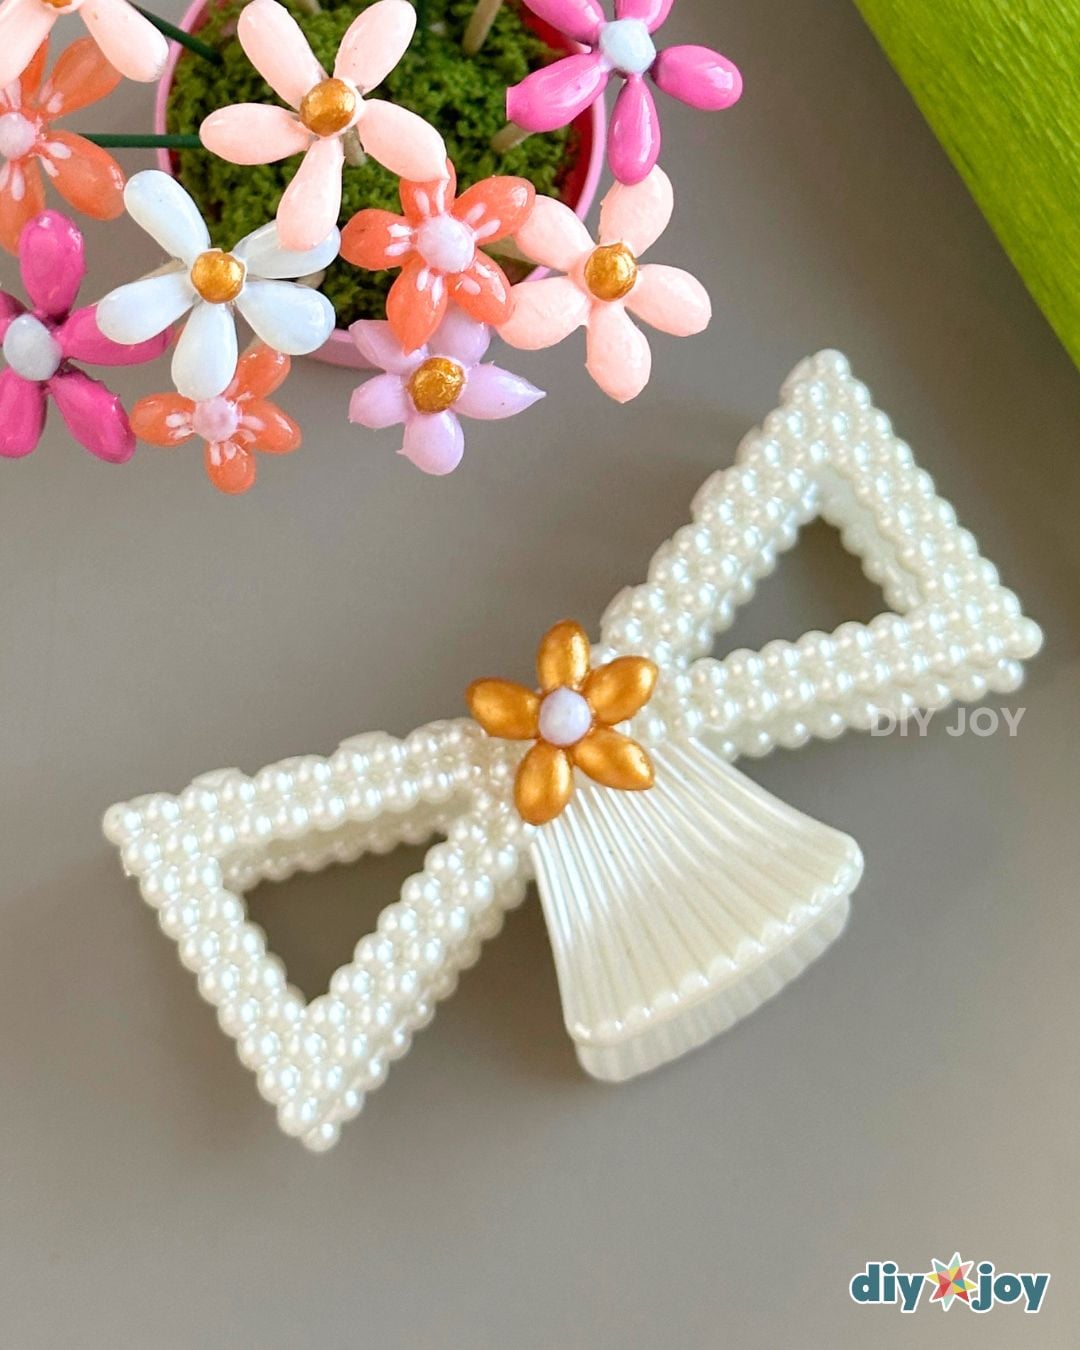
You can make these DIY hot glue flowers in different sizes and designs as you like. You can also add glitter or beads. It can be used as desk decor or decoration for hair clips, bags, phones, mirrors and much more.
More hot glue crafts
How to make hot glue flowers | Video tutorial


