

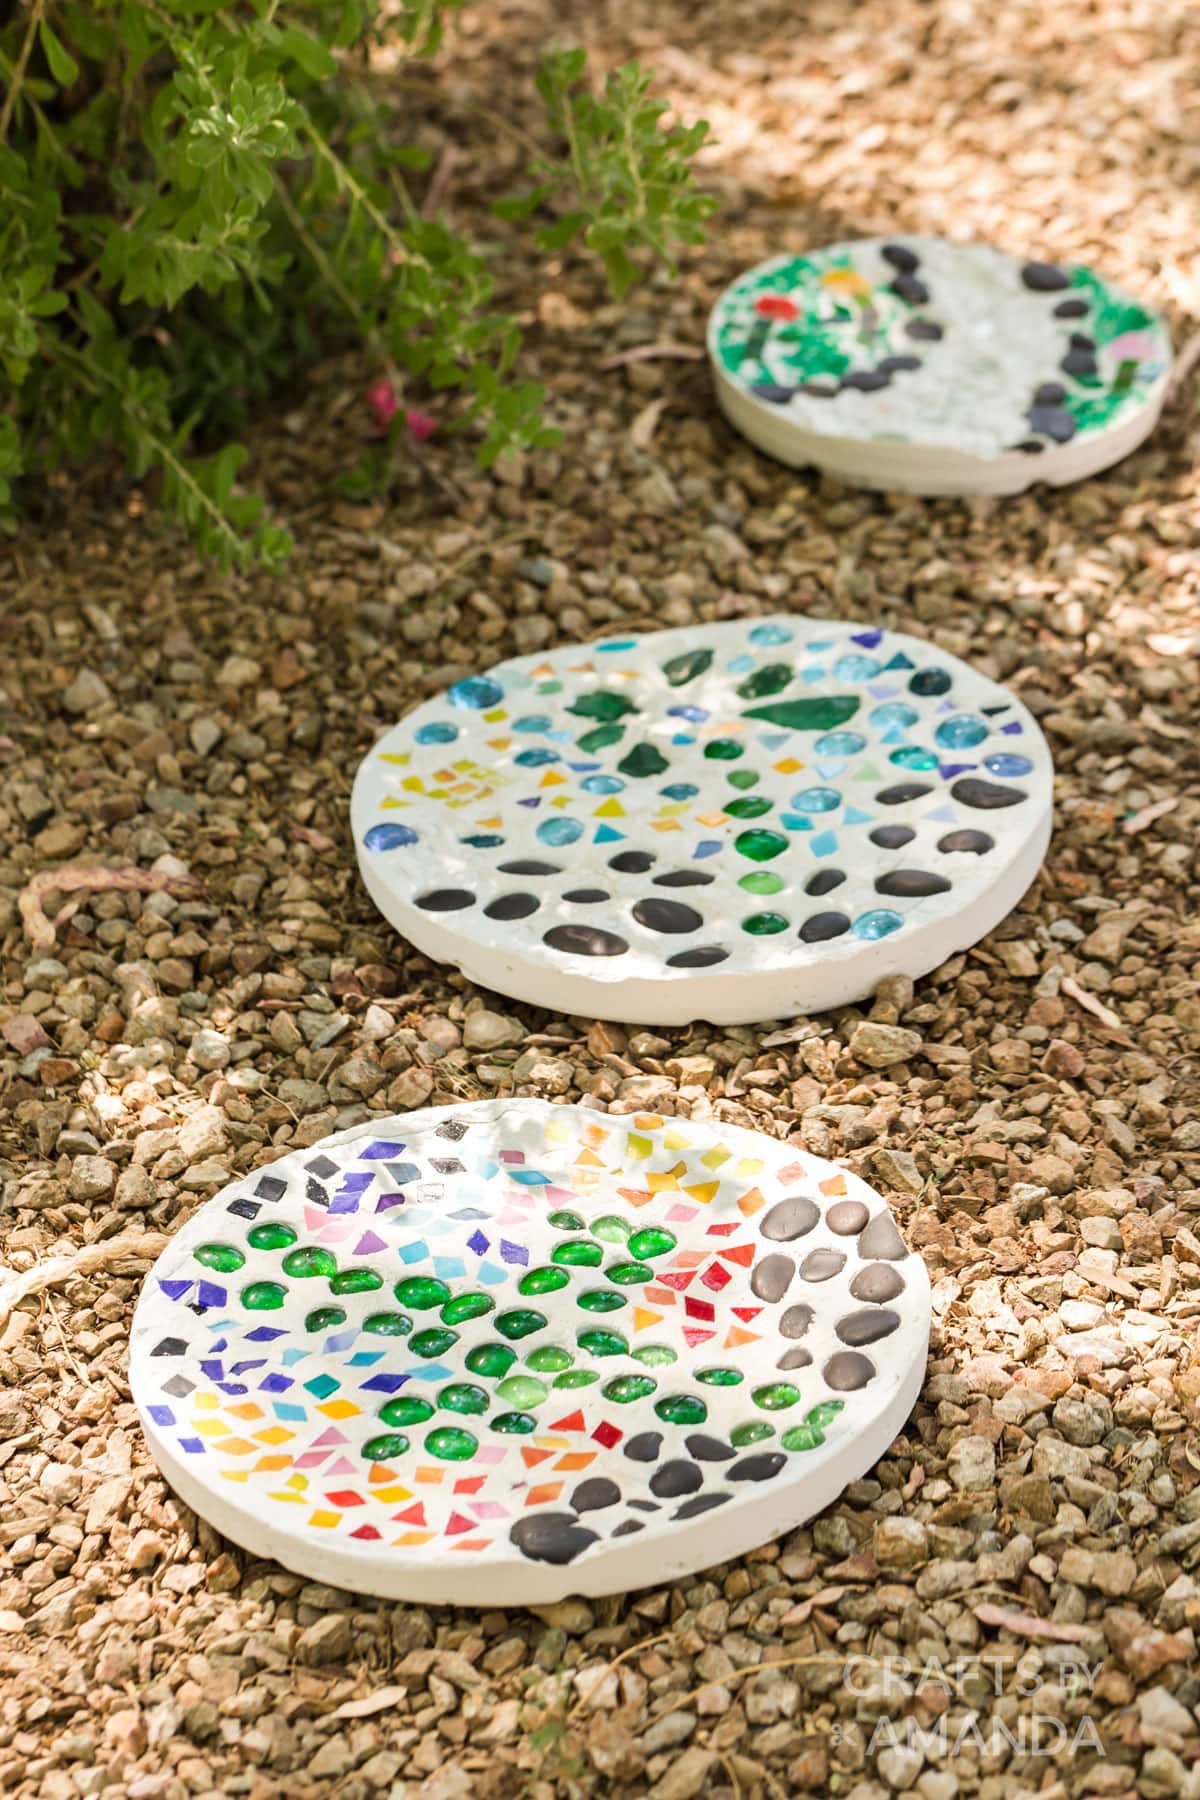
A sunny summer day is perfect for making DIY garden stepping stones! Kids will love creating their own designs and these flat stones can decorate a garden, walkway, or any outdoor space that needs a little love or personalization.
Why this tutorial works
This project is a simple introduction to mosaics, which means it’s a great one Crafts for kids Or anyone who is new to this process. That’s why you’ll find it on our list Adult craft projects as well
In mosaics, you use small tiles or decorations to create a design, usually on a wooden base, which is then grouted and sealed. Our stone projects are made using the “direct” method of placing tiles or decorative items on top of mortar (which is in a mold) to create the design. No grout is needed because the mortar sets and holds the pieces in place.
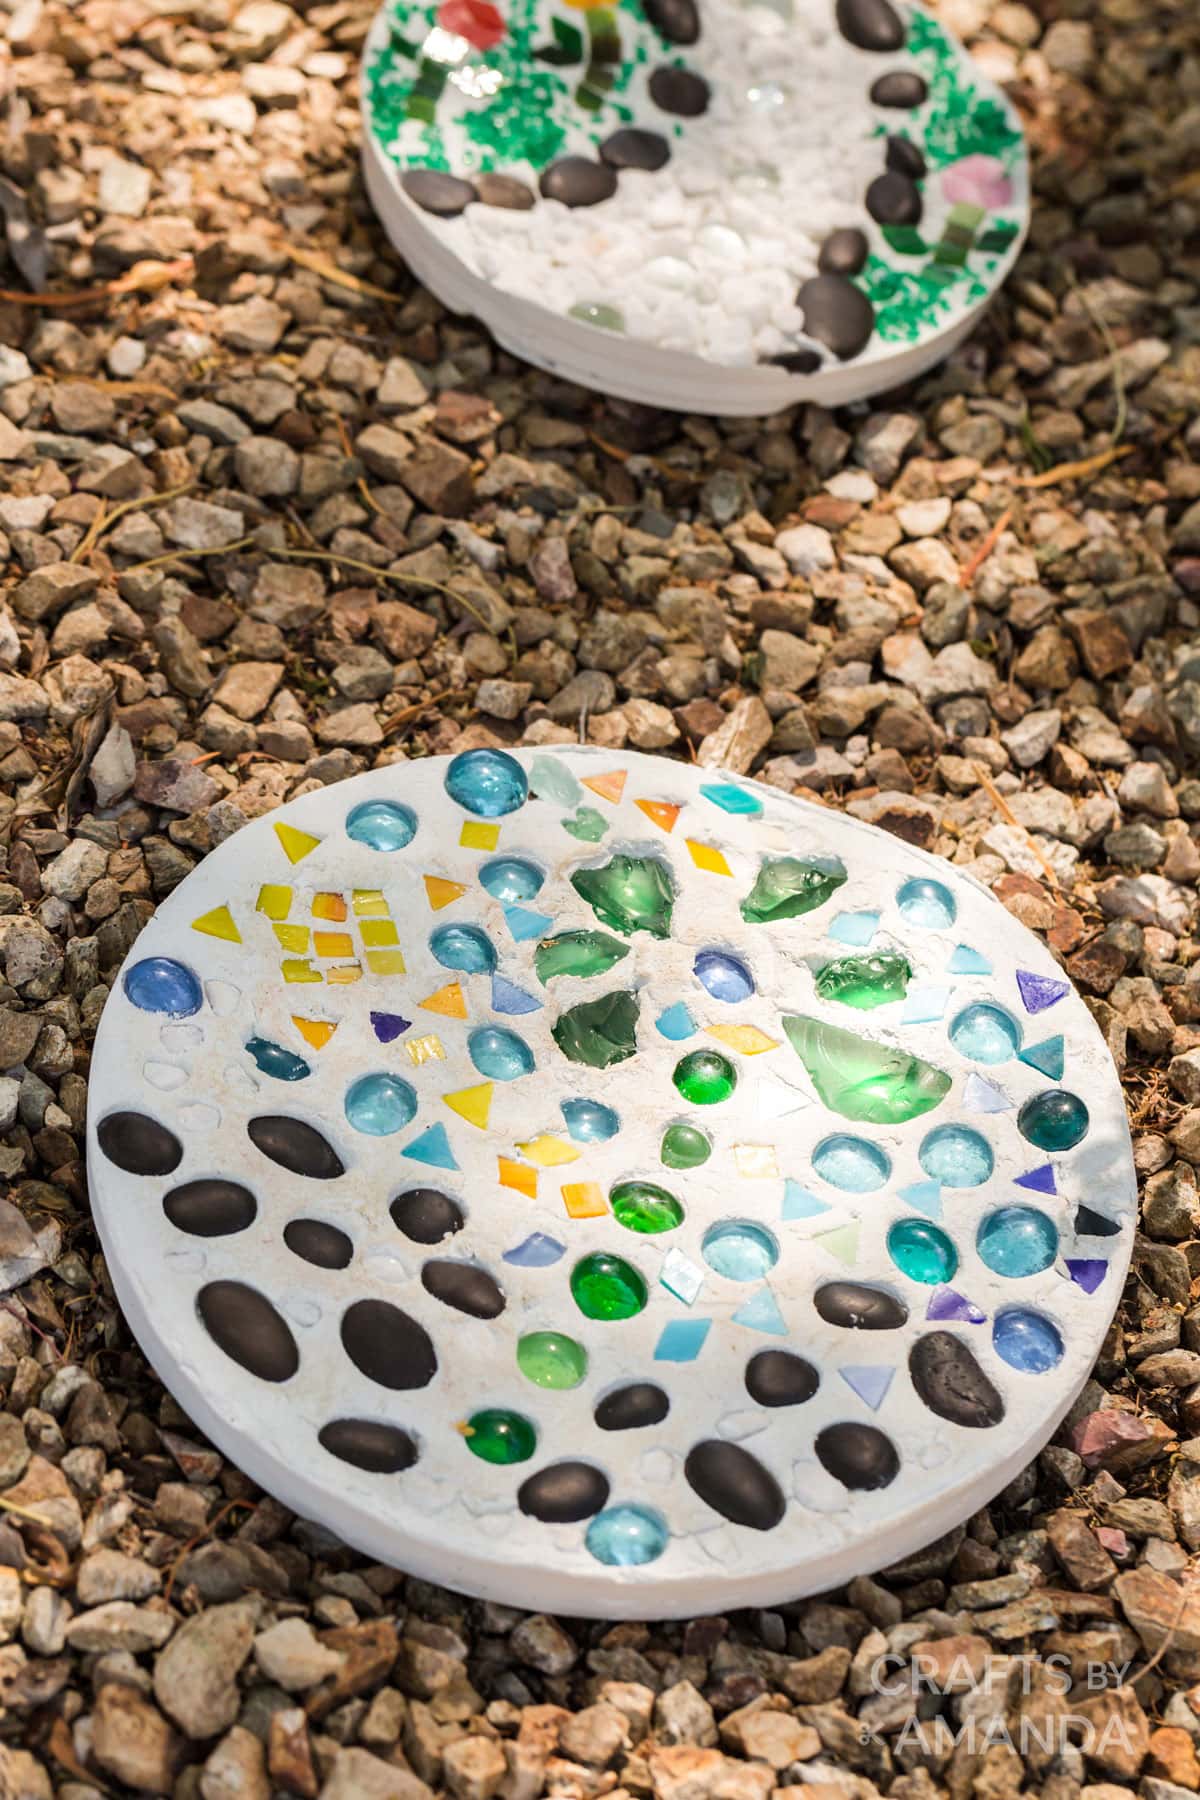
The sky is the limit with these garden stones, you can decorate them to your heart’s desire. I think ours DIY Pebble Art Designs on these stones will look absolutely adorable!
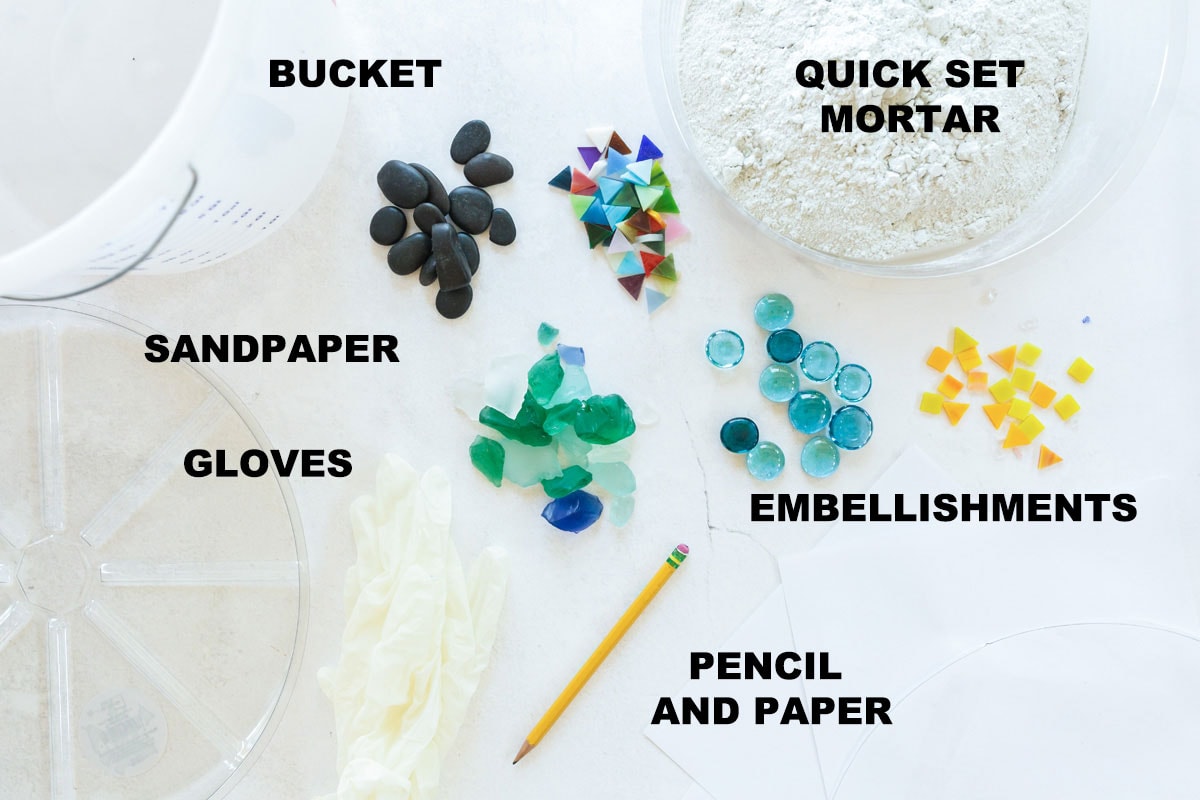
Craft supplies you will need
Decoration ideas
Craft information
- Age Level: 5+
- Confusion factor: medium
- Completion Time: 1 hour plus 24 hours dry time
- Cost Estimate: 10 lbs quick set mortar is $7.85

How to Make DIY Garden Stepping Stones
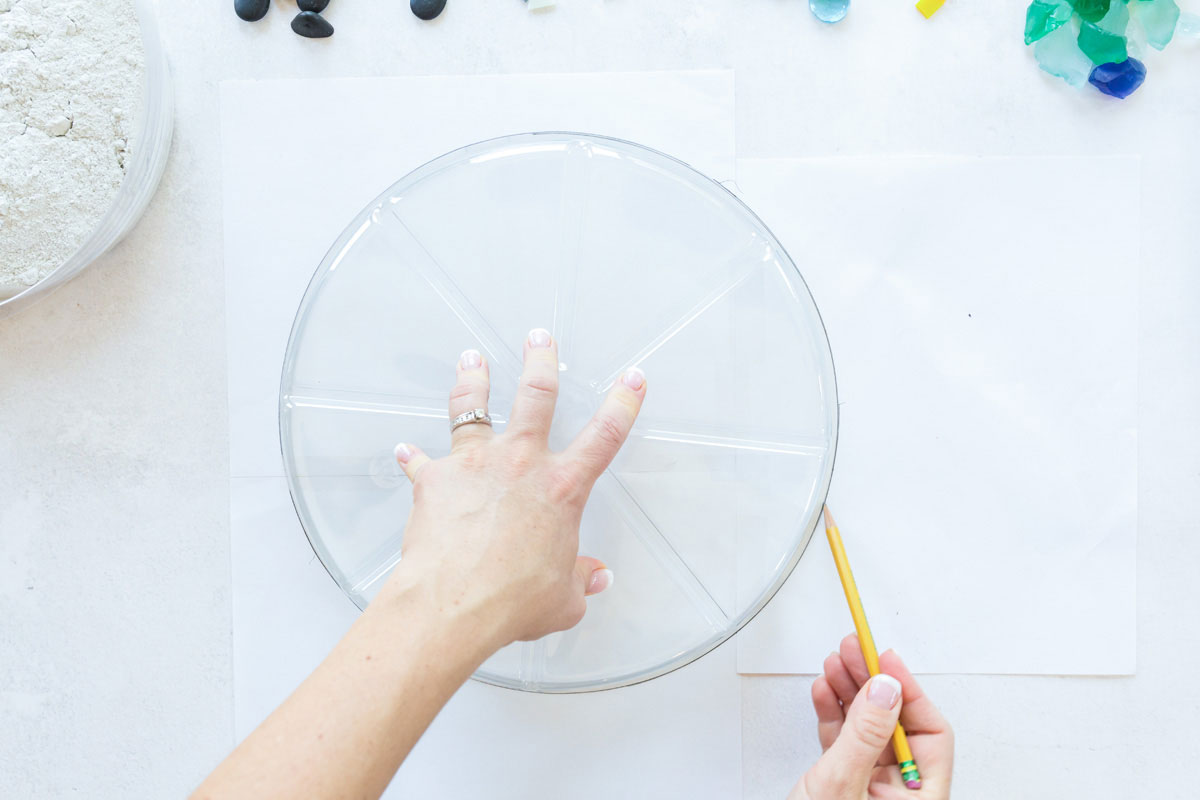
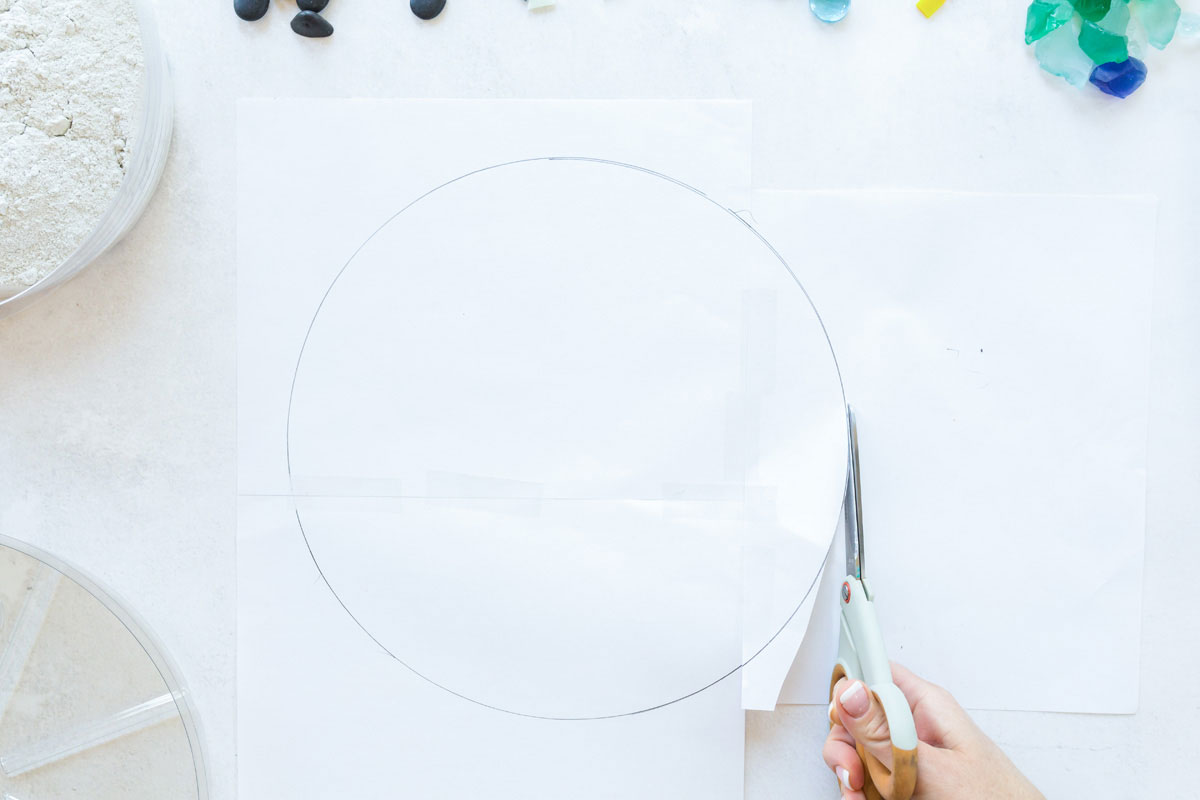
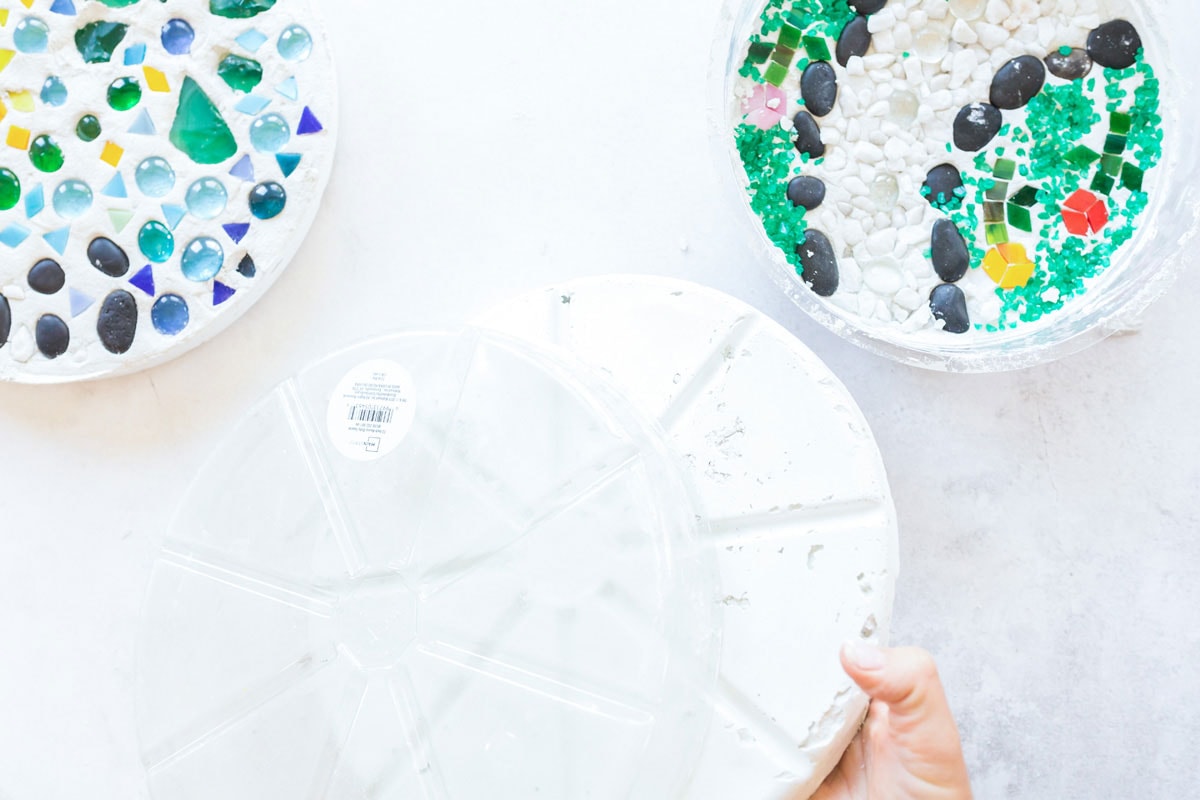
- Trace the shape of your mold (we used Plastic flower pot saucer) on scrap paper using a pencil.
- Cut out the circle.
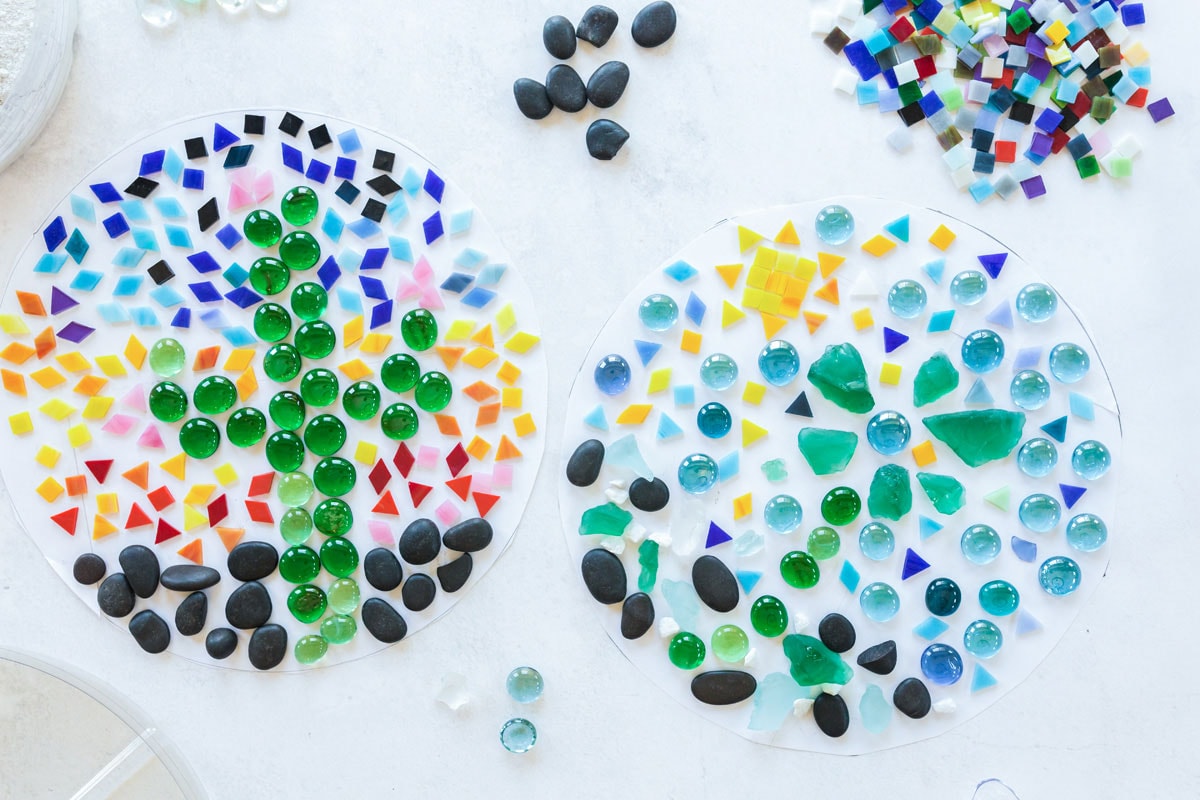
- Sketch out your design by placing your ornaments on scrap paper.
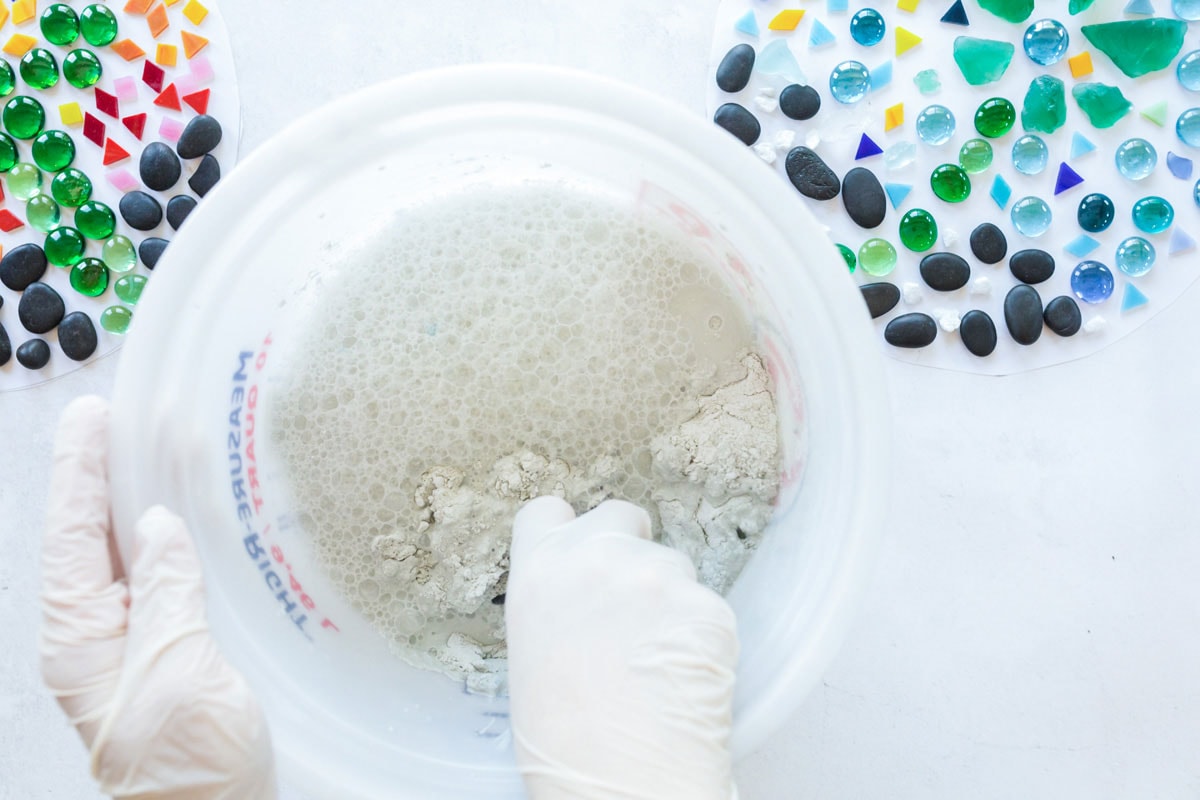
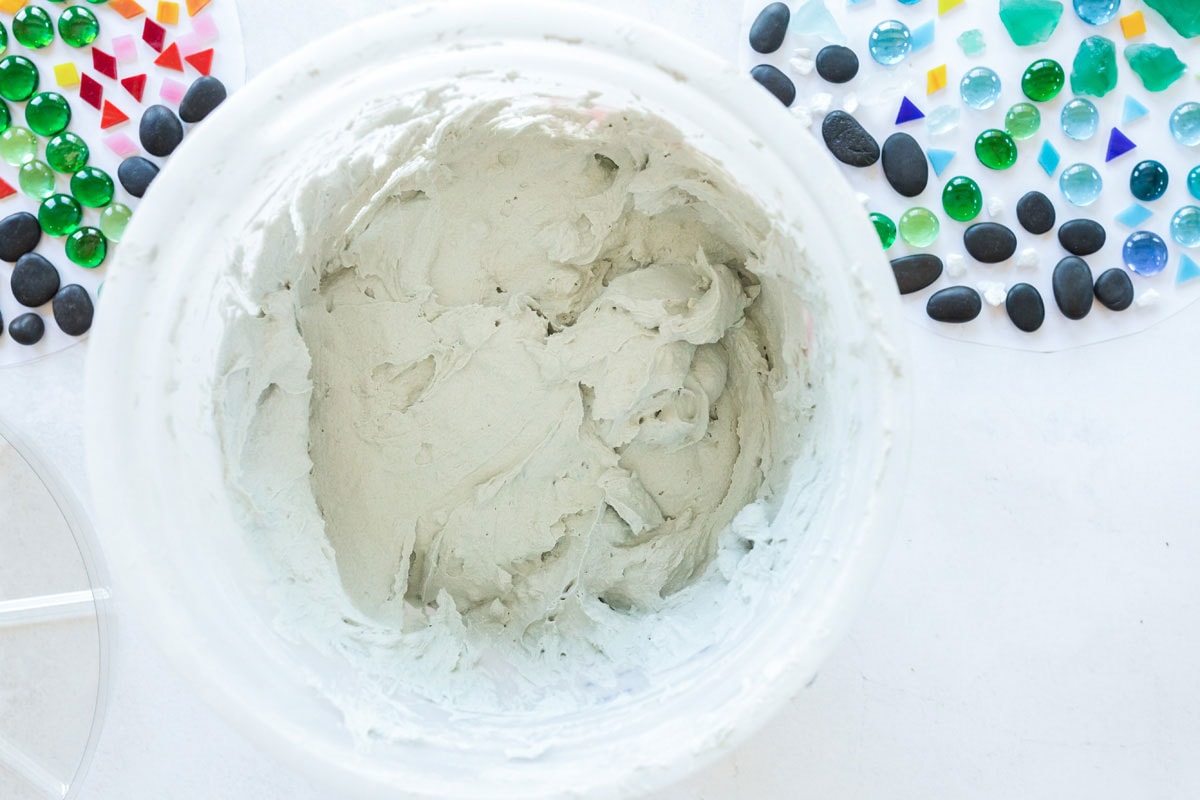
- Once you’ve finalized your design, mix it up Mortar Follow the manufacturer’s directions and pour about 1- 1 1/2″ into the mold. Tap the side of the mold to release any air bubbles. Allow the mortar to “set” in the mold so that you can gently press your decoration into the material. A good rule of thumb is to mix more mortar than you think you need so that each mold is filled to 1 or 1 1/2″ high.
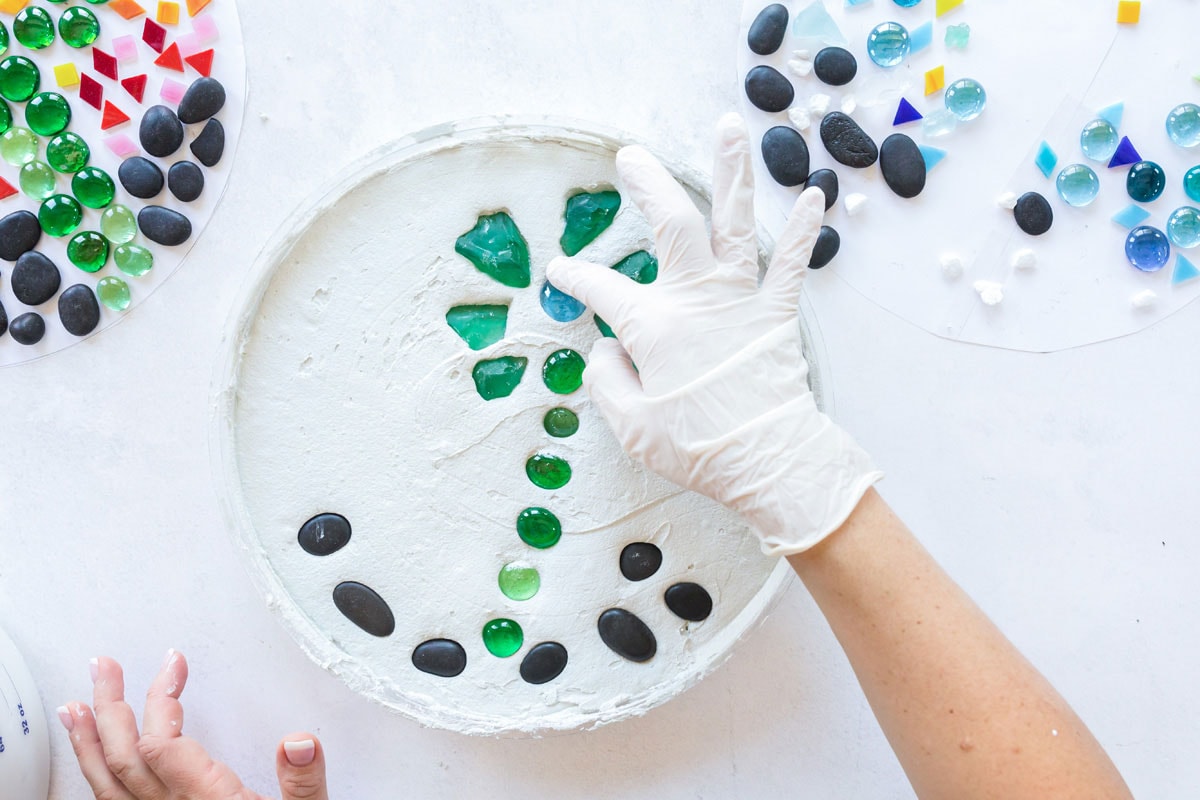
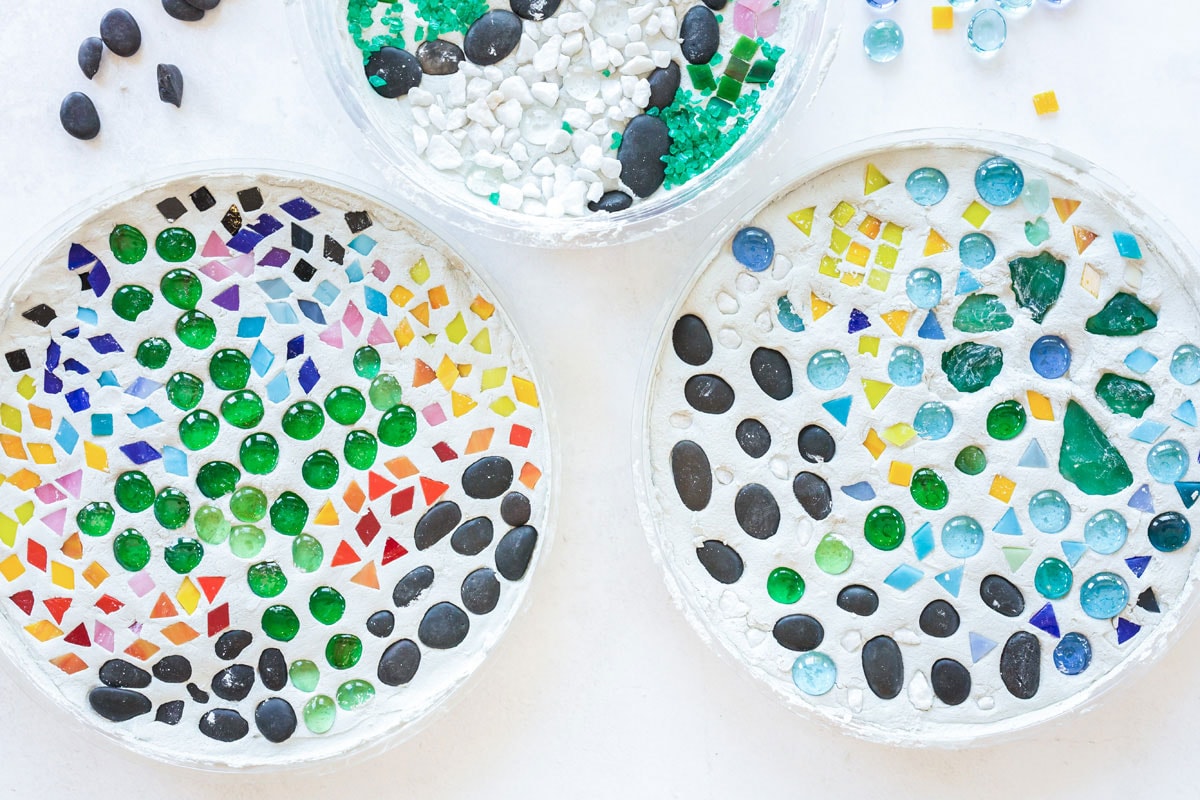
- Add your embellishments to the mortar by removing it from the scrap paper, following the design you made, and gently pressing the pieces into the “stuff”. Some mortars set faster than others so be sure to check all your mixing directions so you know ahead of time.
Tip: You can also “draw” the design into the mortar as it sets – use your pencil! Test in a corner first and leave at least a 1″ border around the edges. Drawing too close to the edge can cause cracking.
- Once all of your decorations are in place, let the entire piece dry thoroughly in a warm, dry place. 24 hours is a safe bet although some may be dry before that.
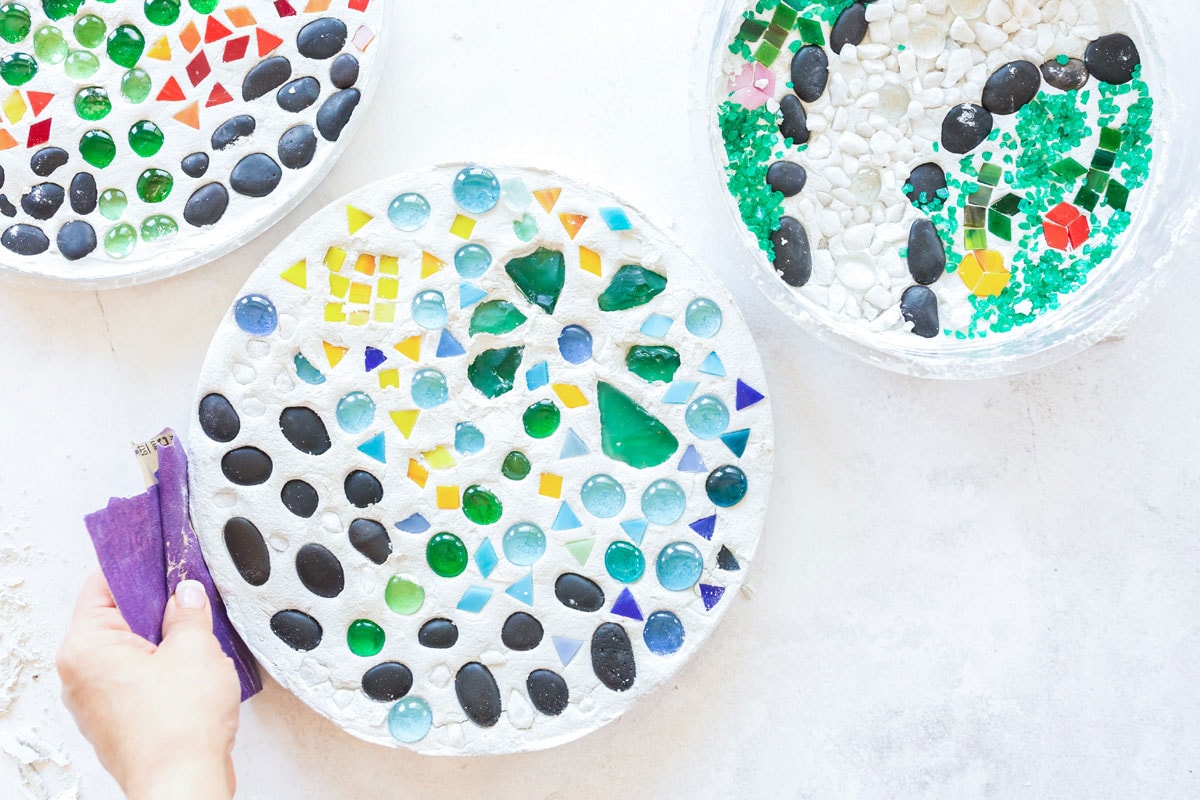
- Once dry, carefully remove the stones from the mold and, if necessary, use some Sandpaper To remove any rough edges (extrude these).
- This step is optional because the concrete will hold up better on the outside. But you can coat your stones with a layer if you like Outdoor Formula Mod Podge.
Expert crafting tips
- After arranging your design in step #2 use your phone to take a picture. This way you can return to the photo in addition to using the template. This is helpful if you have a mishap, such as accidentally bumping the template and moving your design.
- don’t do Wash any mortar down your sink! Put the unused mortar in a plastic bag and throw it away. Use a hose or bucket of water outside to wash hands and equipment.
- If you are working with young children, you should premix the mortar. Follow the manufacturer’s mixing directions.
- You can make a batch of stones from a 10-pound container of Quick Set Mortar, making this a great group project (like Summer camp Or scouts, or even with the elderly!).
- Use whatever decorations you have and look in your recycle bin for plastic containers that you can use as molds.
- If one has sensitive skin, I would recommend wearing it Plastic gloves Because mortar can dry out the skin.
- Use your imagination! An old plastic ice cube tray will make 12 perfect stepping stones Fairy garden (I only pour this in about 1/2″ thick due to its size)!
- Save the mold to reuse to make more stones! Do not re-use molds for food preparation/storage.

Garden stones are a great way to use beautiful tiles and decorations you may have around the house to create a unique piece of outdoor artwork! Sprinkle some glitter on top of the design while the mortar is still setting for extra shine!
More garden crafts
DIY Garden Stepping Stones
Garden stones are a great way to use beautiful tiles and decorations around the house and create a unique piece of outdoor artwork at the same time!
supplies
- Quick set mortar
- Mold for stone shape An old pie tin, a round plastic container, a plastic flowerpot saucer, something that is strong but flexible
- Embellishment for stone design: Shells Tile pieces, sea glass, beads, small stones, glitter, buttons
- Outdoor Mod Podge Sealer Optional
Instructions
-
Trace the shape of your mold onto scrap paper using a pencil.
-
Sketch out your design by placing your ornaments on scrap paper
-
Once you’ve finalized your design, mix the mortar following the manufacturer’s directions. Tap the side of the mold to release any air bubbles. Allow the mortar to “set” in the mold so that you can gently press your decoration into the material. I would mix enough material so that you have a stone about 1- 1 1/2” thick.
-
Add your embellishments to the mortar by removing it from the scrap paper, following the design you made, and gently pressing the pieces into the “stuff”. Some mortars set faster than others so be sure to check all your mixing directions so you know ahead of time. Note: You can also “draw” the design into the mortar as it sets – use your pencil! Test in a corner first and leave at least a 1″ margin around the edges. Drawing too close to the edge may cause cracking.
-
Once all of your decorations are in place, let the entire piece dry thoroughly in a warm, dry place. 24 hours is a safe bet although some may be dry before that.
-
Once dry, carefully remove the stones from the mold and, if necessary, use some sandpaper (do this outside) to remove any rough edges.
-
This step is optional because the concrete will hold up better on the outside. But if you like you can coat your stones with a layer of Outdoor Formula Mod Podge.
Expert tips and FAQs
- After arranging your design in step #2 use your phone to take a picture. This way you can return to the photo in addition to using the template. This is helpful if you have a mishap, such as accidentally bumping the template and moving your design.
- don’t do Wash any mortar down your sink! Put the unused mortar in a plastic bag and throw it away. Use a hose or bucket of water outside to wash hands and equipment.
- If you are working with young children, you should premix the mortar. Follow the manufacturer’s mixing directions.
- You can make a batch of stones from a 10-pound container of Quick Set Mortar, which makes this a great group project (like Summer camp Or scouts, or even with the elderly!).
- Use whatever decorations you have and look in your recycle bin for plastic containers that you can use as molds.
- If one has sensitive skin, I would recommend wearing it Plastic gloves Because mortar can dry out the skin.
- Use your imagination! An old plastic ice cube tray will make 12 perfect stepping stones Fairy garden (I only pour this in about 1/2″ thick due to its size)!
- Save the mold to reuse to make more stones! Do not re-use molds for food preparation/storage.
This post originally appeared here on July 20, 2022.


