
Home decorator and content creator Grace H is one of Ideal Home’s newest Open House contributors, sharing her thoughts on colorful home design, mixing vintage pieces with new, and creating spaces full of personality. Check out the rest of his articles here.
I always dreamed of a period home. You know the one: flickering fireplaces, ornate cornicing, high ceilings and… original wood sash windows. When we bought our Edwardian semi in Manchester four years ago, we got three out of four. the fourth? Ugly, stark white uPVC windows that really bothered me.

Spoiler alert: it didn’t happen. Here’s how I hacked my way to high-end windows for the price of a fancy bunch of flowers.
Image 1 No 2


Phase 1: “Low-Stakes” Trials
I started small with a downstairs loo. It was the perfect test subject as the bright white plastic screamed against the rich green walls.
i chose Zinser Olcott Exterior in Satin Black Because it required minimal preparation (I’ll do anything to get out of sanding!). A quick wipe with sugar soap, three thin coats with a brush, and a few hours of drying and the results were in: a complete transformation.
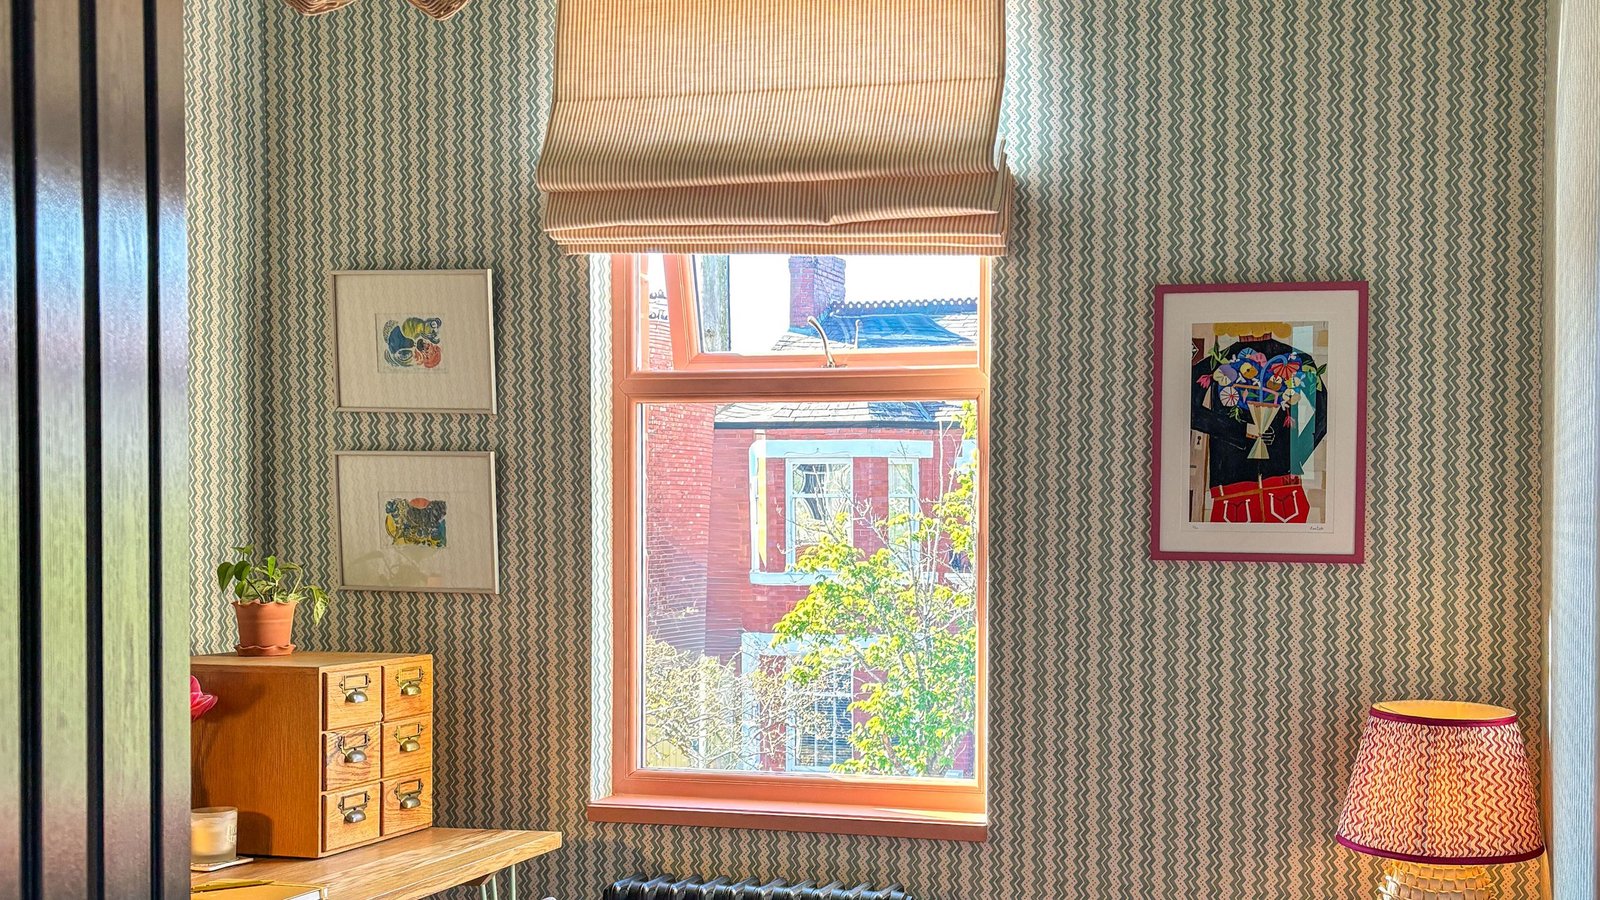
I immediately moved on to the landing window, but the white handles still confused me, so I ordered a cheap multi-pack of black handles and my glow up was complete.

(Image credit: Grace H)
Phase 2: The Magician’s Trick
Once bitten by this nifty DIY bug, I realized black would be too harsh for a living room.
I wanted the window to disappear, not dominate, so I gave the bay window two base coats of AllCoat, then topped with two coats of the same eggshell. color Used on my woodworking.
It worked like a charm. Instead of screaming, “Look at me, I’m plastic!” The windows blended seamlessly into the walls.

(Image credit: Grace H)
Phase 3: The “Pear Drop” Pivot
The plastic handles are the ultimate giveaway (the black ones you can only about getting away from so dark). I knew painting them wouldn’t last with everyday use but it was hard to find fancy brass handles that weren’t too shiny or yellow (and I ordered and returned a lot) or to fit the existing holes without over-drilling.
Finally, the internet gods were in my favor and I stumbled across Mila Heritage pear drop espagnolette handle in antique bronze. There was one problem: it was designed for a side-opening window and I… wasn’t.
I assigned the mechanism research to my second part, and it turns out that replacing the internal mechanism is actually incredibly easy. It boggles my mind how different Windows look.

(Image credit: Grace H)
Phase 4: Full house glow-up
Now there was no question in my mind that every interior window and door deserved the same treatment, and I discovered that you could get an exact paint color to match any brand.
Instead of going in all guns blazing (my default mode), I ordered a color match for the kitchen/diner to test how good the match really was. I was very impressed and over the course of a few months I ordered color matching paint for each room as well as more handles and I can honestly say I changed the overall feel of each room and it was only a £25 tin of paint.

(Image credit: Grace H)
Verdict: Does it really hold up?
In a word: yes. We have a small scratch mark on the living room window (which I could touch up in a jiffy if I wasn’t too lazy) and the rest looks fab and my other half is an aggressive cleaner.
My only regret? For four years it has lived with white uPVC. Well, that and not taking enough “before” photos.
Image 1 No 2


My “cheat sheet” for uPVC painting
- Preparation is king: Don’t ignore Sugar soap. You need to remove every trace of grease to bond the paint.
- The Magic Paint: Zinser Olcott (water based) is the gold standard. It acts as a primer and topcoat in one and the color can be matched to any shade.
- Thin coats: Don’t try to cover it all at once. Three thin coats will always look more professional than one thick, dull one.
- Hardware: Changing the handles is a 50% change. Don’t skip this step!
Ultimately, painting your uPVC bridges the gap between modern practicality and period aesthetics without the eye-watering price tag of new timber frames.
For the price of a tin of paint and a few hours of your time, you can stop living with your windows and start loving them. If you’re on the fence – get out the brush. Honestly, it’s the best £25 you’ll ever spend.


