
Sharing is caring!
This sweet thrift store tray makeover is an easy way to create seasonal spring decor that looks upscale while keeping the cost low.
With a little paint, a few decorative details and a second-hand tray, you can create a charming piece for spring decorating, cottage-style interiors or soft farmhouse home decor.

This DIY tray makeover works for beginners and experienced crafters alike. You can customize colors, finishes and bunny accents to suit your space, whether you prefer neutral vintage tones or pastel spring style.
I’ll walk you through the process with ideas for personalizing your tray and making it look professionally styled. Let’s get started!
Why you’ll love this thrift store tray makeover
- Made with easy-to-find thrift store materials and budget craft supplies
- Perfect for spring decorations, Easter displays or gift decorating ideas
- Simple enough for beginner DIY and upcycling projects
- Easy to customize with a farmhouse, shabby chic or vintage-inspired finish
Join our crafting community To find more DIY and upcycled craft ideas. It feels good to reuse and upcycle!
Materials needed
- Thrifted silver tray
- Chalky white paint
- Paint brush
- Rhinestone ribbon trim
- Decoupage paper
- Mod Podge
- Scissors
- EasyPress Mini
- Hot glue gun

How to make a bunny themed thrift store tray makeover
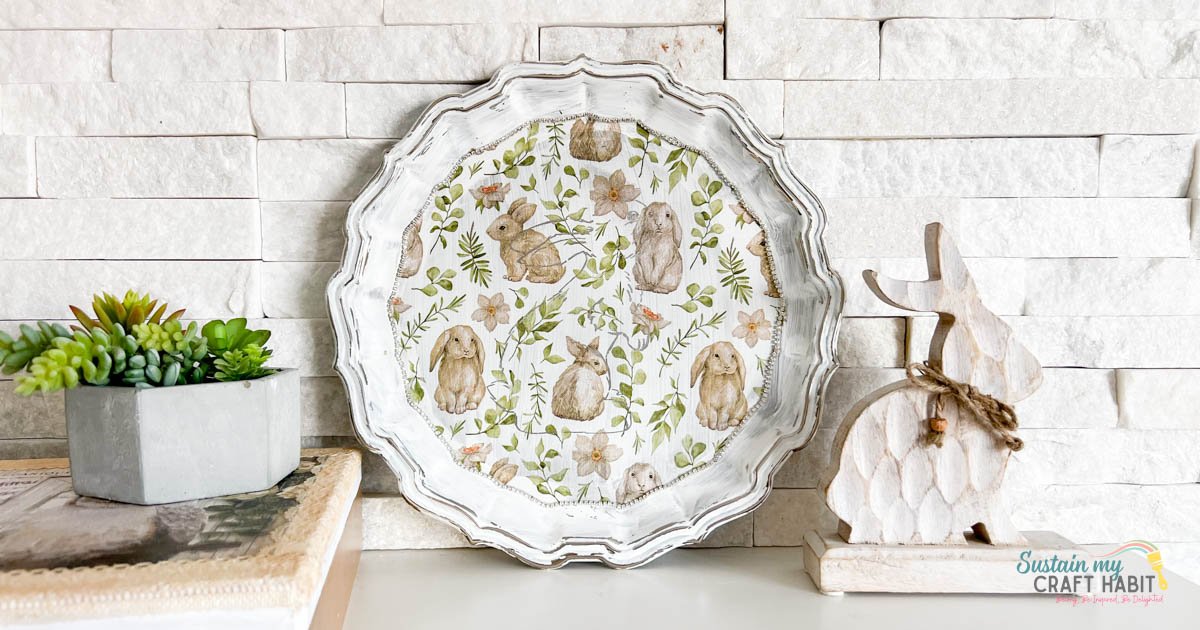
Apply a coat of white paint to the silver tray – a thick coat in the center of the tray and a lighter dry brush on the outer edges.

When dry apply a coat of Mod Podge to the center of the tray.
Press the decoupage paper onto the top of the tray.
Apply gentle pressure with an iron (we use a small EasyPress Mini) to heat the paper without wrinkling.

Trim the excess paper that extends into the center of the tray.

Seal the tray with varnish and leave it to dry completely.


Finally, with a hot glue gun, bead along the outside edge of the paper and press the rhinestone trim in place covering the cut edges.


Select the right tray
Wooden trays are the easiest to work with as they take paint well and can be lightly sanded for a smooth finish.
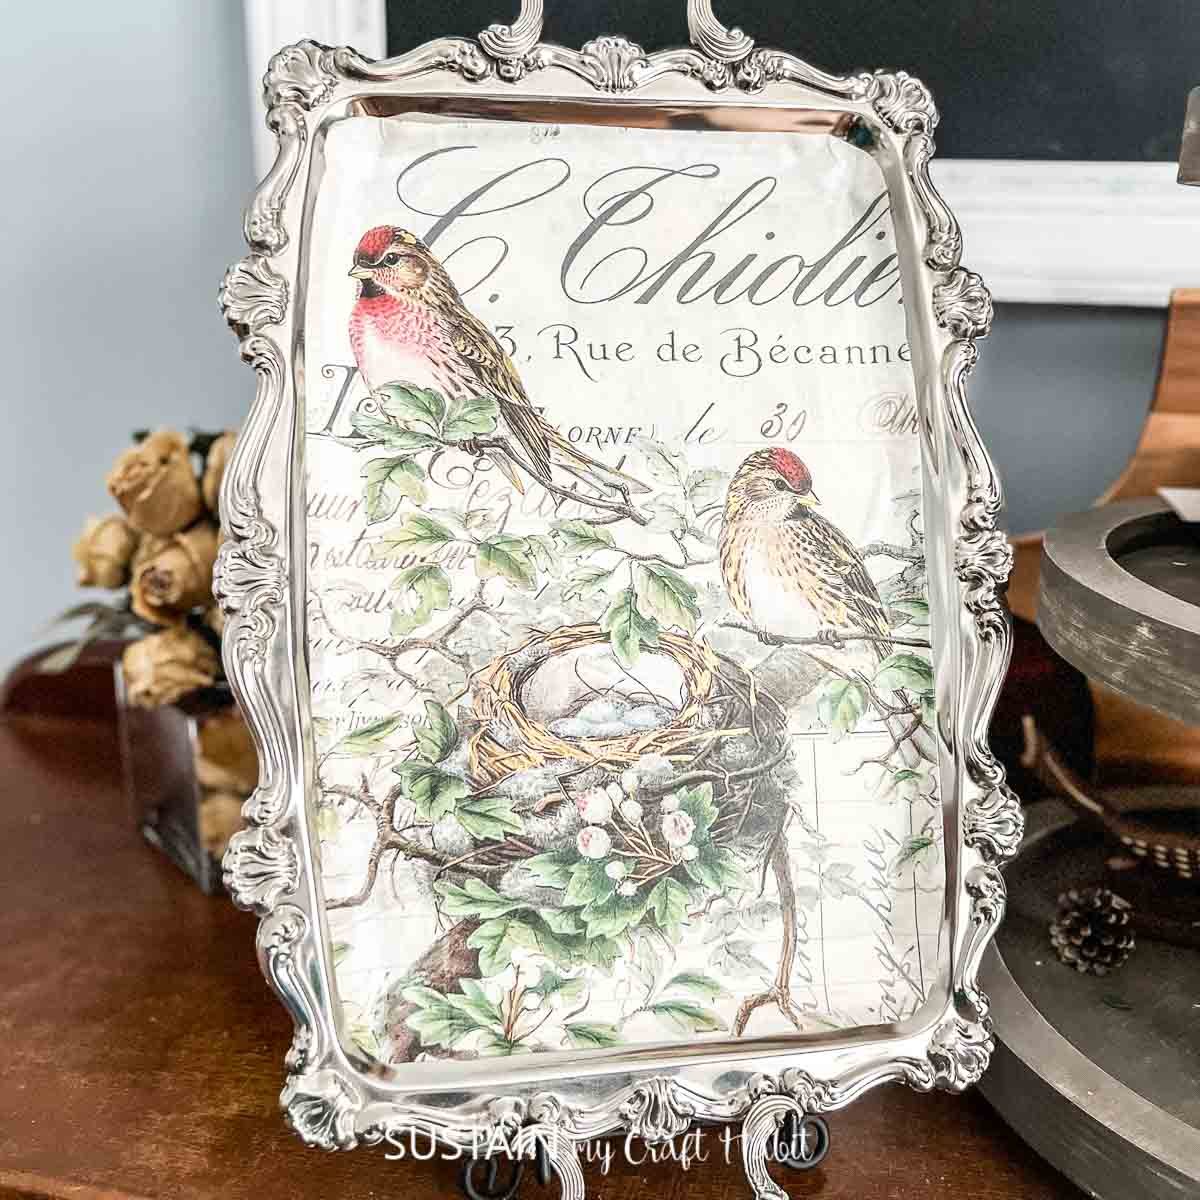
But we love using thrifted metal and silver trays because of their unique shapes and expensive look.
Look for trays with handles or decorative edging for a more boutique look.
The best paint colors to use
Soft neutrals help create that high-end home decor look. Try:
- warm white
- Soft sage green
- Blush pink
- Greige or taupe
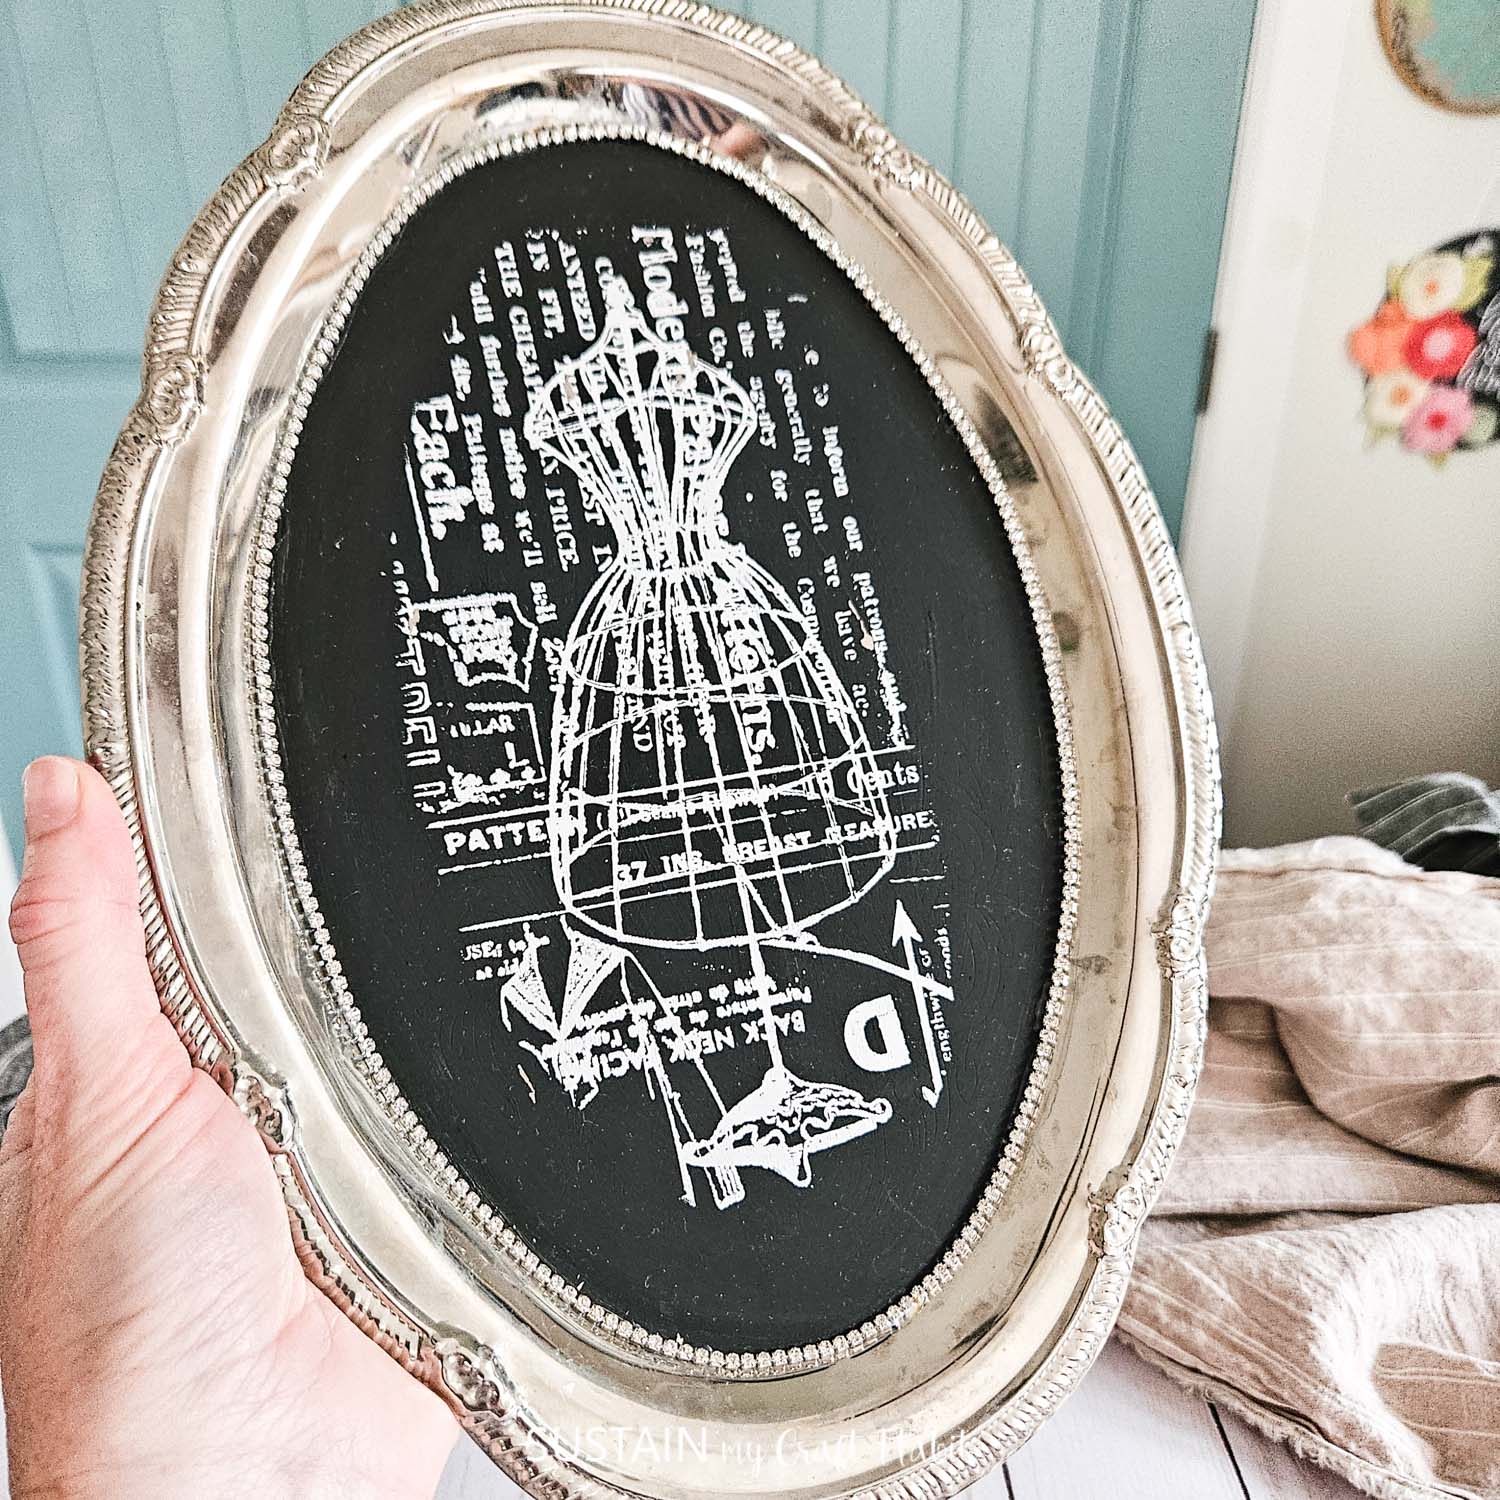
- Matte black for modern farmhouse style
Dry brushing a slightly lighter shade on the edges can help create a more expensive-looking weathered finish.
A few troubleshooting common problems
The paint looks streaky
Use thin layers instead of one heavy coat. Matte furniture paint or chalk paint usually gives a smooth finish.
Decoupage wrinkles
Apply a thin layer of adhesive and gently smooth the paper from the center outwards using a soft brush or plastic card.
The tray scratches easily
Seal the prepared tray with a clear matte topcoat or furniture wax to protect the surface.

How to display your finished project
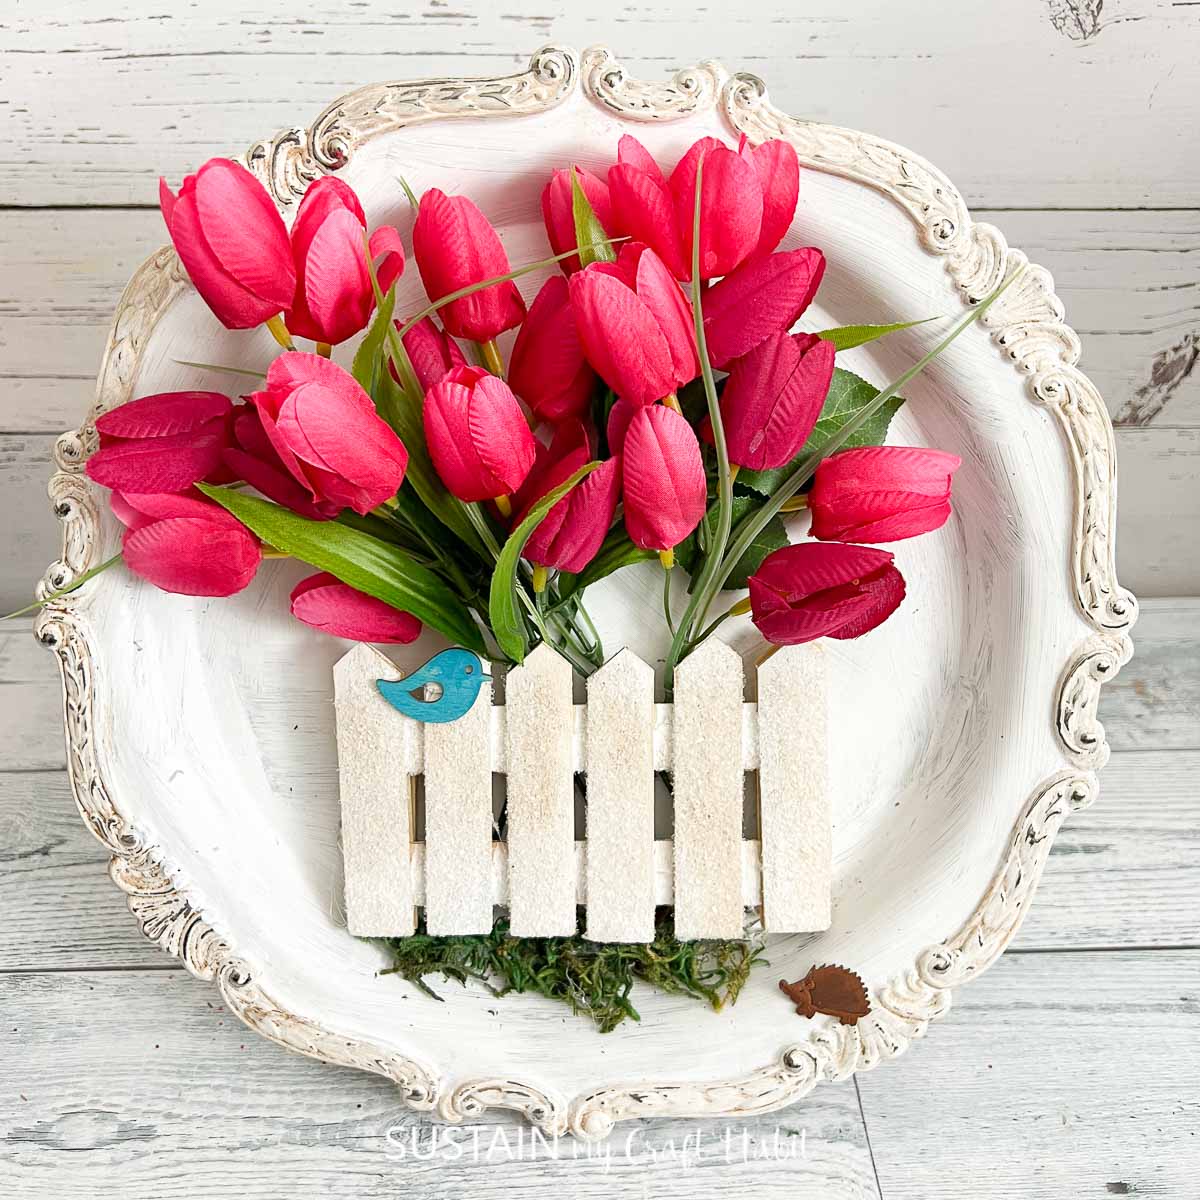
This special tray works beautifully as a makeover seasonal centerpiece. Place it on the dining table with candles and fresh flowers for an elegant home decor idea.
You can also style it on a coffee table with stacked books and soft pastel accents for a cozy cottage-inspired display.
If you enjoy decorating tiered trays, these larger trays can also anchor smaller seasonal accessories on a console table or kitchen counter.
Beautiful home decorations
A simple second-hand tray can become a charming seasonal feature with a few creative touches and some inexpensive supplies. Whether you prefer farmhouse style, vintage-inspired decor, or soft spring cottage decor, this project is easy to adapt to your taste and space!
More thrift store tray makeovers


Want to get lots of inspiration and money saving ideas for decorating, gifting and crafts? join up here!
like? Pin it for later!

Boutique decorating on a budget: Bunny-themed thrift store tray makeovers
Learn how to DIY a stunning Easter Bunny tray using simple napkin decoupage techniques and paint.
- Thrifted silver tray
- Chalky white paint
- Paint brush
- Rhinestone ribbon trim
- Decoupage paper
- Mod Podge
- Scissors
- EasyPress Mini
- Varnish
- Hot glue gun
-
Apply a coat of white paint to the silver tray – a thick coat in the center of the tray and a lighter dry brush on the outer edges.
-
When dry apply a coat of Mod Podge to the center of the tray.
-
Press the decoupage paper onto the top of the tray.
-
Apply gentle pressure with an iron (we use a small EasyPress Mini) to heat the paper without wrinkling.
-
Trim the excess paper that extends into the center of the tray.
-
Seal the tray with varnish and leave it to dry completely.
-
Finally, with a hot glue gun, bead along the outside edge of the paper and press the rhinestone trim in place covering the cut edges.
Sharing is caring!


