
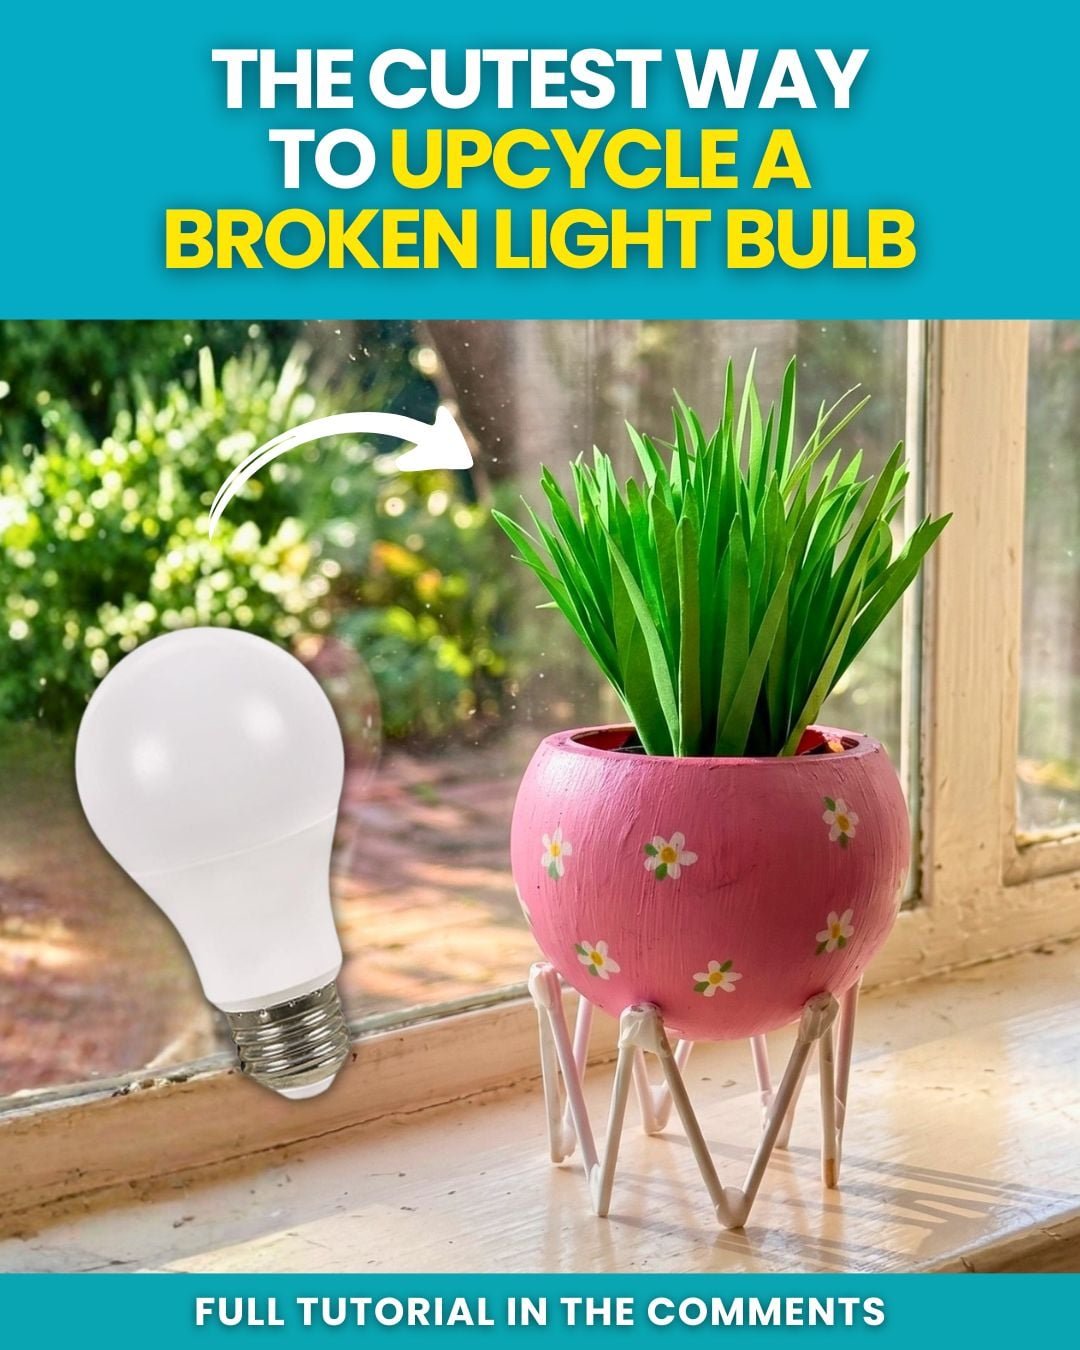
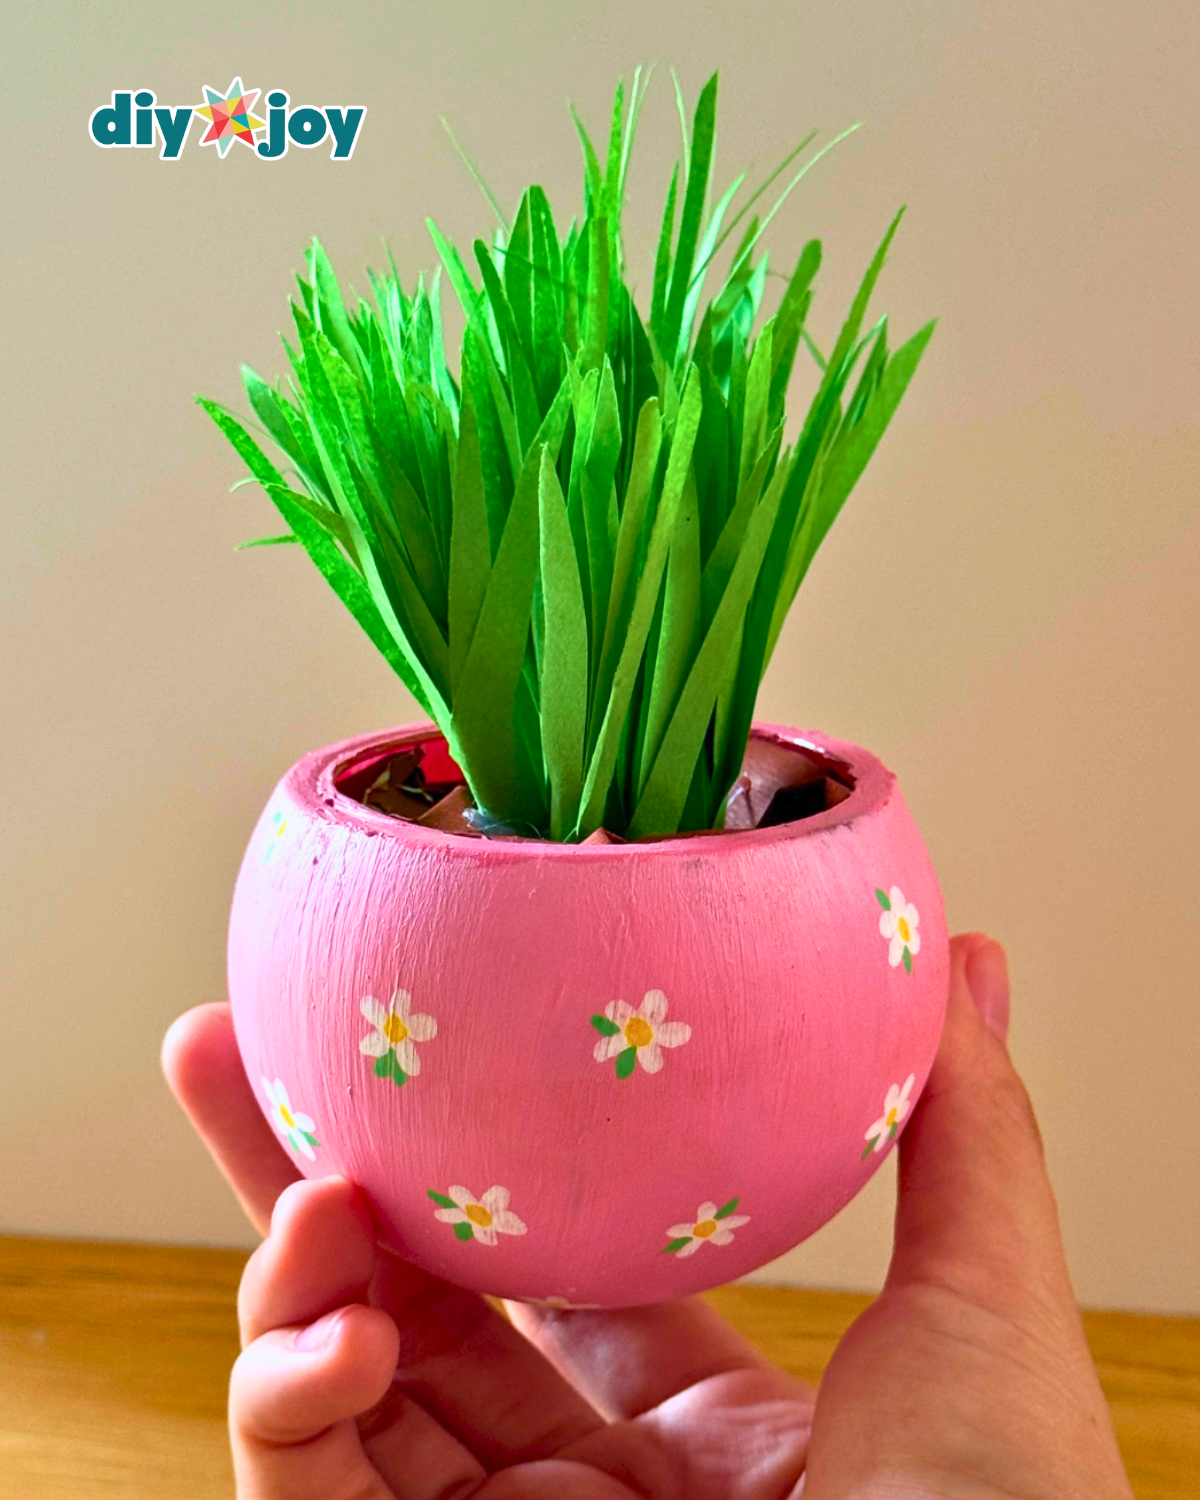
If you’ve ever replaced a light bulb and thought it was a waste to throw away, this easy DIY project is the perfect way to give it a second life. Instead of throwing them out, you can turn those old bulbs into cute mini planters using a round piece of glass as your base. This is an easy, creative way to reuse something you already have while creating a fun and unique piece for your space.
This DIY light bulb mini planter is quick to make and doesn’t require a lot of materials, making it perfect for beginners or anyone looking for a low-effort craft. You can use real plants, small succulents or even artificial or handmade paper plants depending on your preference. It’s great as a desk decoration and works especially well as a light, fresh spring craft idea.
Related: DIY Plastic Bottle Bracelet
What makes this project even more enjoyable is how easy it is to customize. You can paint the bulbs or draw your own designs to match your style, and if you want more control and cleaner details, using POSCA pens makes the process even easier. It’s also a fun activity to try with kids, family, or friends because it’s easy, creative, and doesn’t take much time to complete.
Small, creative, and surprisingly satisfying, this DIY light bulb planter is one of those projects that proves that even the most unexpected items can be turned into something worth keeping.
How to make a light bulb planter
-
Step 1: Separate the glass from the base
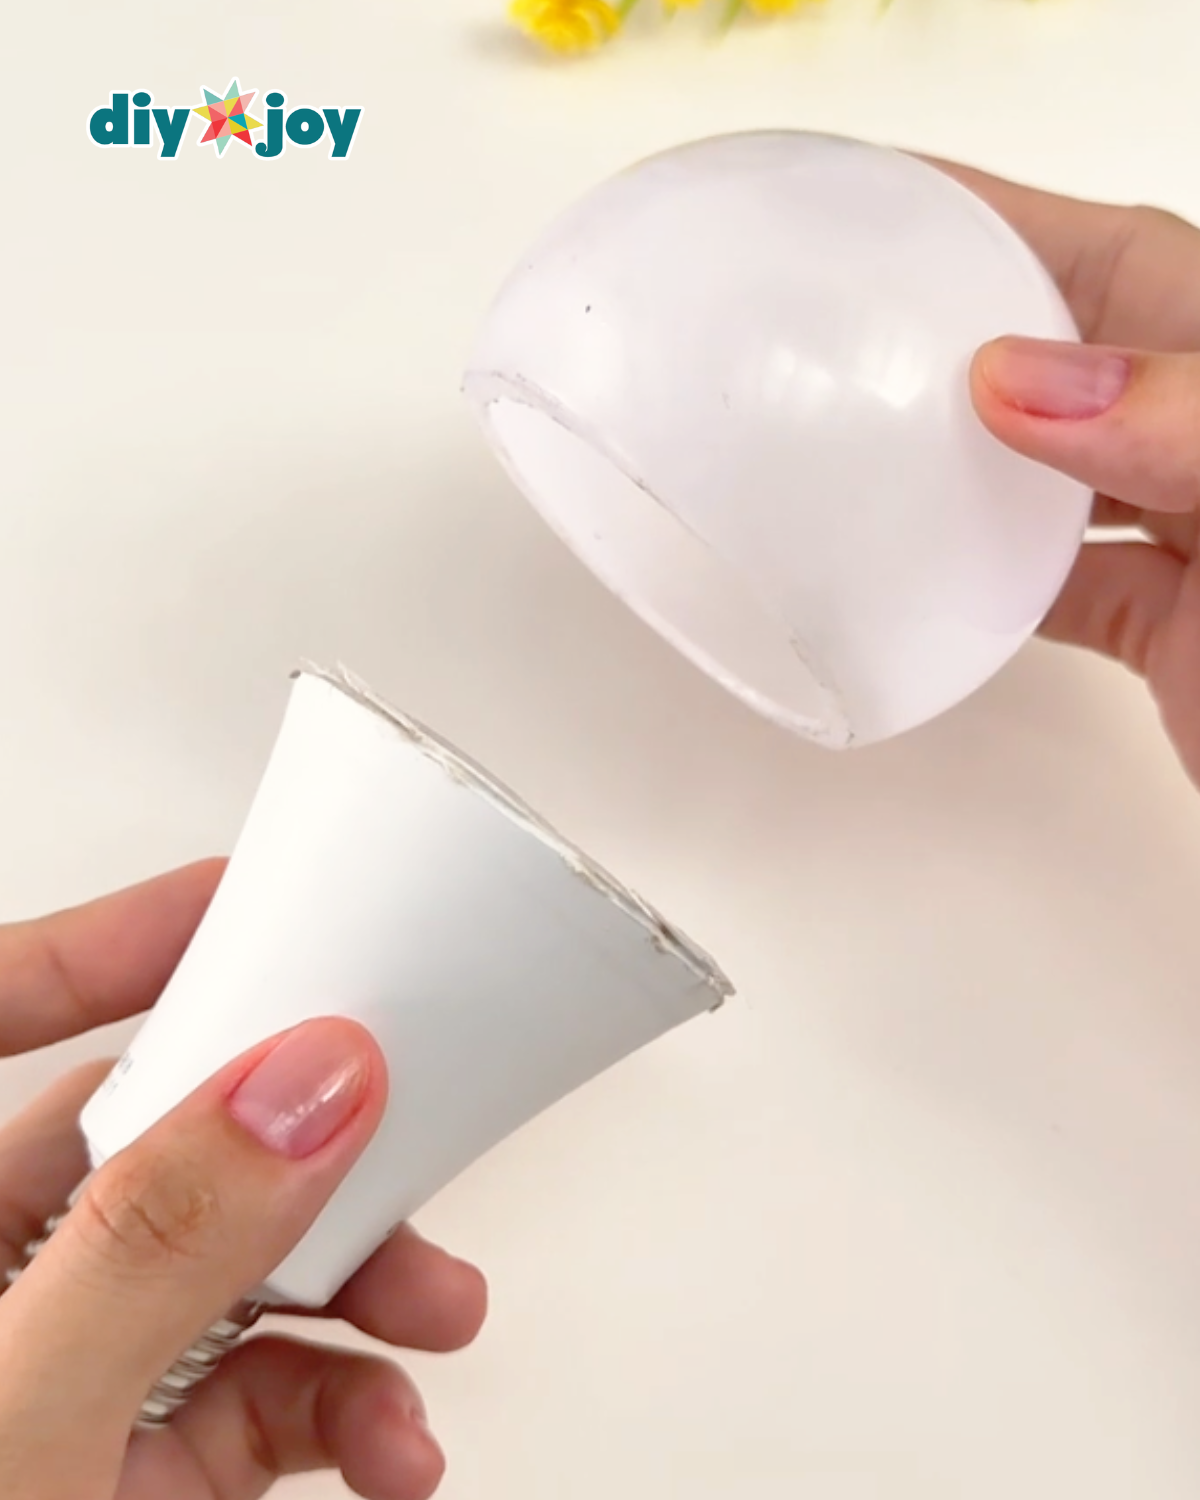
Carefully separate the glass part of the light bulb from its base. -
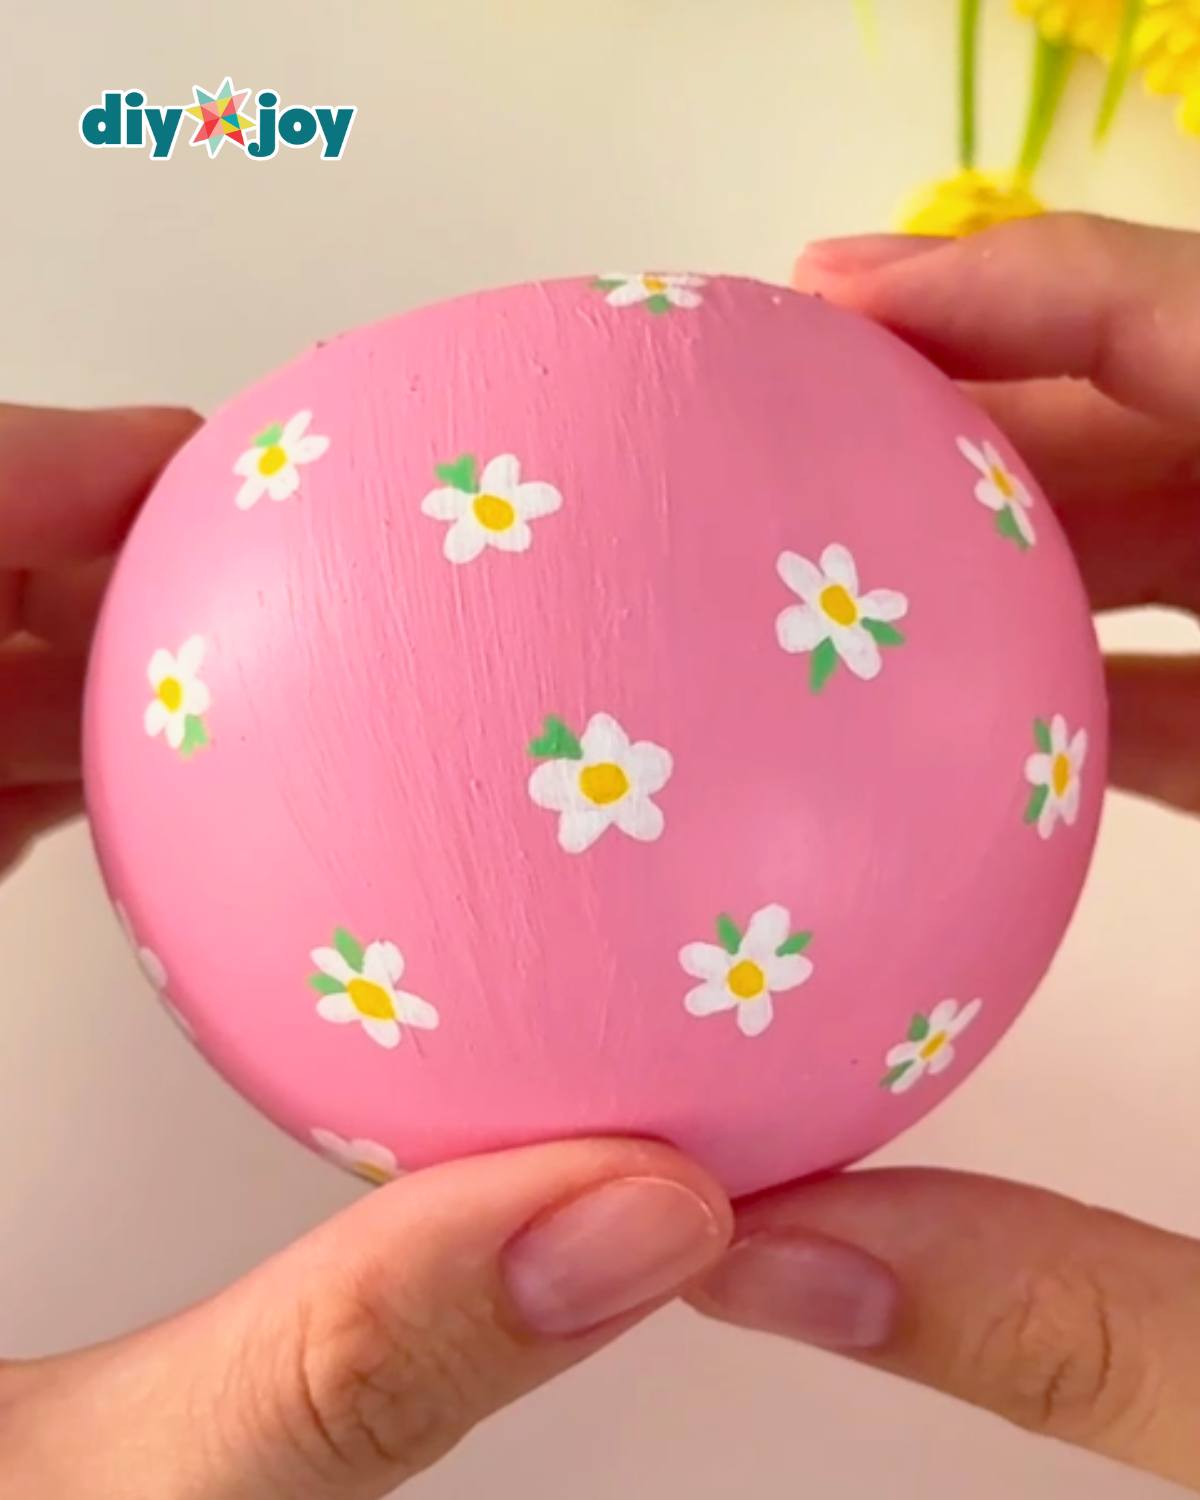
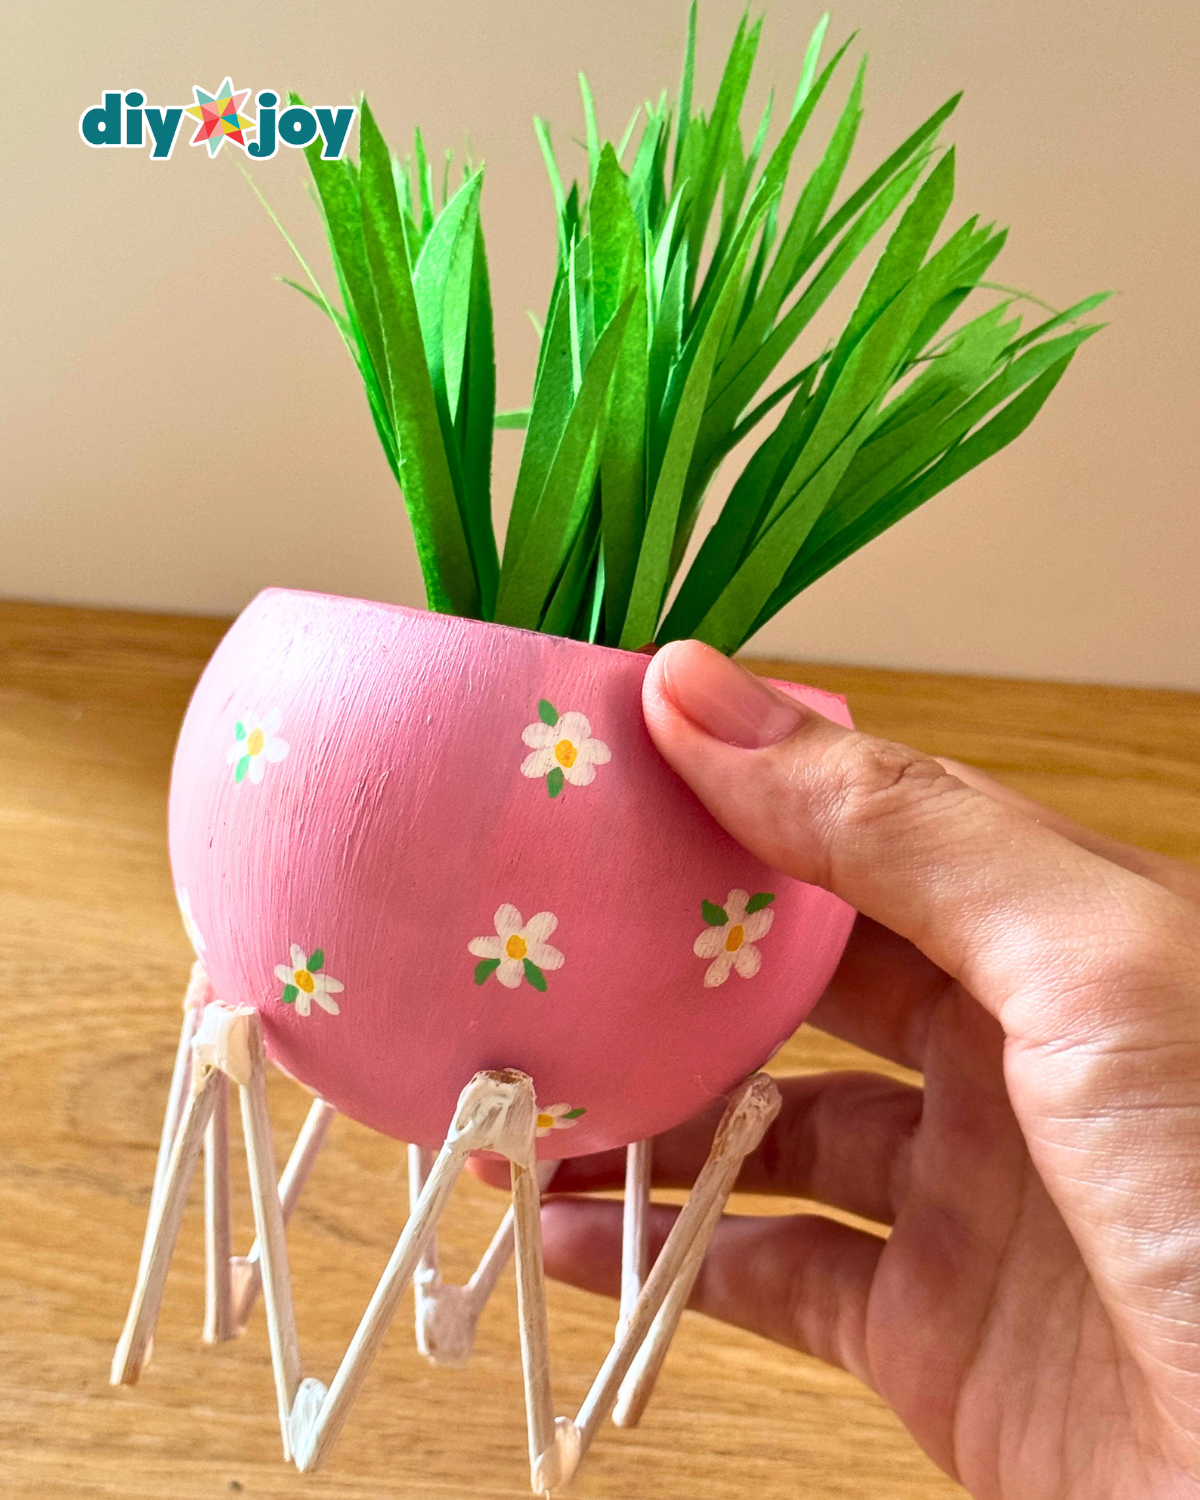
Step 2: Paint and add designs
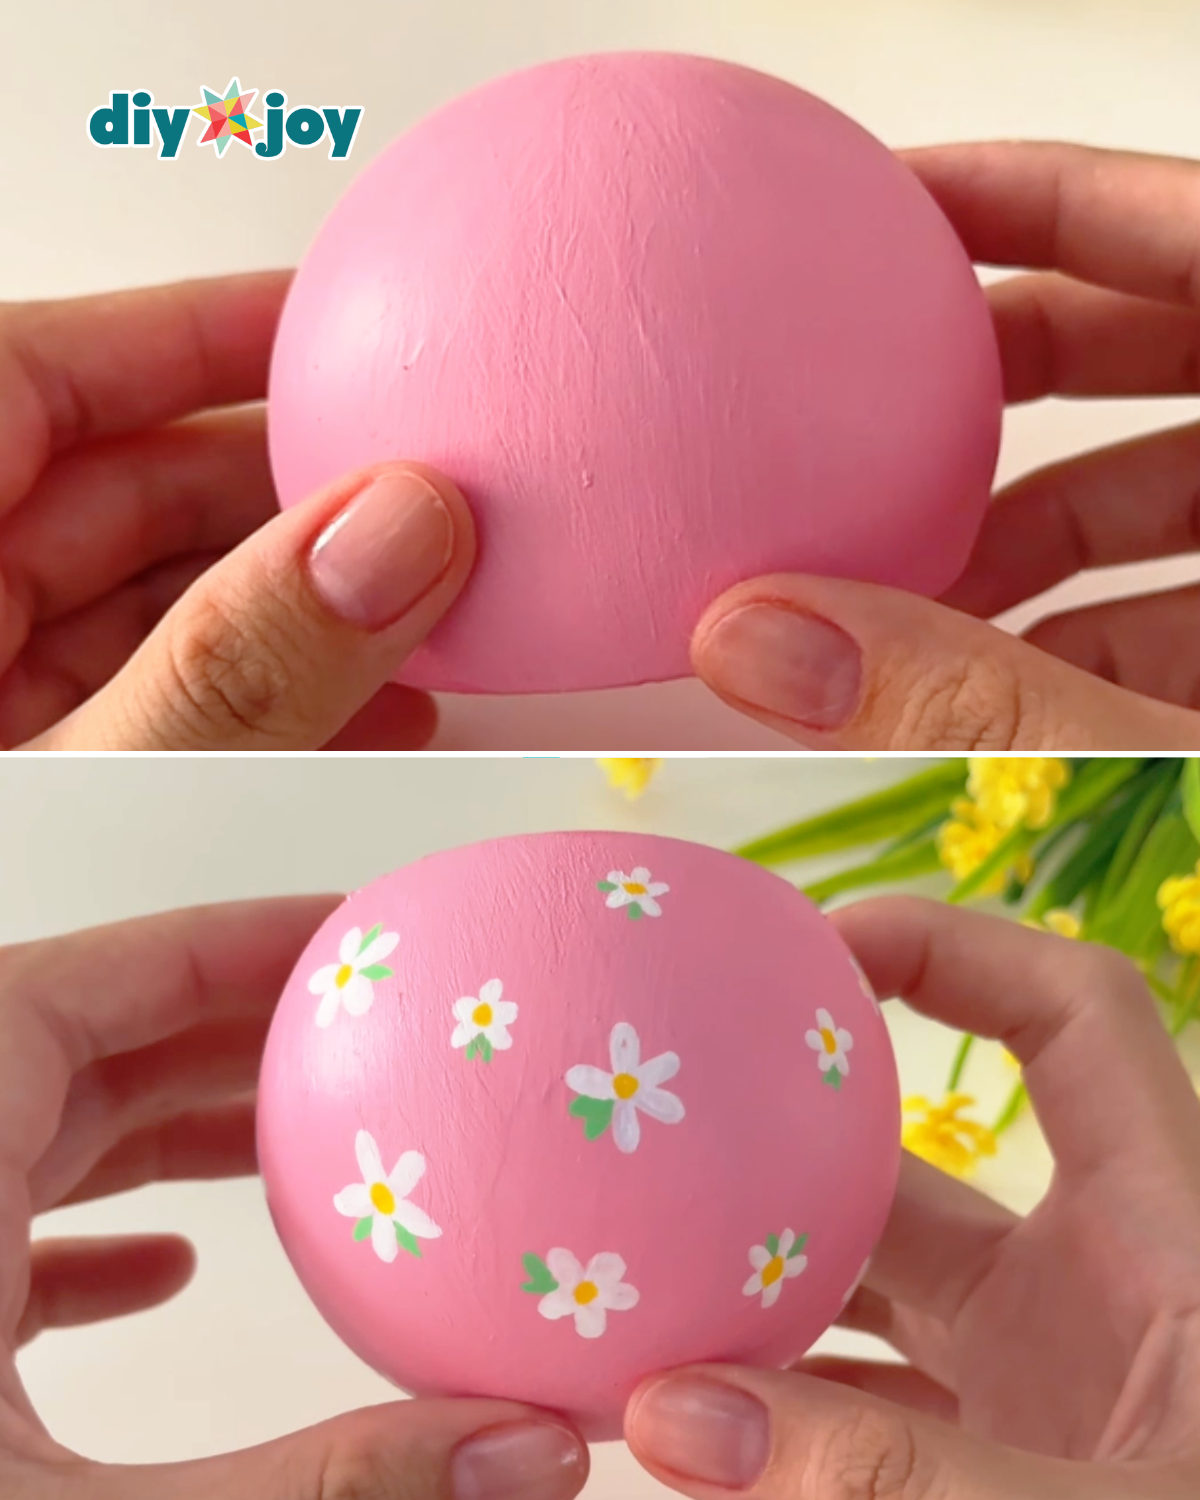
Paint the glass with your desired color, applying another coat if necessary. Once dry, draw the flower design using a poska pen. -
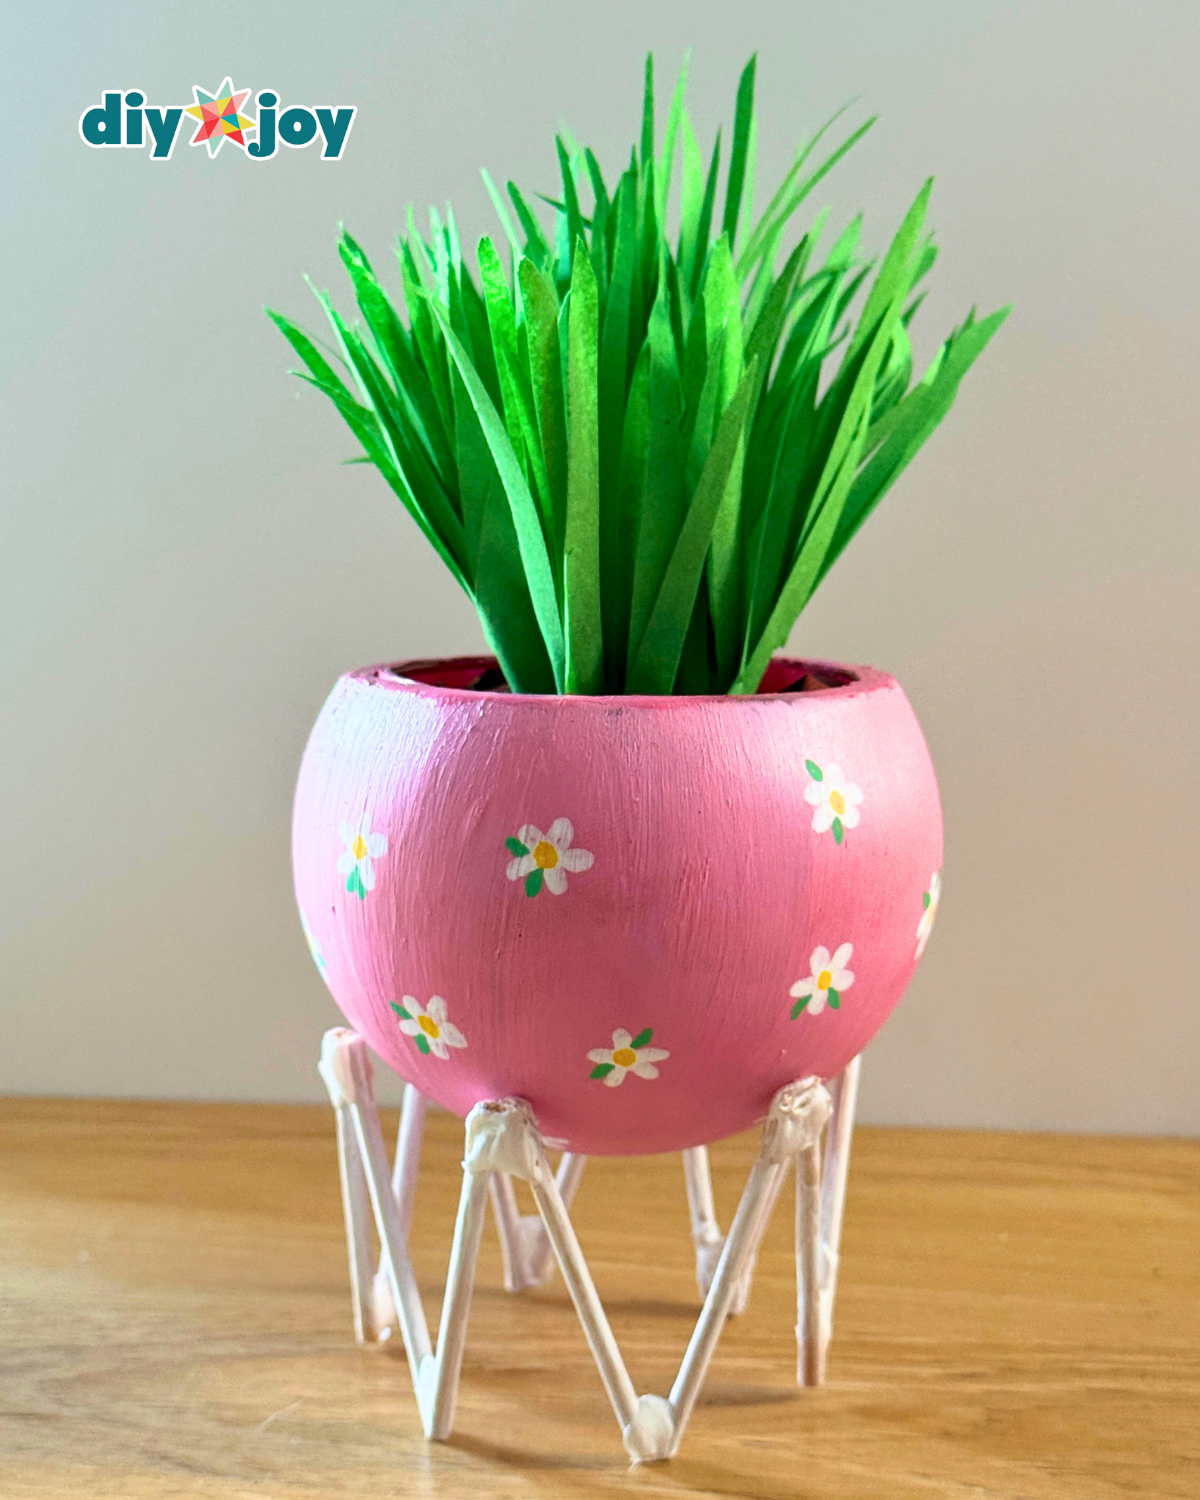
Step 3: Build the planter base pieces
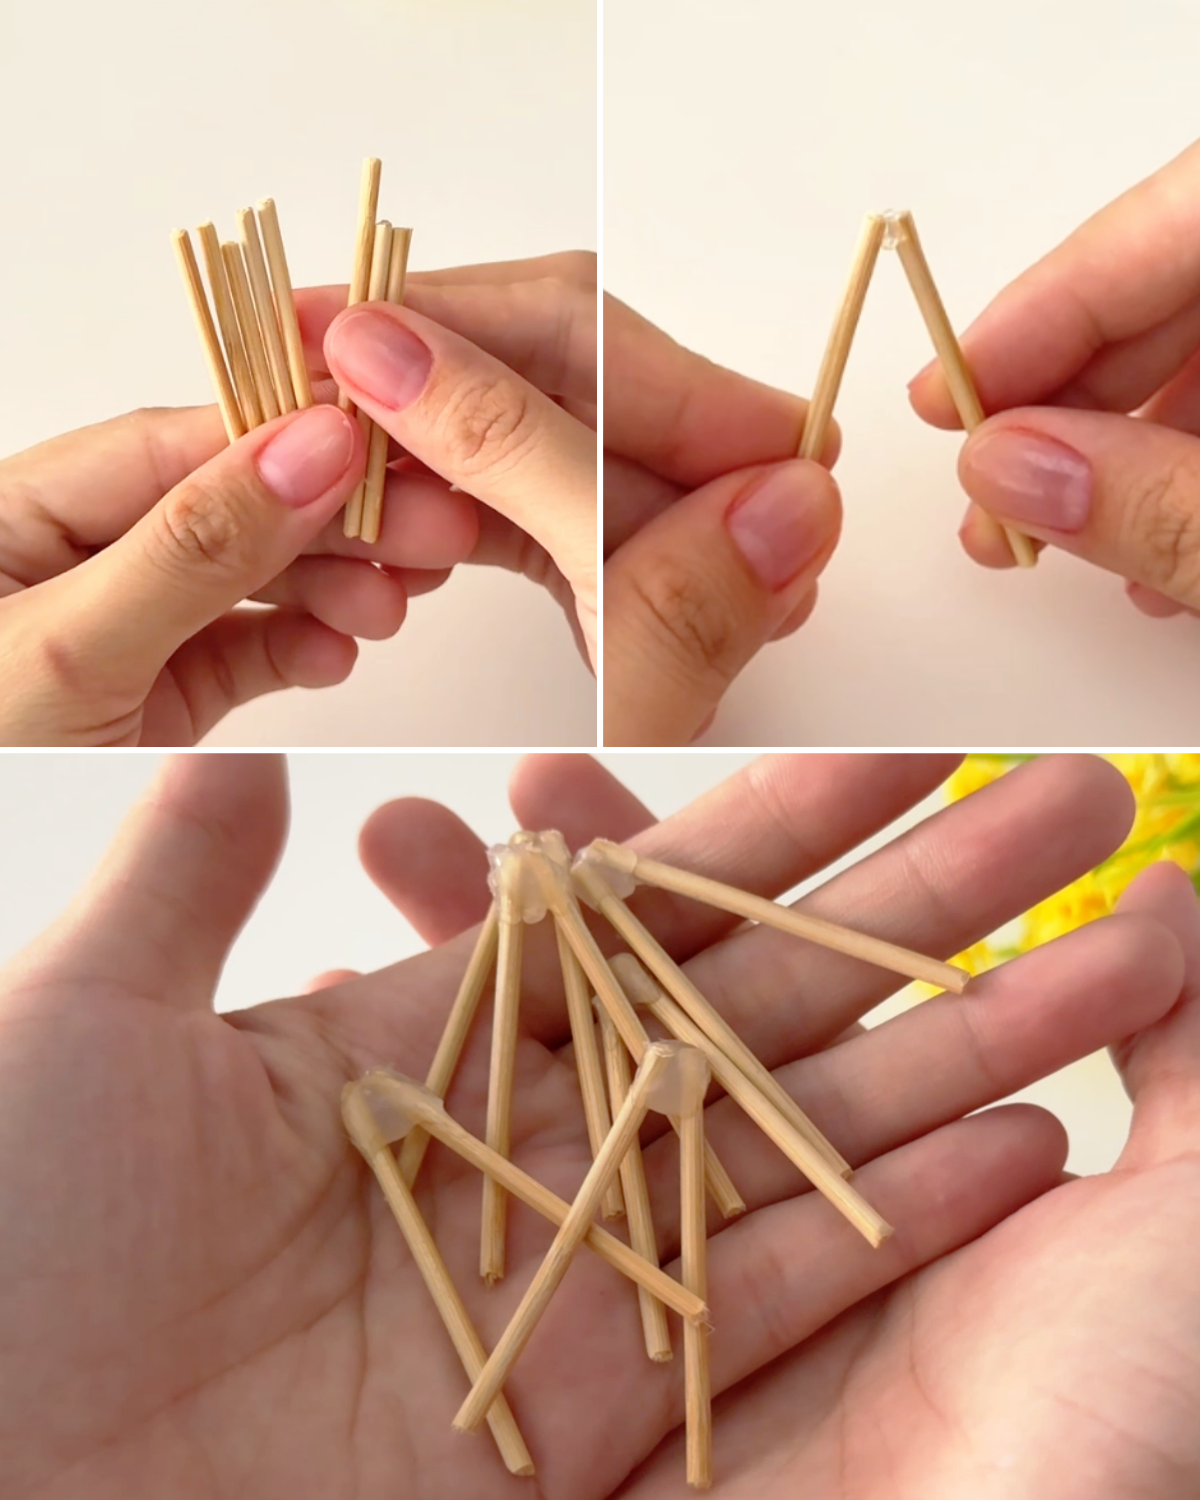
Cut 8 to 10 sticks into about 2-inch lengths. Join them and use hot glue to join the top edges, creating an “A” shape. Repeat this step for all pairs. -
Step 4: Build the planter base
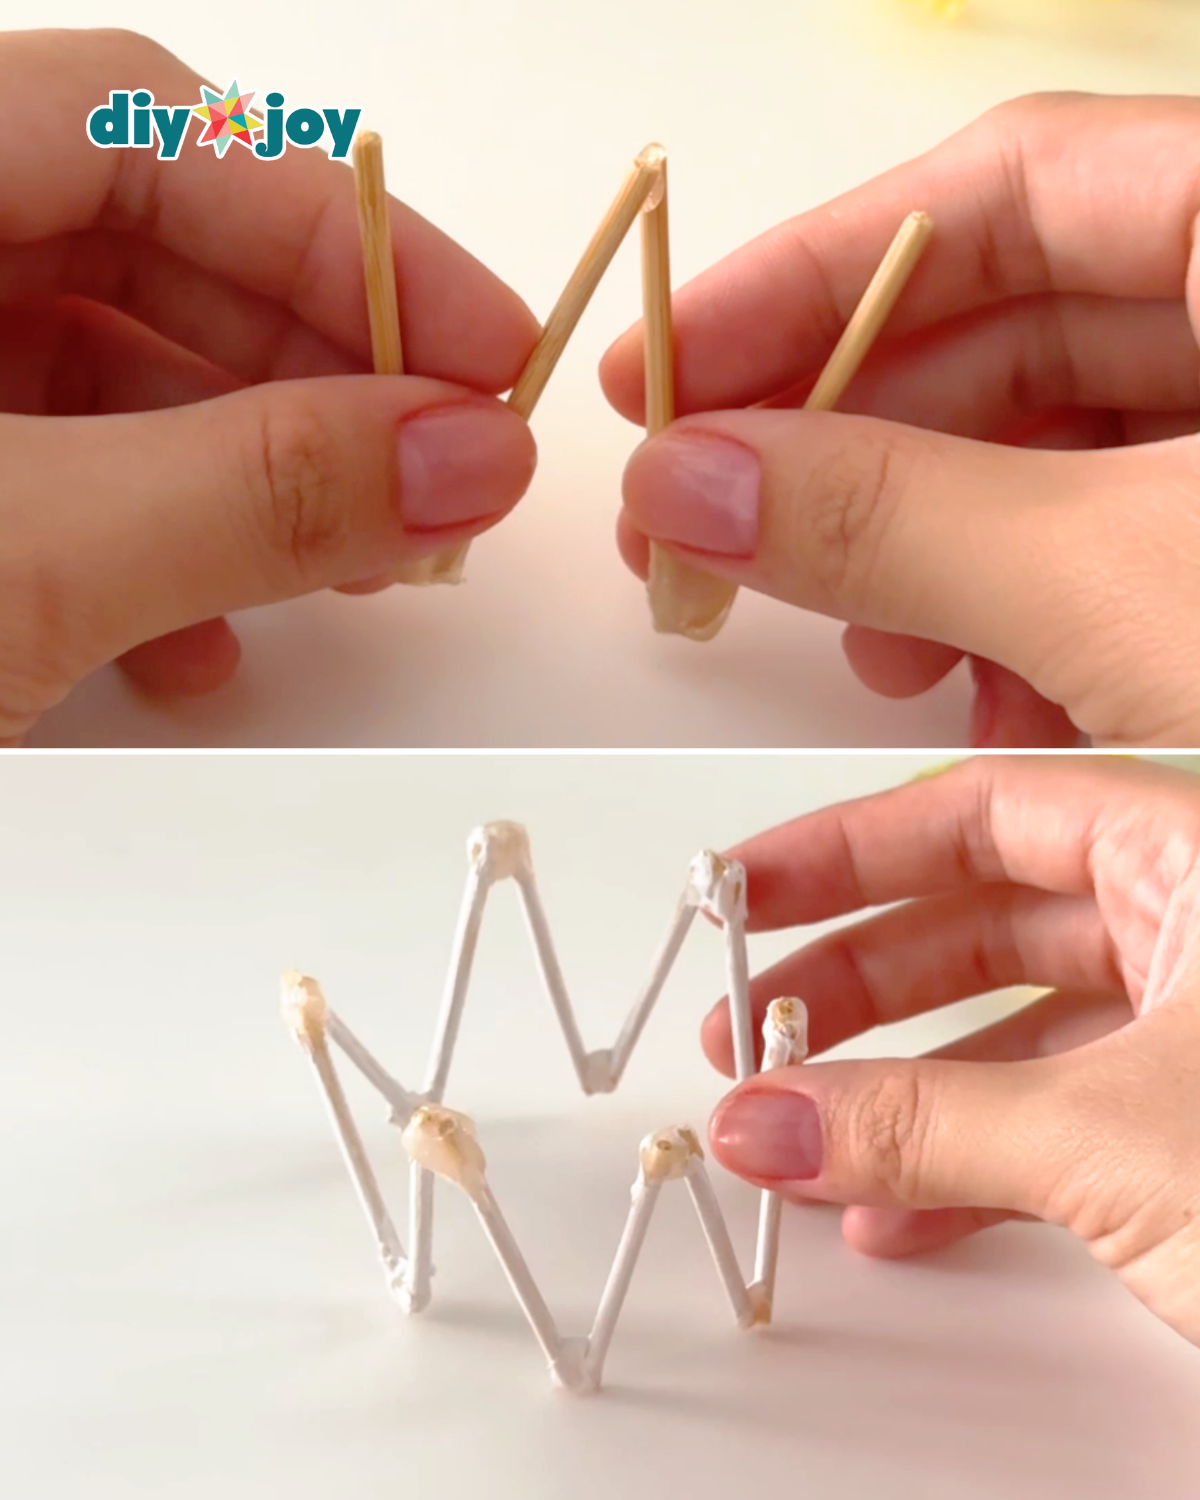
Join the bottom edges of each pair together, continuing until the last piece is found. As you attach each section, be sure to angle them slightly so they form a rounded shape by the end. This will serve as the base of your planter. -
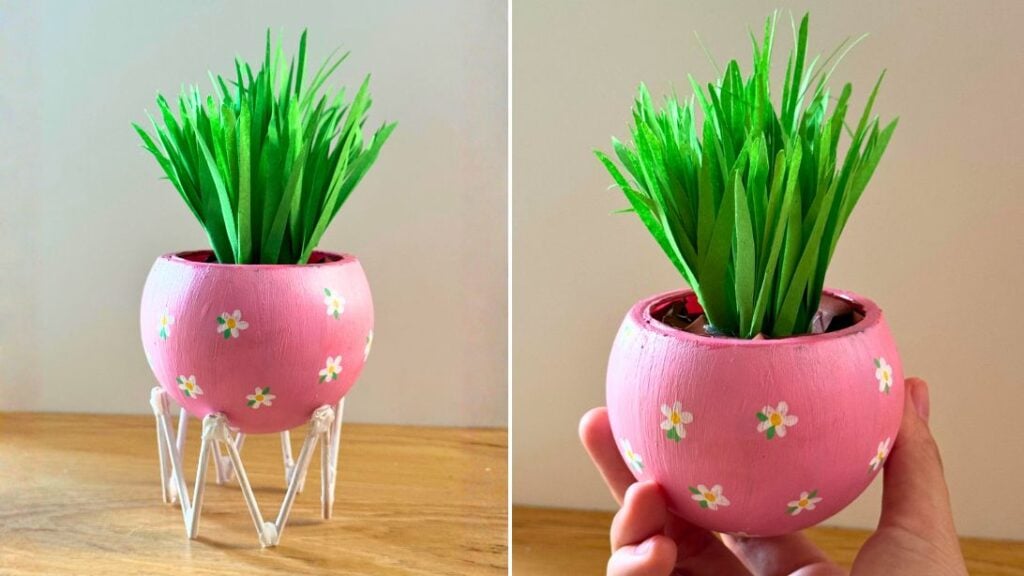
Step 5: Make the grass
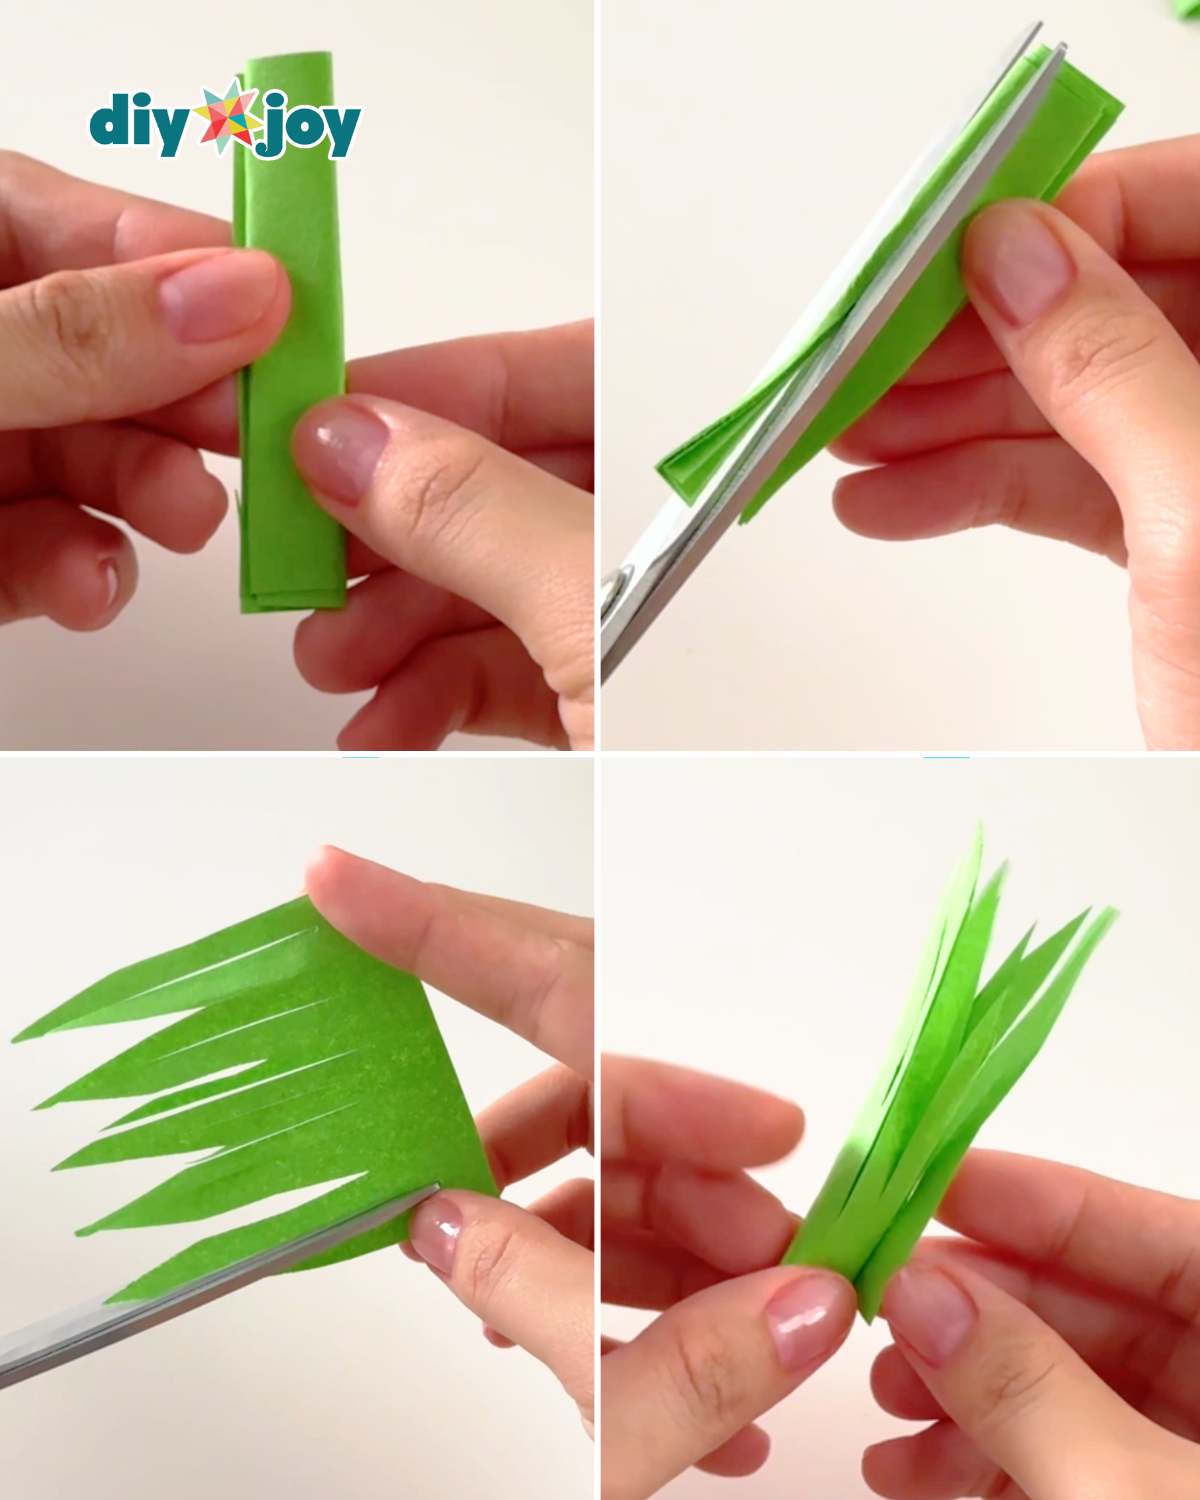
Cut a piece of green paper to your desired height, then fold it several times until it is about half an inch wide. Cut both ends at an angle to make a long triangle shape. Open the paper and cut small slits along both edges. Once done, roll it tightly and secure it with glue. Repeat the process to make several pieces. -
Step 6: Add the base filling
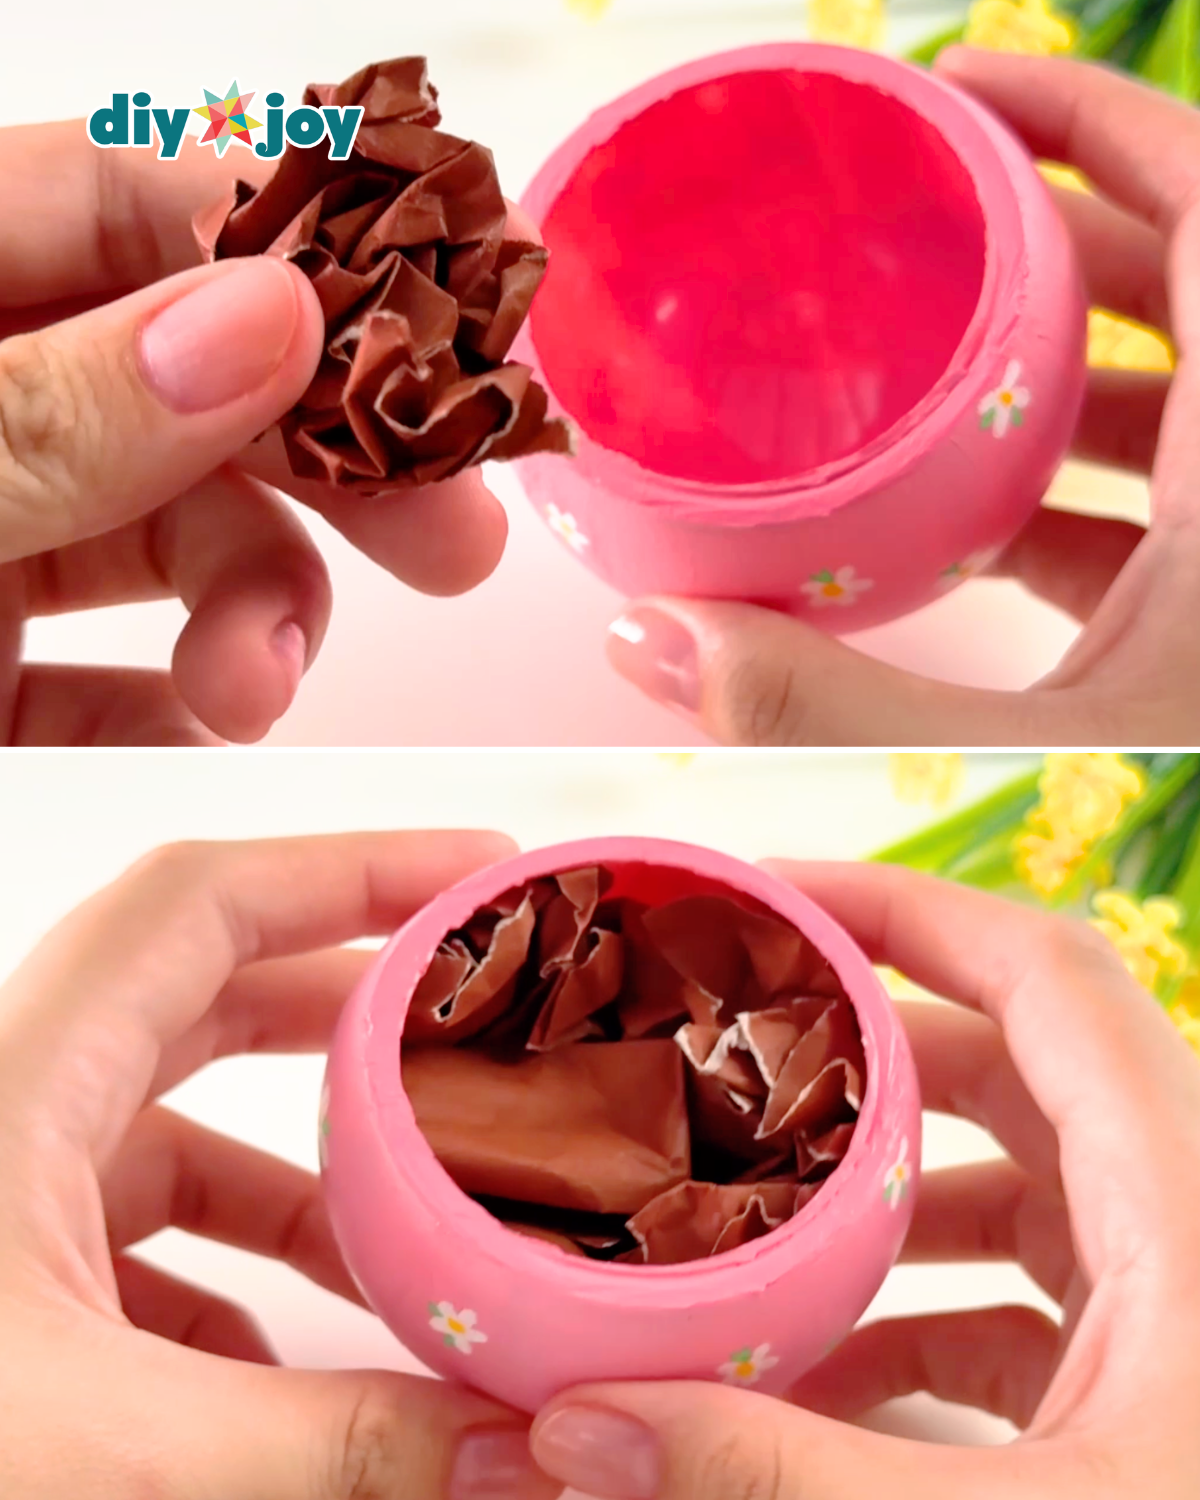
Tear the brown paper into small pieces, then glue each piece. Insert the crumpled paper into the glass planter, filling as you go. Repeat the process until the planter is completely filled. -
Step 7: Attach the grass paper

Apply hot glue to the bottom of each paper grass piece, then attach it to the top of the crumpled brown paper inside the planter. Continue adding more pieces until you achieve your desired completion, adjusting their placement as you go.
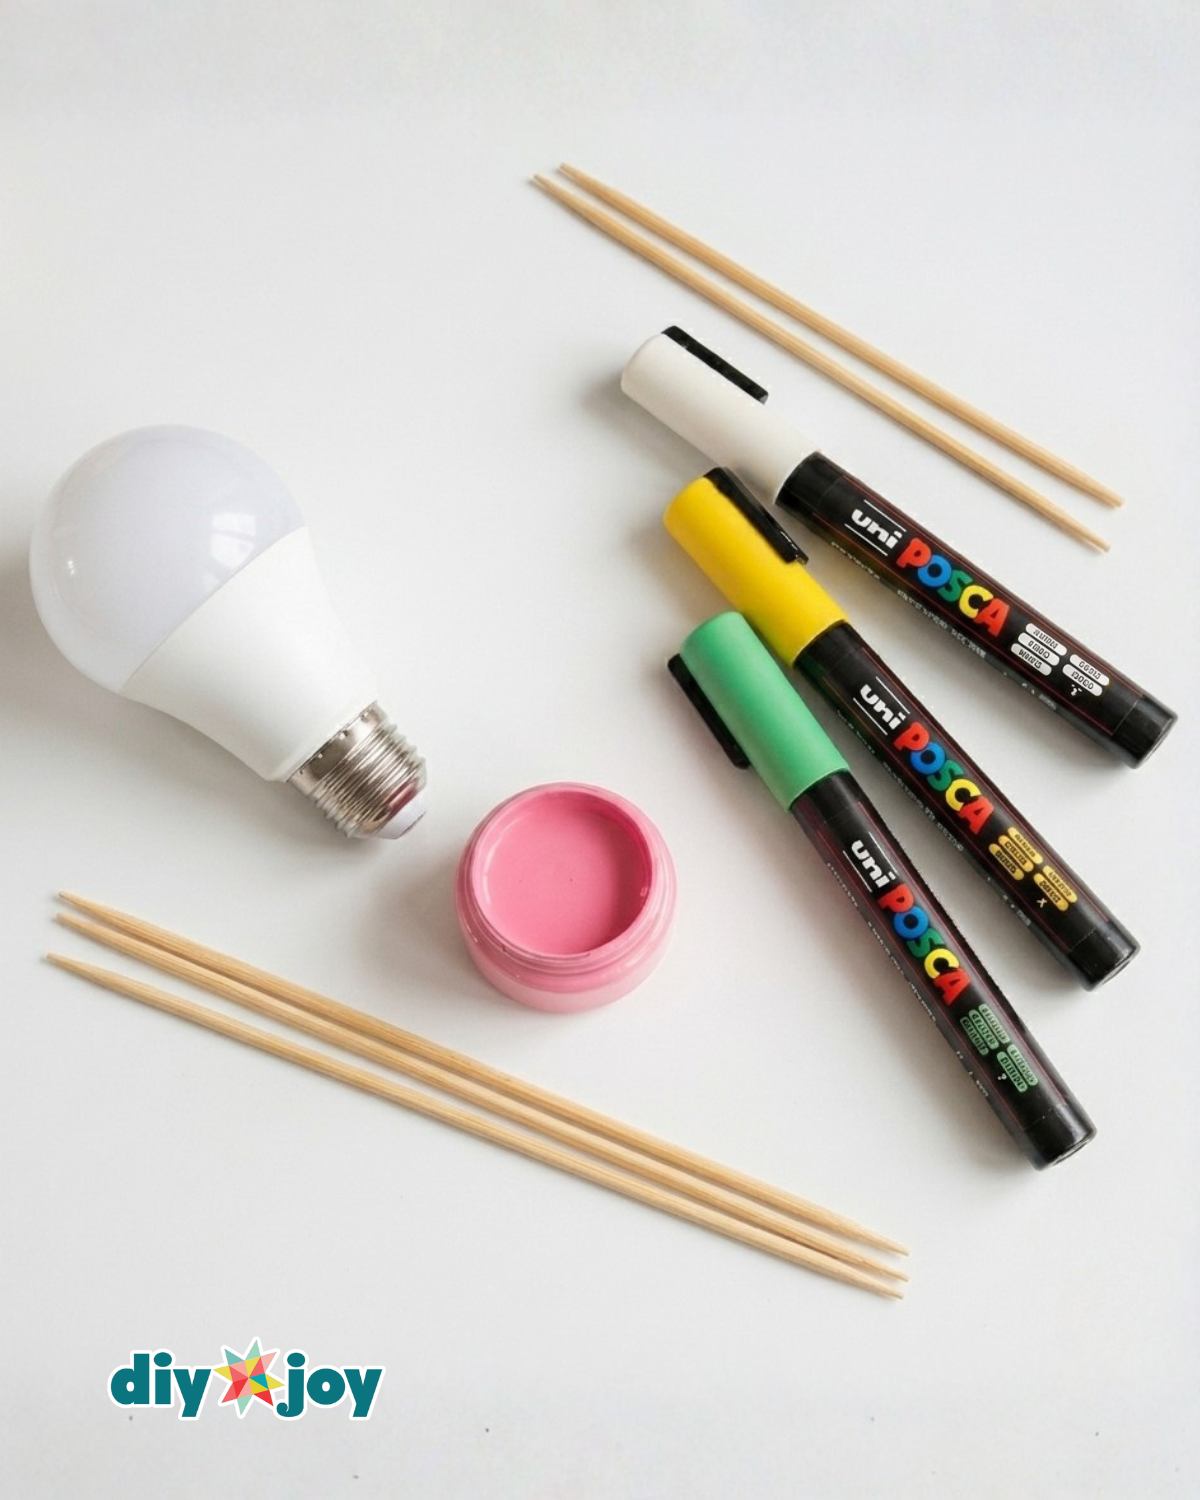
material
- light bulb
- Skewer or toothpick
- paint, White and pink
- Scissors
- paper
- Glue gun and glue stick
- Think Poska
![]()
Pro tips 💡
- Sand the edges of the light bulb to smooth any sharp parts and avoid scratches during handling.
- Add ribbon, twine or any additional details you want to enhance the design and make your mini planter more personal
Try this craft next:
*If you like this craft, then visit our official website, follow us Facebook pageAnd subscribe to us YouTube channel For more!


