
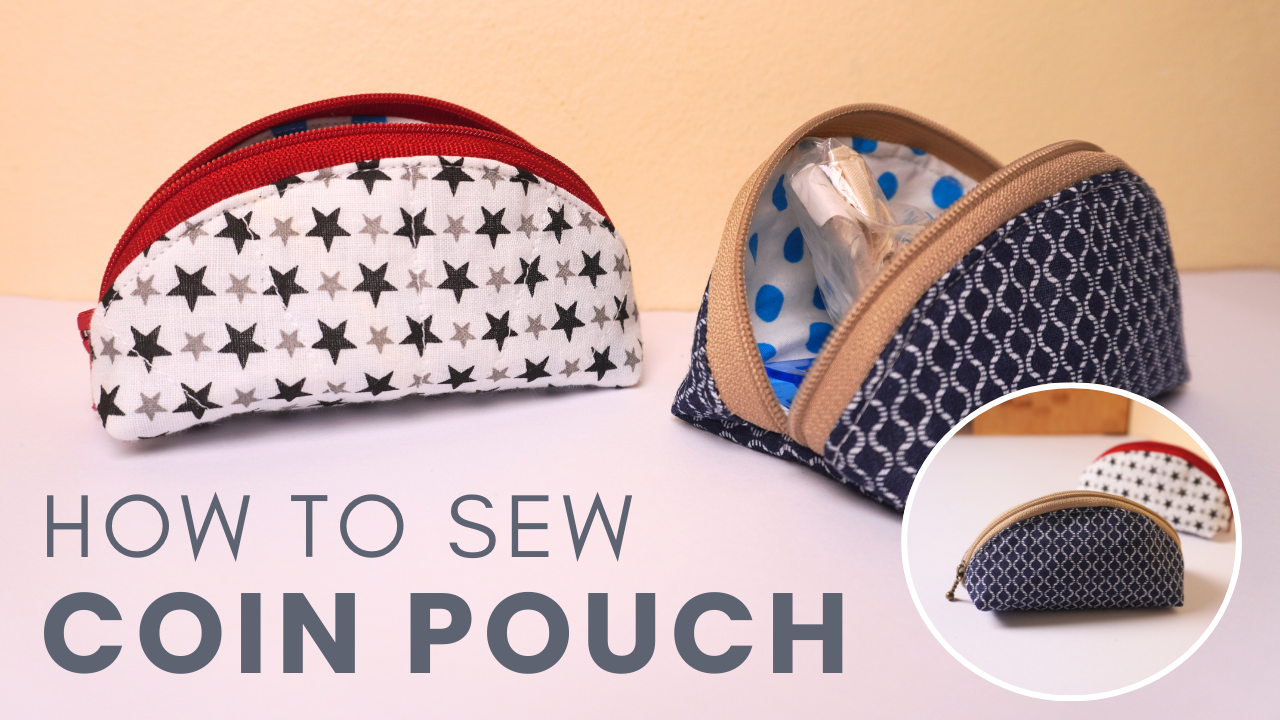
I wanted to make a small pouch to store some of my sewing supplies like clips, tags and small bobbins. That’s how this crescent bag came about! It’s so adorable – it can easily fit in the palm of your hand.
This crescent pouch is incredibly simple and easy to make, even if it’s your first time making a pouch.
You can also use this pouch to store other things like your keys, lip balm or change. This is also a cute, handmade gift idea that you can make in just 10 minutes or less.

*This post may contain affiliate links. We will earn a commission at no additional cost to you if you use one of our links. Please read our disclosure for more details.
If you’re looking for an easy, quick, and fun sewing project, this crescent bag is a great option!
In this guide, I’ve included all the supplies you’ll need to get started and step-by-step instructions.
There’s also a video tutorial you can watch before you get started.
let’s get started
Finished Pouch Size: 11cm x 5cm x 6.5cm (4.33in x 1.97in x 2.56in)
Half Moon Purse Tutorial
Consumables
- Patterned Cotton Fabric – 25cm x 25cm (9.84″ x 9.84″)
- Lining – 25cm x 25cm (9.84″ x 9.84″)
- Interaction
- Zipper – 25 cm (9.84 inches)
If you want high quality, AD-FREE version of this sewing guide with step-by-step instructions included below each photo, get the printable PDF guide here!
Video guide
Instructions
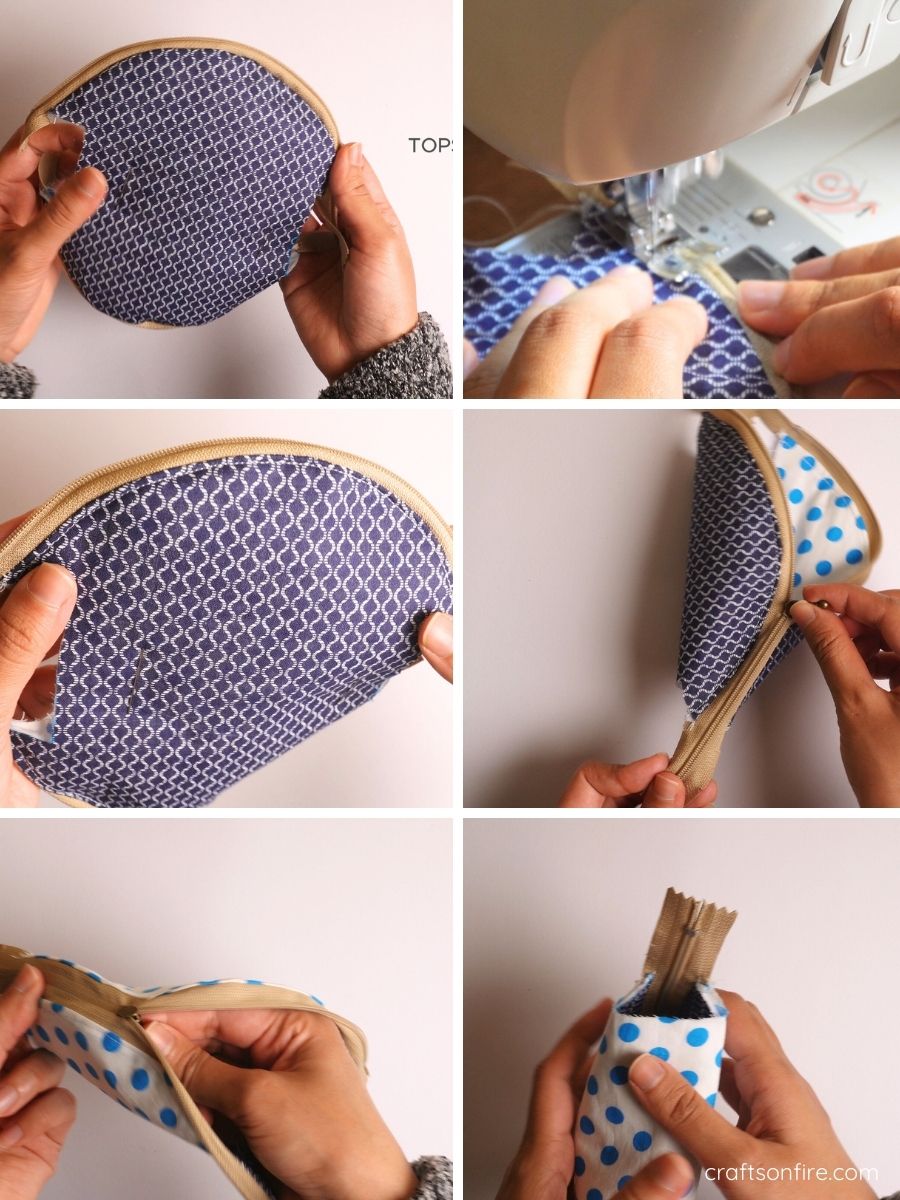
Draw a circle
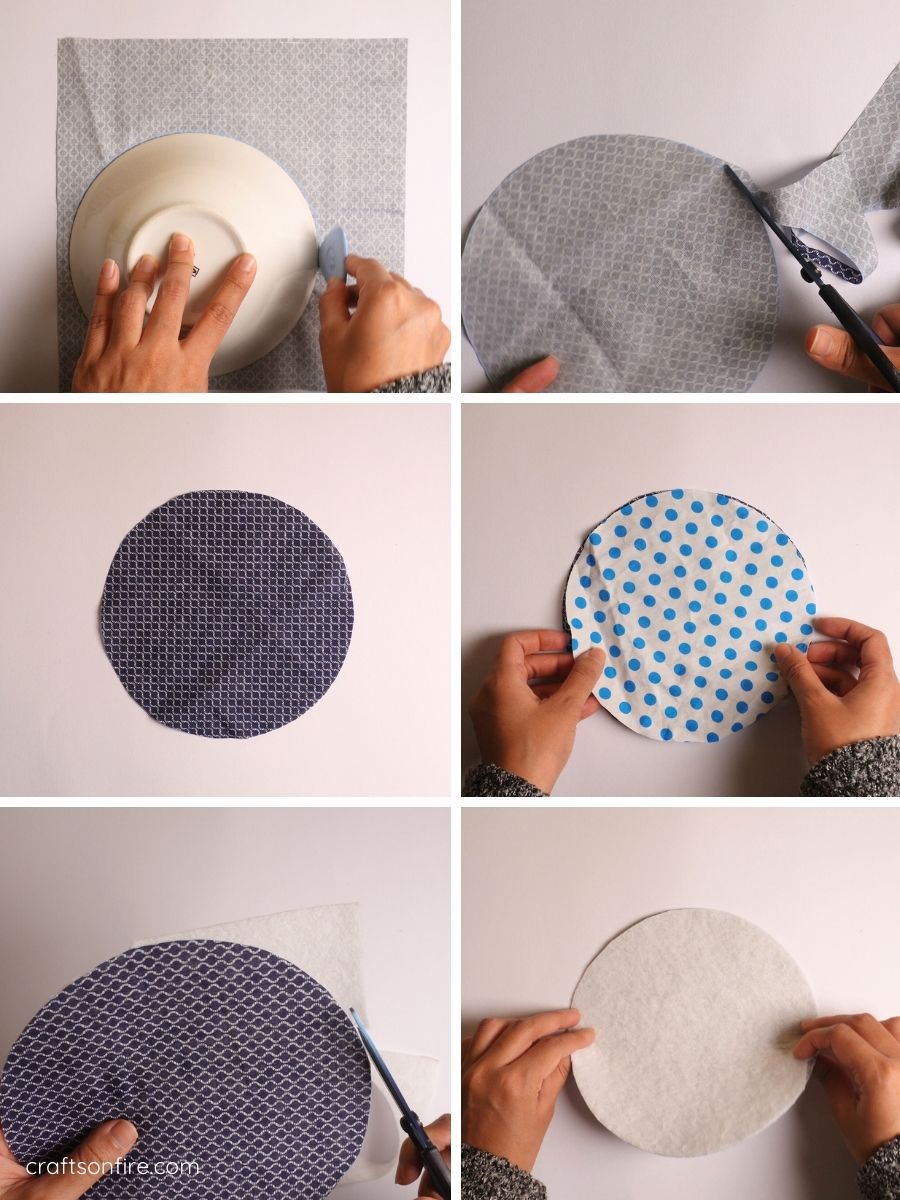
- Take a bowl measuring 18 cm. Place the bowl on the wrong side of the fabric. Then use chalk or a fabric pen to trace around the bowl.
- After tracing your circle, carefully cut out the shape from the fabric.
- Go ahead and cut out another circle for the lining.
- Press the outer circle of fabric onto the fusible surface, then trim off any excess surface.
Create the model

- Then fold the outer piece of fabric in half as shown above.
- Pin the fabric to hold it in place. Then mark a 2.5 cm x 2.5 cm (1 inch square) on both sides of the fabric using a fabric marker or sewing chalk.
- Cut the corners of the piece and it should look like this.
- Follow the previous steps for the lining part as well.
- With both sides marked, go ahead and remove the corners.
Add the zipper
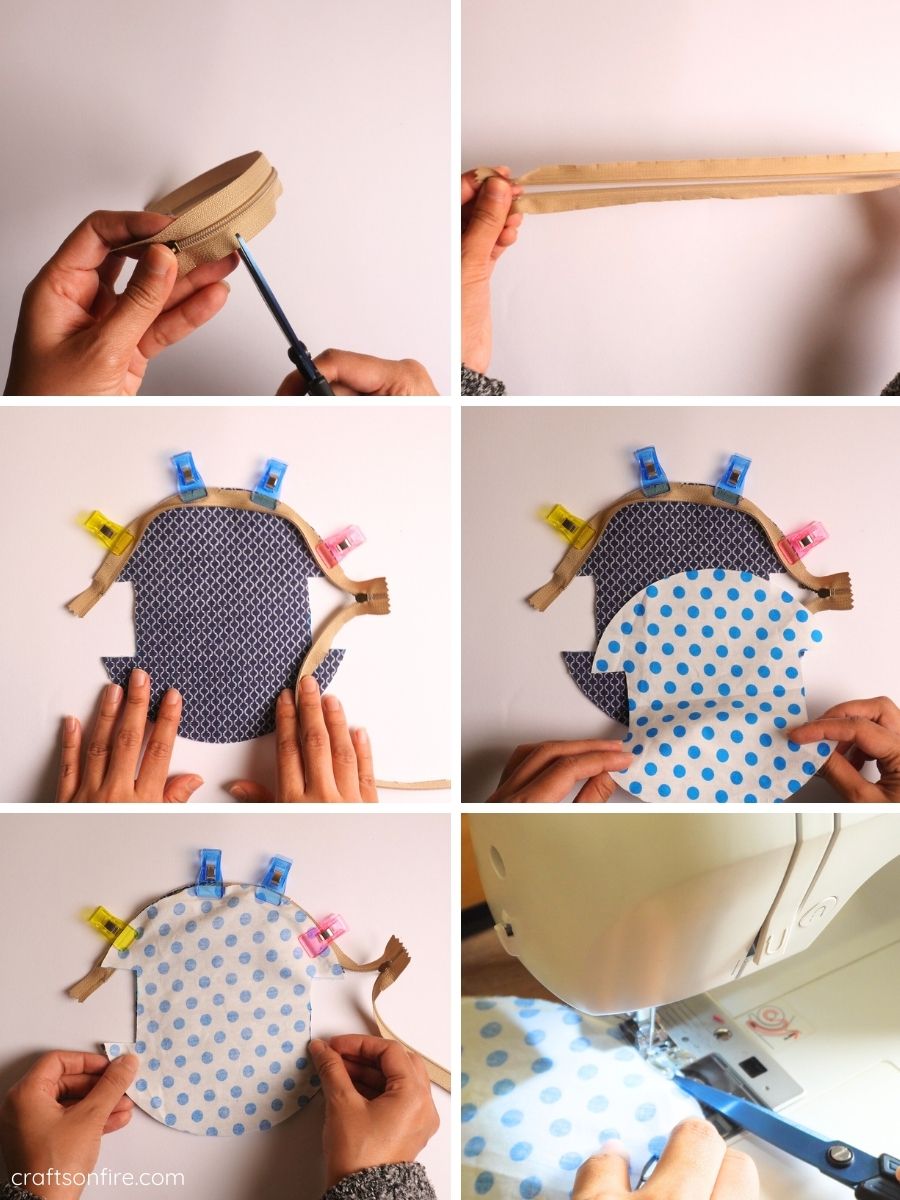
- To prepare your zipper, make small cuts until you reach the end of the zipper on both sides.
- Open the zipper, take the outer piece of fabric and place the zipper right side in, following the curve of the fabric.
- Use sewing clips to secure the zipper in place, and then catch the lining piece.
- Place the lining piece on top, following the round edge of the piece to the zipper, and use the sewing pins to hold it in place. Right sides should be facing inwards.
- Go ahead and attach the zipper to the piece. Once finished, lift the trim piece off the bottom.
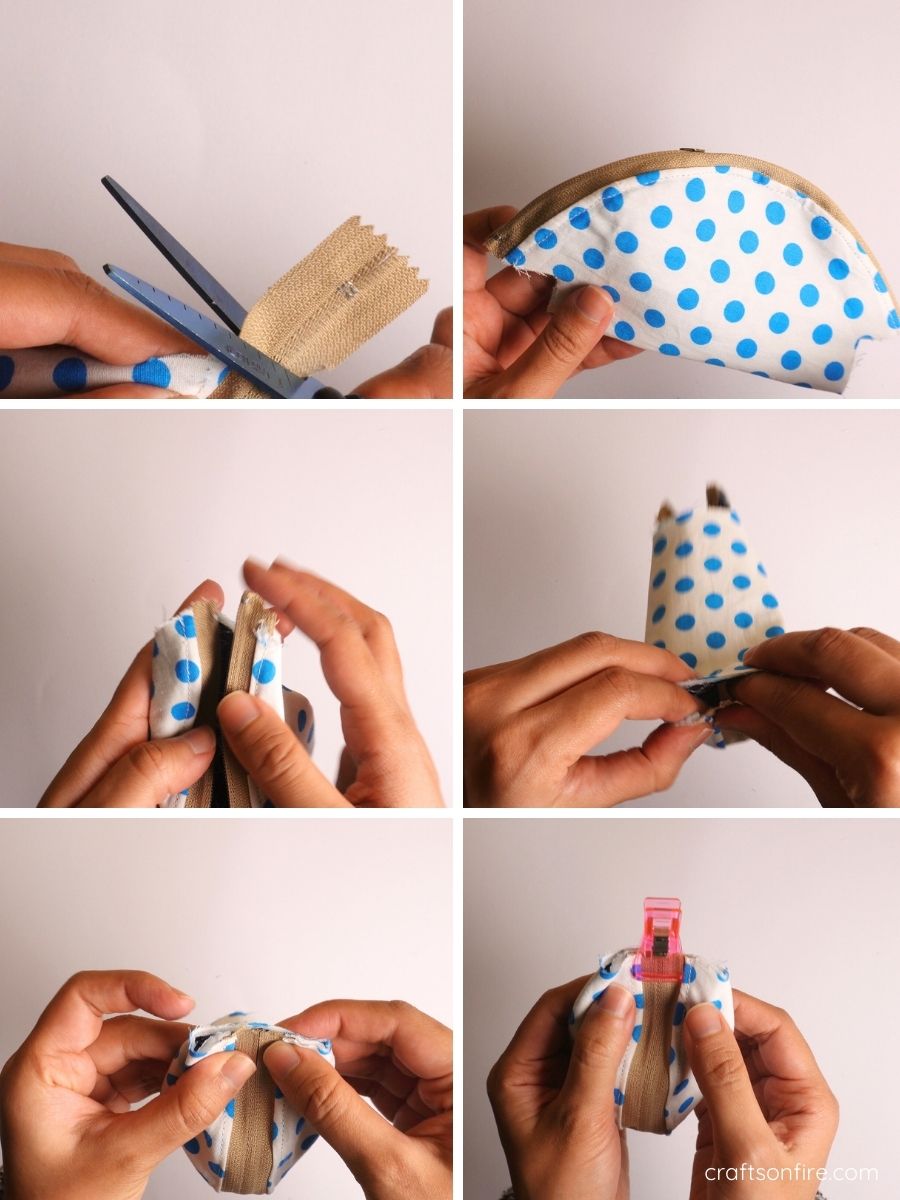
- Take the other side of the zipper and repeat the same process as shown before.
- This is how it should look. Sew the zipper.
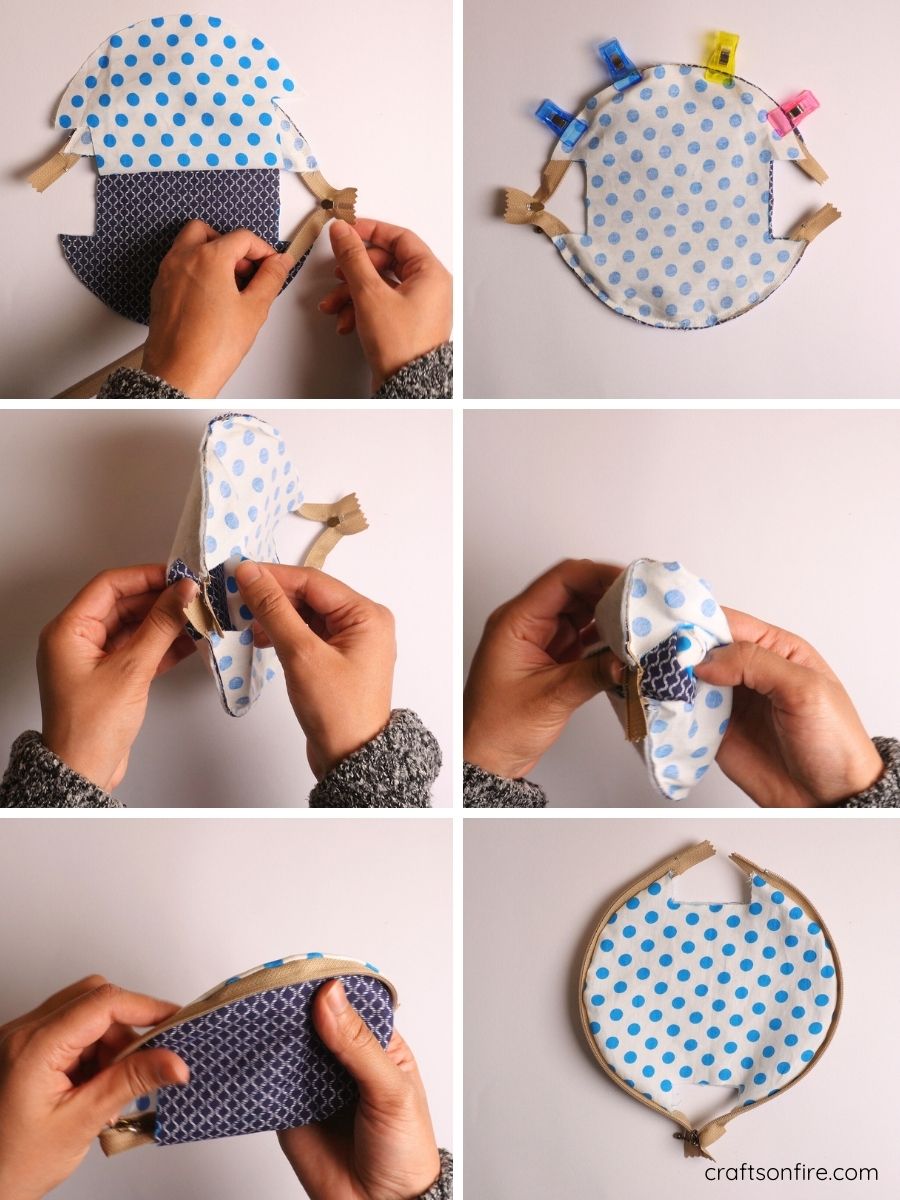
- To turn the piece right side out, put your thumbs through the open end.
- Pull or fold the fabric through the opening and bring the fabric right side out.
- Adjust the layers. You can iron the piece if you like.
- Secure the inside of the fabric with pins.
Create the pouch
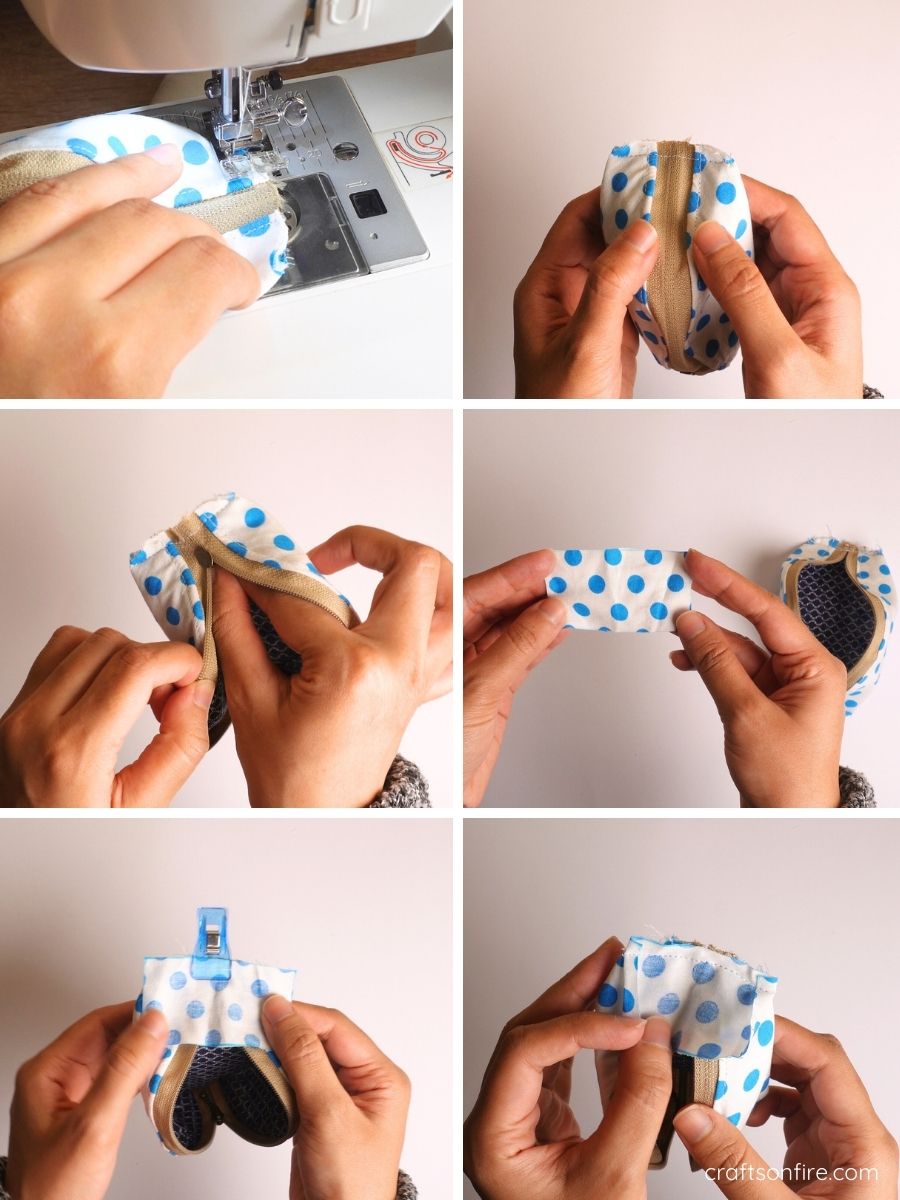
- Next, you’ll want to add topstitching to both sides of the piece.
- Here’s how it looks after topstitching.
- Close the zipper halfway, then turn the piece inside out. The lining side should be facing you.
- Adjust the zipper.
- Bring the sides together.
- Remove the excess zipper from both sides of the pouch.
Close the sides
- Remove the excess zipper from both sides of the pouch.
- To close the sides, bring the sides together as shown above.
- Use a sewing clip to hold it in place and then sew using a 0.5cm seam. Repeat this process for the other open side of the pouch.
Sew the sides
- After you finish sewing, unzip the zipper.
- To line up the sides, start by preparing the two side pins, each measuring 7cm x 6cm. Place a tab on one side, making sure the edge is aligned and the right side is facing in. Then sew the tab firmly to the side.
- You may also want to consider folding the edges in before sewing.
Finishing works
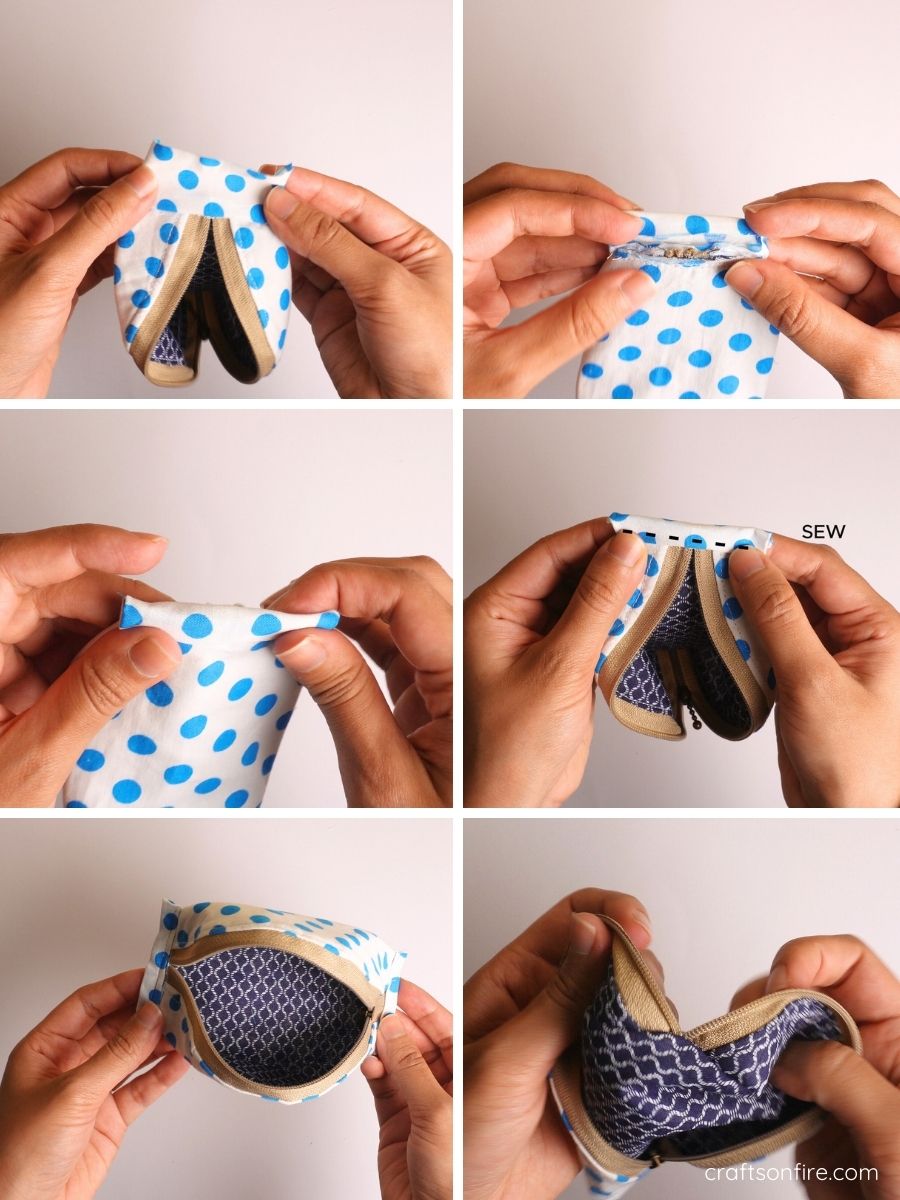
- Then lift the tab.
- Turn the bag over and fold the top edge down.
- Fold the tab over once more, covering the seam.
- Finally, sew as directed and repeat for the other side.
- Grab the two ends of the bag and fold them to the opposite side.
Finally adjust the inside and your pouch is ready!
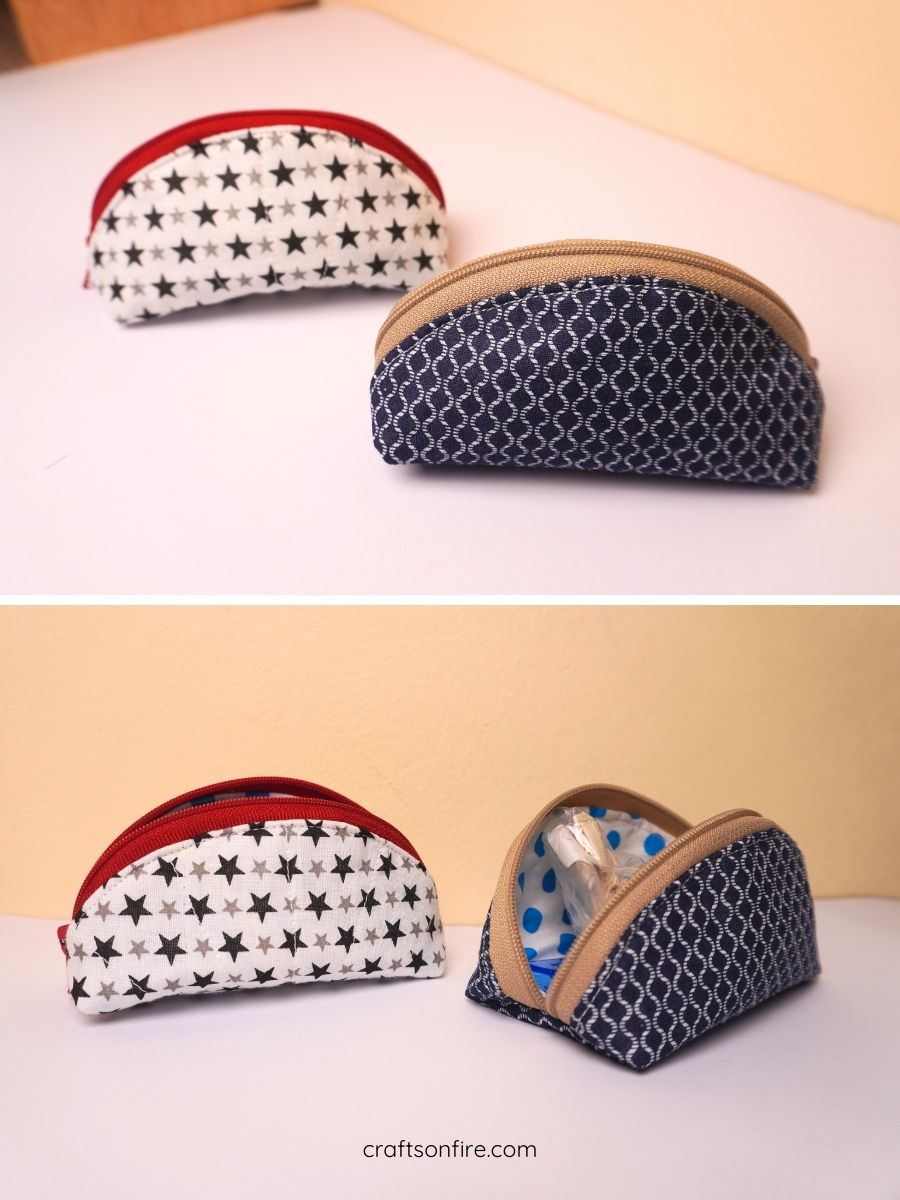
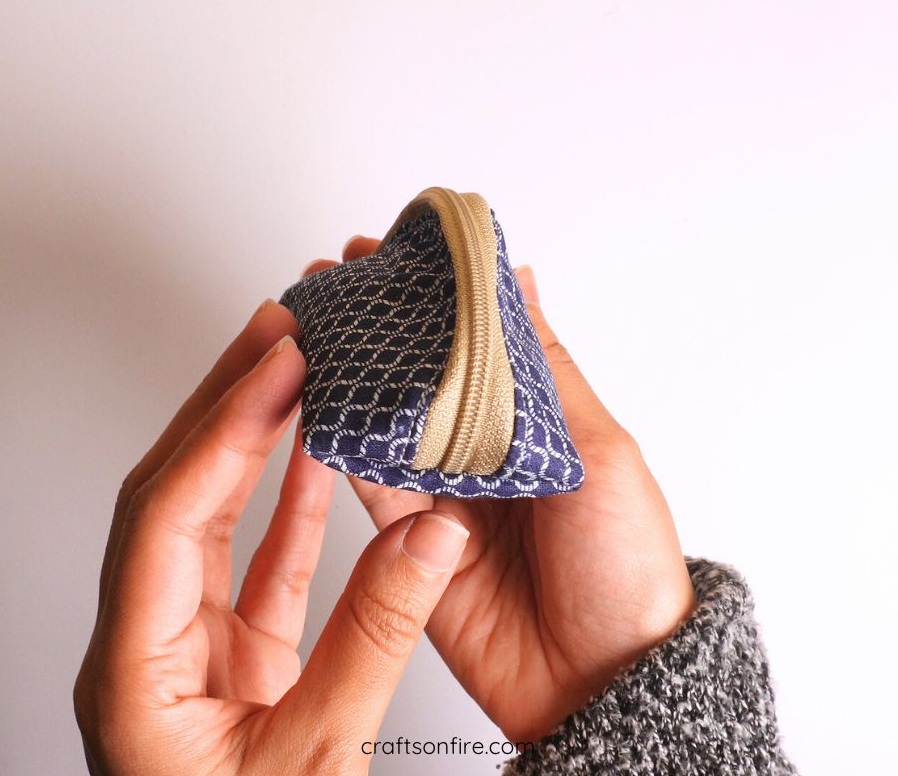
There it is! This little crescent bag is now ready!
I really like how it turned out and it looks great from all sides.
You can also make this pouch literally any size, depending on the circle you draw.
As you can see, this is such a simple and straightforward pattern and I believe even a beginner can sew these pouches.
I also love that you can use any zipper color to match your fabric. There is no rule and it will still be great. I used this brown zipper for the blue bag and a red zipper for the patterned star bag and you can definitely see the red zipper pop against the fabric.
This adds a nice little detail to the bag that makes it pop more!

You can also add a tag to the front of the bag if you want to personalize it further, but it’s fine without it.
With that said, I hope you enjoyed following this tutorial for sewing a crescent bag. If you have any additional questions or need help, leave a comment below and I’ll do my best to help!
Before you go, here are a few more step-by-step sewing tutorials to try next:
Strawberry Zipper Pouch: A Step-by-Step Sewing Guide


