

We may earn a commission on purchases made through links.
When it comes Styling bookshelves and built-insWe’ve all seen beautifully layered arrangements that mix art, decor, keepsakes, photographs and more for a wonderfully composed aesthetic. But what if that tried-and-true design approach leaves you feeling stuck in a rut and craving something different? Luckily, Susan Klaich (@nest_styling_and_staging_co) shared it Instagram How she completely transformed her dime a dozen shelves by creating a luxe tilted display area with just one small addition.
Klich demonstrated how easy and inexpensive it is to add brass pulls to an adjustable shelf and then reinstall it at an angle to create a gorgeous display shelf that looks like a million bucks. Display your favorite coffee table book open to the most iconic page, or display your favorite art pieces or series of photographs. In short, display any favorite piece of decor or keepsake that is usually flat. This angled shelf with brass rails showcases and elevates — literally and figuratively! – Make your special items look more expensive than the hardware cost to pull them off.
This hack works on any adjustable shelves mounted with pegs or hardware that sits in a cutout under the shelf or screws into the bottom for stability. Although it works on Instagram, the flat L-shaped hardware that rests under the shelf may not be substantial enough to hold a tilted shelf in place, risking further slide, so be sure to check tilt stability with your specific shelf hardware before drilling any holes. When choosing which shelves you want to angle, keep in mind that the ideal placement is below eye level so that your displayed treasures are still fully visible when tilted upwards. Now you’re ready to begin this beginner-friendly angled display shelf DIY.
Reinstall adjustable shelves at an angle and add a brass rail for display
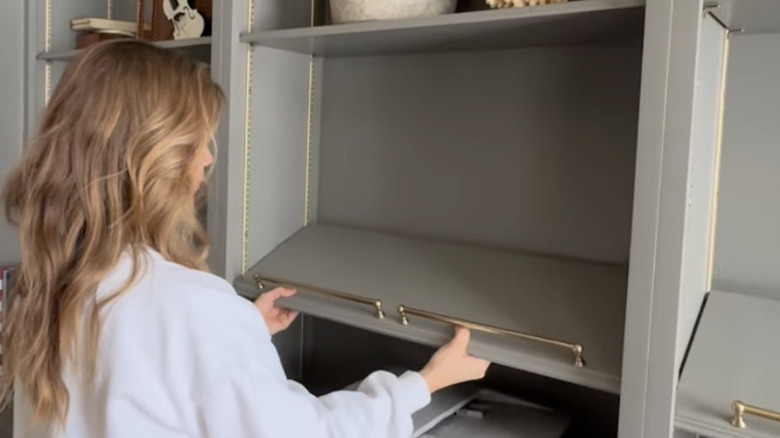
The base for this sophisticated diagonal shelf is very simple, requiring only a drill, a level and a pencil. Instagrammer used two 12-inch (on center) brass bridges Amazon For her specific shelves, but you can opt for one large pull or two pulls of alternate sizes, depending on the width of your shelf. Use decorative vintage-inspired rods for a historic touch, or choose a sleek profile if you have a more modern home aesthetic. using the level To make sure the bridge is straight, place, measure and mark the holes for the pull. Center a single pull widthwise on the shelf about an inch or so back from the front edge or evenly space a pair of pulls with a gap in the middle. Pre-drill the holes and Install cabinet pulls With the hardware provided.
Once your front rail is installed, which will prevent items from sliding off the shelf, remove the shelf hardware and place the back pegs about 4 to 6 inches higher than the front pegs. For shallow shelves, this dimension may be lower, but for deeper shelves or more dramatic display angles, it may be higher. Once you’re happy with the angle of the shelf, reinstall it into the frame with the brass front rail on the bottom. DIY a Standalone Tilted Shelf Create a full row of custom slanted displays at consistent heights on multiple shelves to truly showcase a special treasure in a unique way, or to transform the entire look of your built-ins. This angled shelf hack will bring your favorite treasures to life by angling them all for viewing on this beautiful and classy DIY.


